DMT01


Table of Contents:
- 1. Introduction
- 2. Use DMT01
- 3. Configure POM01-NB
- 4. Battery & Power Consumption
- 5. Firmware update
- 6. FAQ
- 7. Order Info
- 8. Packing Info
- 9. Support
1. Introduction
1.1 What is DMT01 Wireless Meat Thermometer
The DMT01 is a professional-grade wireless meat thermometer engineered for accurate, real-time temperature monitoring in commercial cooking environments. Ideal for restaurants, central kitchens, catering services, and food processing facilities, the DMT01 ensures consistent results across various cooking methods—including grilling, smoking, roasting, deep-frying, sous vide, baking, and more. Its precise monitoring helps improve cooking efficiency, ensure food safety, and meet HACCP compliance standards.
The system consists of two components:
- Food-grade BLE High-Temperature Probe – A durable, high-heat resistant probe that measures internal food temperature during cooking.
- Charging Base with BLE & LoRaWAN Forwarder – This base not only charges the probe but also acts as a communication bridge. It receives temperature data from the BLE probe and transmits it via the LoRaWAN long-range wireless protocol to your IoT platform or monitoring system.
With its dual wireless support (BLE for close-range accuracy and LoRaWAN for long-range data transmission), the DMT01 is ideal for both home cooking enthusiasts and commercial kitchen environments seeking smart, connected temperature monitoring.
1.2 Features
- Wireless Meat Thermometer – Designed for accurate and reliable cooking temperature monitoring
- Food-Grade Probe – Safe for food contact and dishwasher-compatible for easy cleaning
- BLE 5.1 Broadcasting – Supports real-time local data transmission via Bluetooth Low Energy
- LoRaWAN Connectivity – Enables long-range, low-power data transmission to IoT platforms
- Smart Uplink Triggering – Supports periodic data reporting and real-time alerts on temperature thresholds
1.3 Specification
Common DC Characteristics:
- Supply Voltage: 90 ~230v
- Operating Temperature: -40 ~ 85°C
Food Probe Spec:
- Food temperature range: -20 ~120 °C, Accuracy: ±0.5°C
- Ambient temperature range: 0 ~300°C, Accuracy: ±3°C
Battery Duration: 2 days per full charge
Battery:
- Probe Battery Duration: 2 days per full charge
Power Consumption
- ldle:
- Transmit:
1.4 Applications
- Commercial Kitchen
- Restaurant
- Catering
- Food Processing
- Central Kitchen
- Cloud Kitchen
- HACCP Monitoring
- Food Safety
- Meat Factory
- Industrial Cooking
1.5 Sleep mode and working mode
Deep Sleep Mode: Sensor doesn't have any NB-IoT activate. This mode is used for storage and shipping to save battery life.
Working Mode: In this mode, Sensor will work as NB-IoT Sensor to Join NB-IoT network and send out sensor data to server. Between each sampling/tx/rx periodically, sensor will be in IDLE mode), in IDLE mode, sensor has the same power consumption as Deep Sleep mode.
1.6 Product Illustration

2. Use DMT01
2.1 Send data to IoT server via NB-IoT network
The POM01-NB is equipped with a NB-IoT module, the pre-loaded firmware in POM01-NB will get environment data from sensors and send the value to local NB-IoT network via the NB-IoT module. The NB-IoT network will forward this value to IoT server via the protocol defined by POM01-NB.
Below shows the network structure:
There are two version: -GE and -1T version of POM01-NB.
GE Version: This version doesn't include SIM card or point to any IoT server. User needs to use AT Commands to configure below two steps to set POM01-NB send data to IoT server.
- Install NB-IoT SIM card and configure APN. See instruction of Attach Network.
- Set up sensor to point to IoT Server. See instruction of Configure to Connect Different Servers.
Below shows result of different server as a glance.
| Servers | Dash Board | Comments |
| Node-Red | 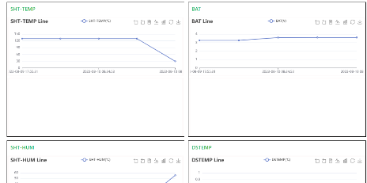
| |
| DataCake | 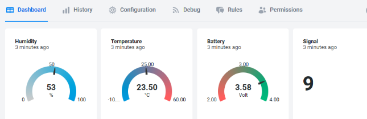
| |
| Tago.IO | ||
| General UDP | Raw Payload. Need Developer to design Dash Board | |
| General MQTT | Raw Payload. Need Developer to design Dash Board | |
| ThingSpeak | 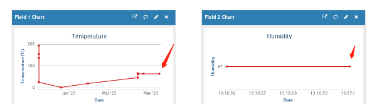
| |
| ThingsBoard | 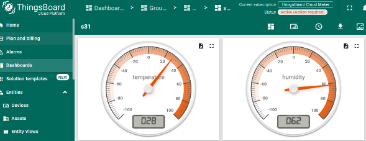
|
1T Version: This version has 1NCE SIM card pre-installed and configure to send value to ThingsEye. User Just need to select the sensor type in ThingsEyeand Activate POM01-NB and user will be able to see data in ThingsEye. See here for ThingsEye Config Instruction.
2.2 Payload Types
To meet different server requirement, POM01-NB supports different payload type.
Includes:
- General JSON format payload. (Type=5)
- HEX format Payload. (Type=0)
- ThingSpeak Format. (Type=1)
- ThingsBoard Format. (Type=3)
User can specify the payload type when choose the connection protocol. Example:
AT+PRO=1,0 // Use COAP Connection & hex Payload
AT+PRO=1,5 // Use COAP Connection & Json Payload
AT+PRO=2,0 // Use UDP Connection & hex Payload
AT+PRO=2,5 // Use UDP Connection & Json Payload
AT+PRO=3,0 // Use MQTT Connection & hex Payload
AT+PRO=3,5 // Use MQTT Connection & Json Payload
AT+PRO=4,0 // Use TCP Connection & hex Payload
AT+PRO=4,5 // Use TCP Connection & Json Payload
2.2.1 General Json Format(Type=5)
2.2.2 HEX format Payload(Type=0)
3. Configure POM01-NB
3.1 Configure Methods
POM01-NB supports below configure method:
- AT Command via Bluetooth Connection (Recommended): BLE Configure Instruction.
- AT Command via UART Connection : See UART Connection.
3.2 Serial Access Password
After the Bluetooth or UART connection is successful, use the Serial Access Password to enter the AT command window.
The label on the box of the node will print the initial password: AT+PIN=xxxxxx, and directly use the six-digit password to access the AT instruction window.
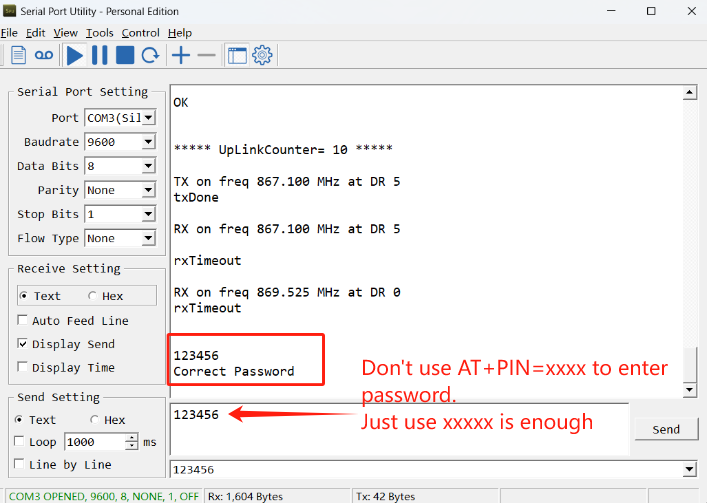
If you need to change the password, use AT+PWORD=xxxxxx (6 characters), -CB nodes only support lowercase letters.
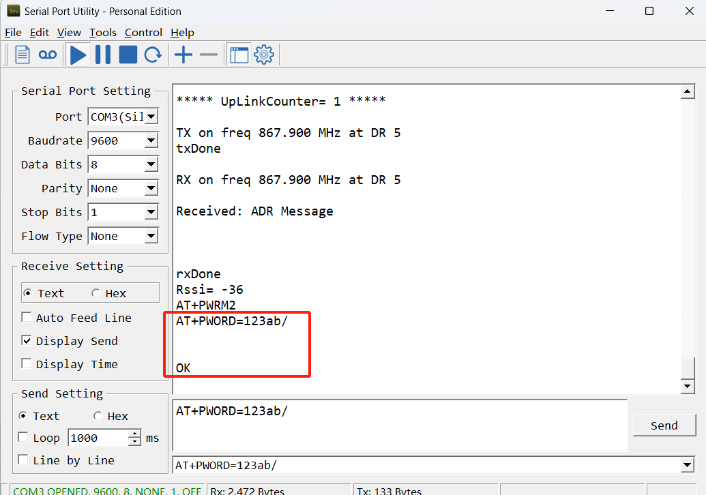
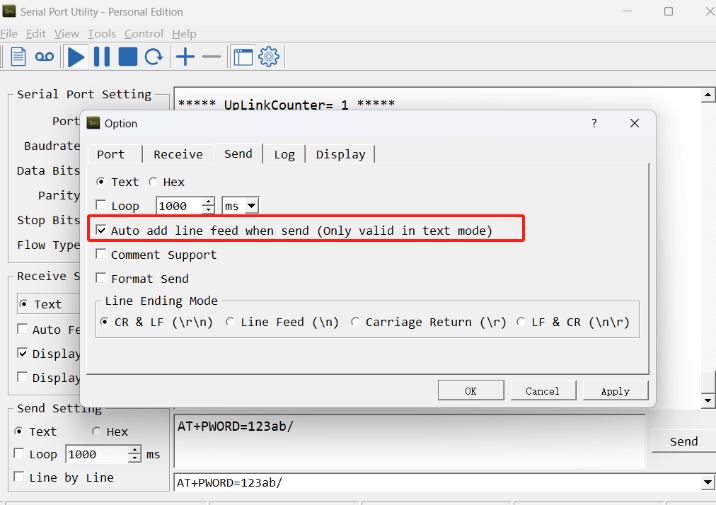
Note: After entering the command, you need to add a line break, and you can also set automatic line breaks in the Bluetooth tool or UART connection tool.
3.3 AT Commands Set
4. Battery & Power Consumption
LPOM01-NB use ER26500 + SPC1520 battery pack and POM01-NB use 3000mAh Recharable Battery with Solar Panel. See below link for detail information about the battery info and how to replace.
Battery Info & Power Consumption Analyze .
5. Firmware update
User can change device firmware to:
- Update with new features.
- Fix bugs.
Firmware and changelog can be downloaded from : Firmware download link (To be updated...)
Methods to Update Firmware:
- (Recommended way) OTA firmware update via BLE: Instruction.
- Update through UART TTL interface : Instruction.
6. FAQ
6.1 How can I access the BC660K-GL AT Commands?
User can access to BC660K-GL directly and send AT Commands.
7. Order Info
Part Number: DMT01-XX
XX:
- EU433: LT with frequency bands EU433
- EU868: LT with frequency bands EU868
- KR920: LT with frequency bands KR920
- CN470: LT with frequency bands CN470
- AS923: LT with frequency bands AS923
- AU915: LT with frequency bands AU915
- US915: LT with frequency bands US915
- IN865: LT with frequency bands IN865
- CN779: LT with frequency bands CN779
8. Packing Info
Package Includes:
- POM01-NB NB-IoT Power Outage Monitoring Sensor x 1
Dimension and weight:
- Device Size: cm
- Device Weight: g
- Package Size / pcs : cm
- Weight / pcs : g
9. Support
- Support is provided Monday to Friday, from 09:00 to 18:00 GMT+8. Due to different timezones we cannot offer live support. However, your questions will be answered as soon as possible in the before-mentioned schedule.
- Provide as much information as possible regarding your enquiry (product models, accurately describe your problem and steps to replicate it etc) and send a mail to support@dragino.com.