Connection to Netmore LoRaWAN
Table of Contents:
- 1. Netmore LoRaWAN
- 2. Configure Gateway connection to Netmore LoRaWAN
- 3. Configure LoRaWAN node connection to Netmore LoRaWAN
1. Netmore LoRaWAN
In this guide, you will learn how to connect a dragino gateway to the LNS solution provided by Netmore LoRaWAN.
1.1 Login an account
Login an account to get started with Netmore LoRaWAN and start using Netmore LoRaWAN Console.
Once you have an account,get started by following steps for adding Gateway,Device and Intergrations.
2. Configure Gateway connection to Netmore LoRaWAN
Below list the support products and Requirements:
What do you need to prepare?
A gateway that can access the internet normally.
For more information about Netmore LoRaWAN, please refer to the document in the lower right corner of Netmore's official website.

Step 1. Log in Netmore LoRaWAN

Step 2. Create a LoRaWAN Gateway
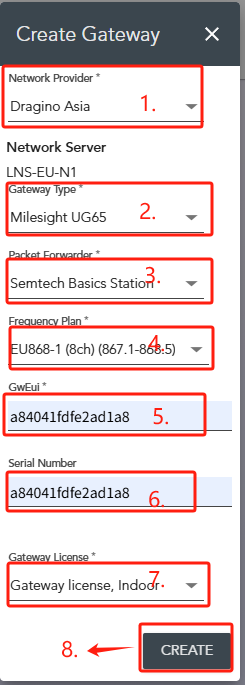
First, Uesrs need to click "Create Gateway" in the menu
1.Network Provider:Selecting an Network Provider
2.Gateway Type:Select the gateway model, such as Dragino LPS8v2
3.Packet Forwarder:Select Semtech Basics Station
4.Frequency Plan:Select the desired frequency plan
5.GwEui:Fill in the gateway eui of the gateway
6.Serial Number:Enter the gateway's SN
7.Gateway License:Select Gateway License
8.GREATE

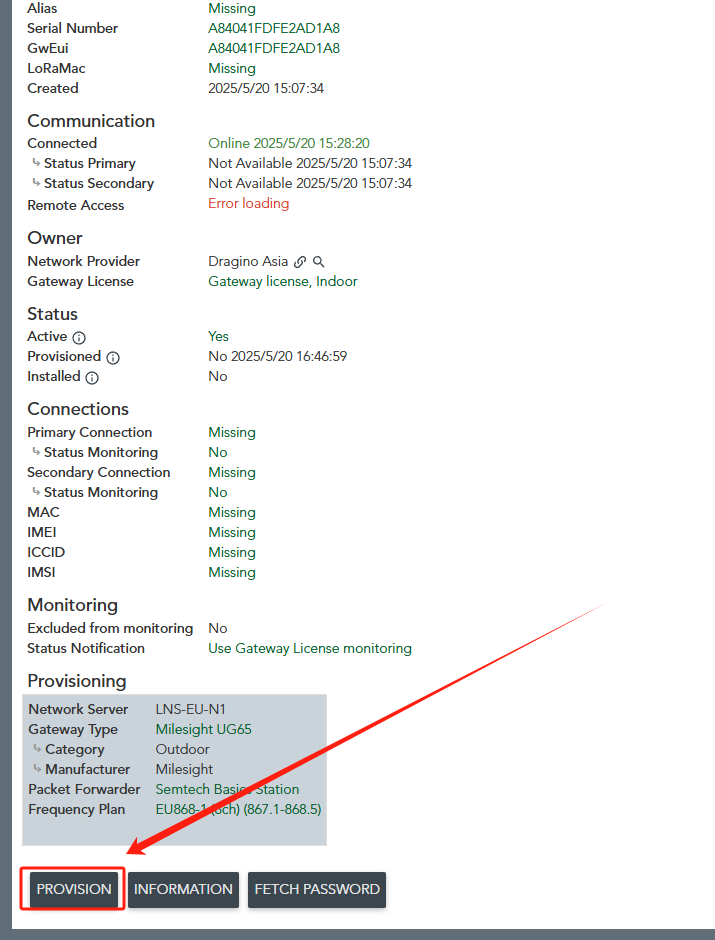
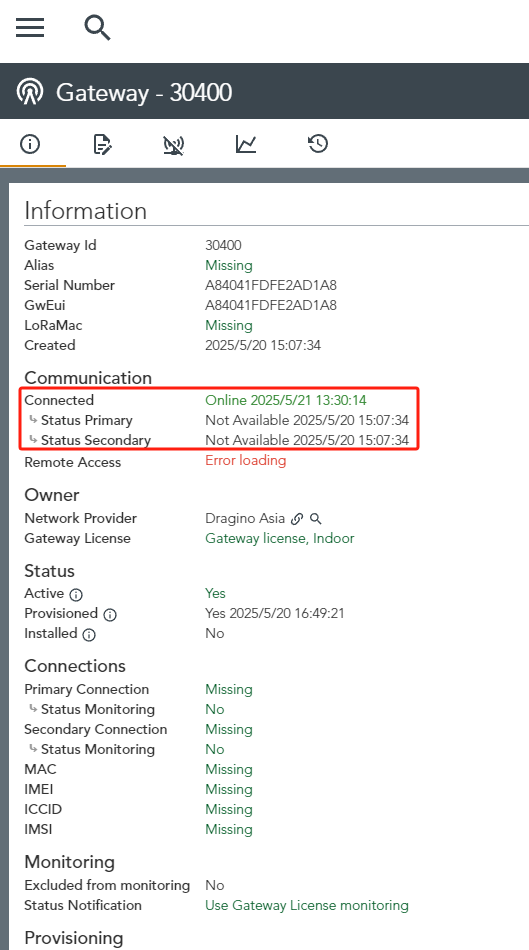
In the gateway's information interface, click "provision" to activate the gateway device.

Step 3. Access the gateway GUI
To configure the gateway, access it via the Web UI. To learn how to do that, refer to the Quick Start Guide for each gateway.
Users need to fill in the LNS URI and upload the Certificate.
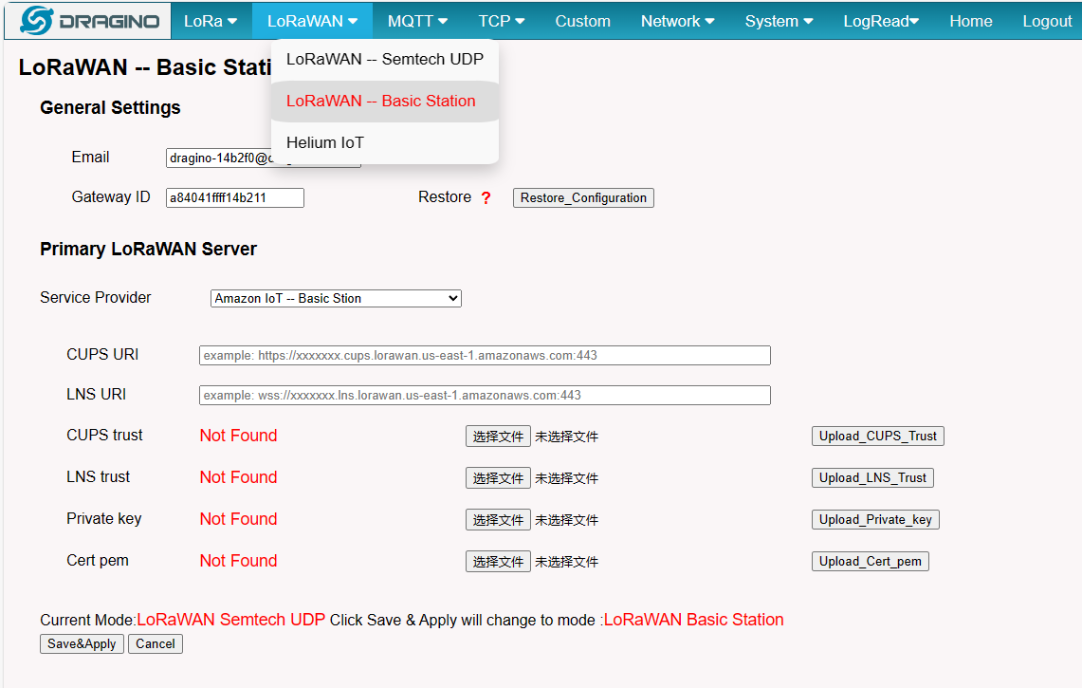
Step 4. Configure Station
Users need to fill in the LNS URI and upload the Certificate.
Note: The Service Provider does not have Netmore LoRaWAN, we will fix and add it in the next firmware release
Users can now use Chirpstack Basic Station for testing.

Trouble Shooting
User can check the station log in the LogRead --> System Log page.
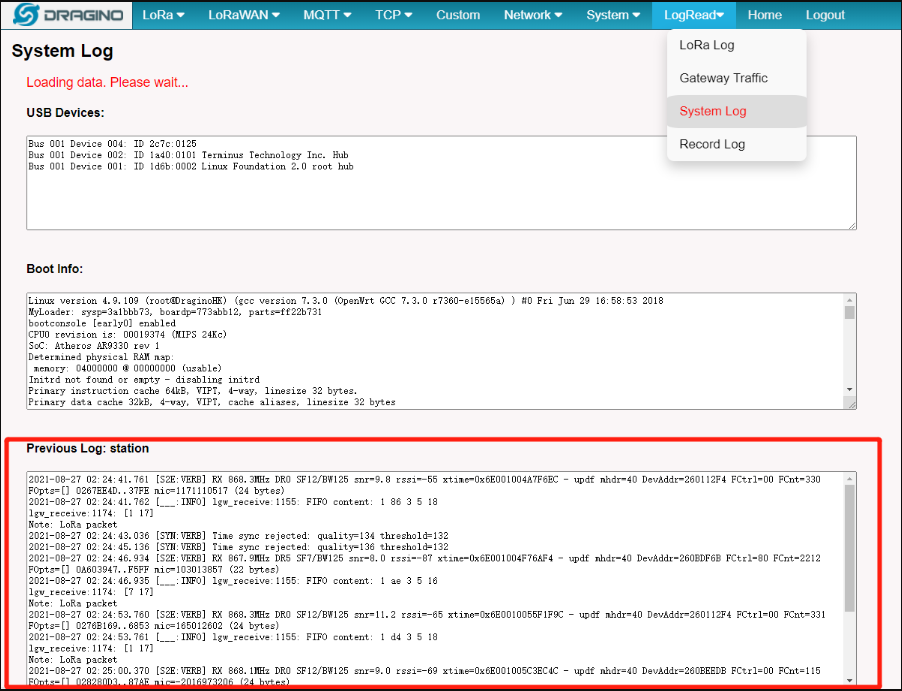
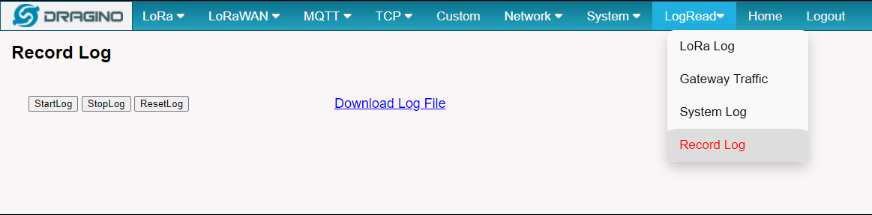
nd recode the station log in the LogRead --> Recode Log page.
Check the connection status
3. Configure LoRaWAN node connection to Netmore LoRaWAN
Following is an example for how to join the Netmore LoRaWAN Network.
The gateway is already set up to connect to the Netmore, so we now need to configure the Netmore LoRaWAN.
We take LHT65N as an example.
Create a device inNetmore LoRaWAN with the OTAA keys from LHT65N.
Each LHT65N is shipped with a sticker with the default device EUI as below:

First, Uesrs need to click "Create Sensor" in the menu
1.Activation Method: Configure the OTAA mode
2.Class:Configure the Class A mode
3.LoRaWAN Version:Select LoRaWAN Version 1.0.3
4.Sensor Type:Select the Sensor Type,such as Dragino(LHT65)
5.DevEUI:Fill in the DevEUI of the LHT65N
6.Serial Number:Enter the LHT65N's SN
7.Biling Group:Set how many data packets to send each day
8.Channel Plan: Set the frequency plan, such as EU868
9.GREATE


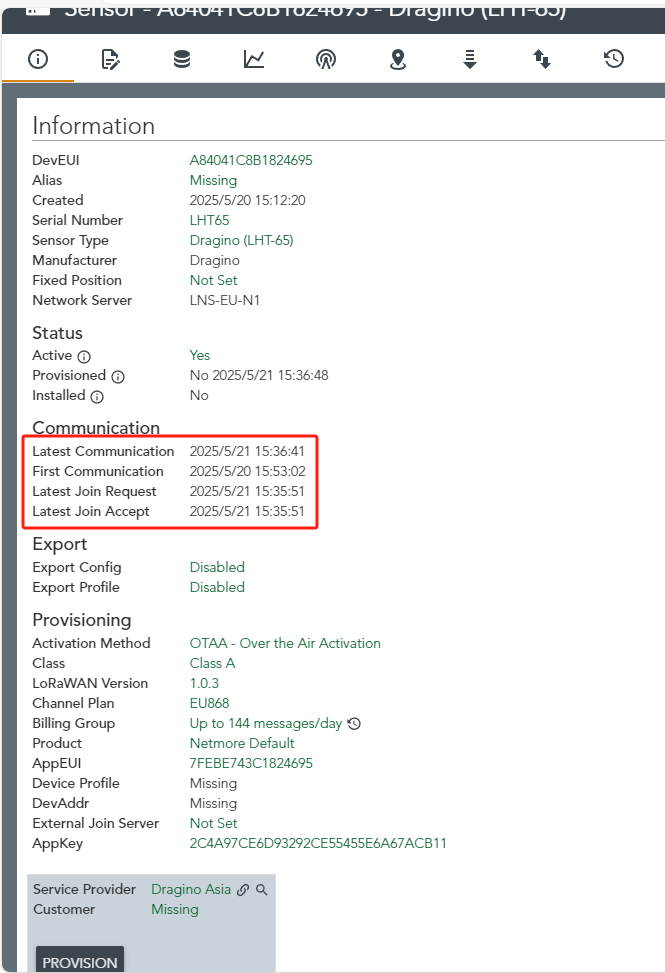
Add the APPEUI and APPKEY of the LHT65N, and finally click "PROVISION".
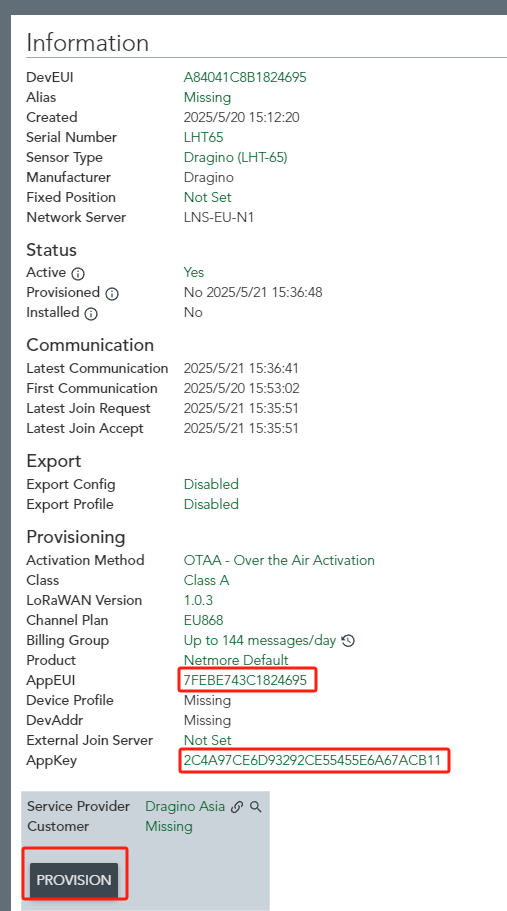
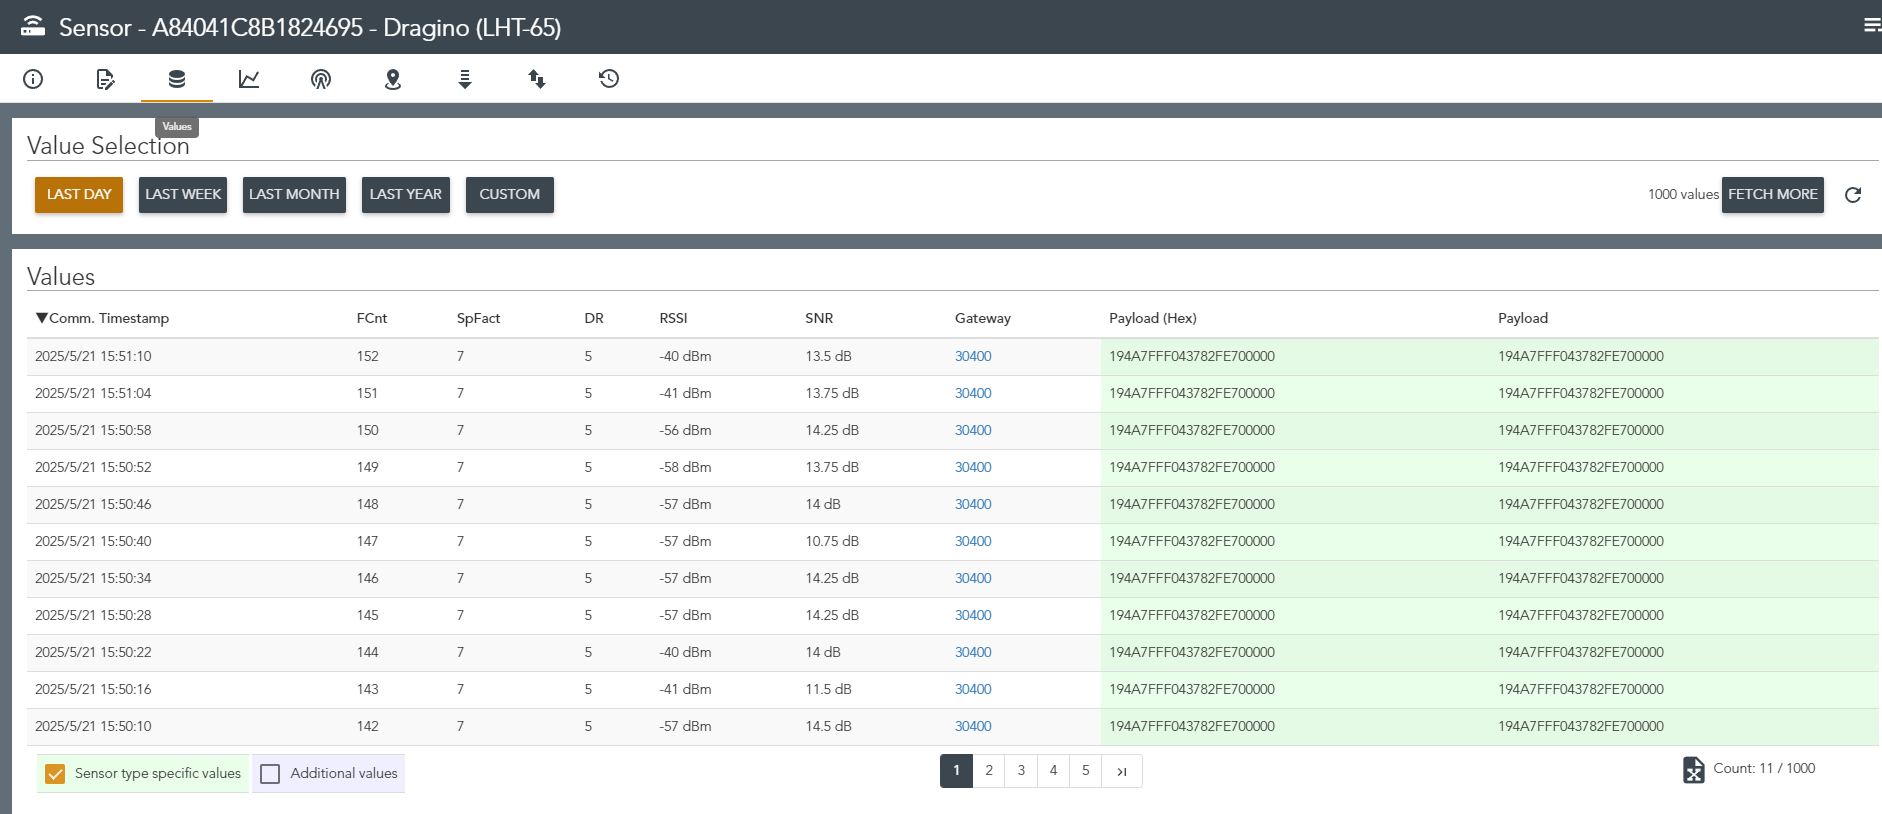
Check the connection status
Check the sensor log in the "![]() " interface
" interface