Instructions to demo BLE indoor positioning
Table of Contents:
1. Python Examples
Step 1: Configure Python Simulator
- Download and run BLE_Positioning.exe
Enter the following information:
Subscribe to topics:MQTT Subscription Topic of TTN-V3
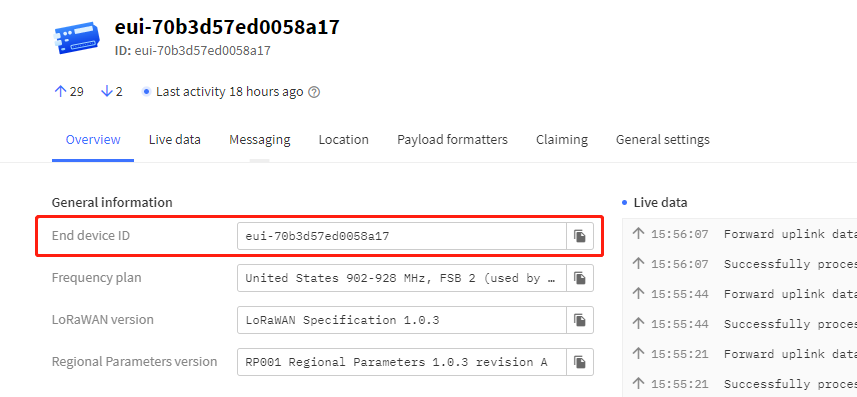
Example: v3/litest@ttn/devices/eui-70b3d57ed0058a17/up
- v3: Unchanging
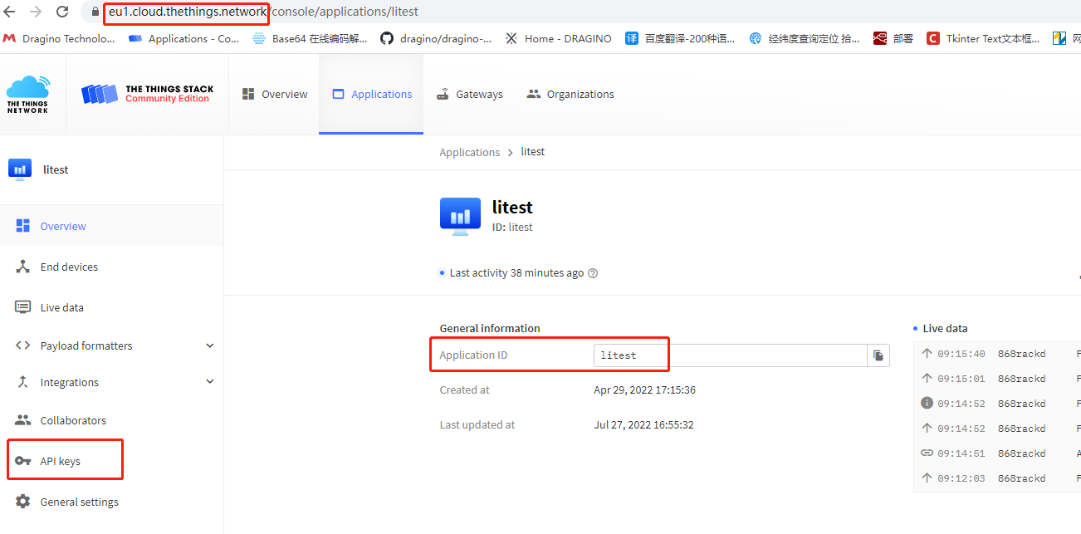
- litest@ttn: 'litest' is the ID of the application, '@ttn' unchanging.If you use your own TTN platform, @ ttn doesn't need
- devices: Unchanging
- eui-70b3d57ed0058a17: TrackerD End Device ID
- Up: Unchanging
server address:Server address of TTN-V3
Application ID:Application ID of TTN-V3
APIKEY: APIKEY of your own account
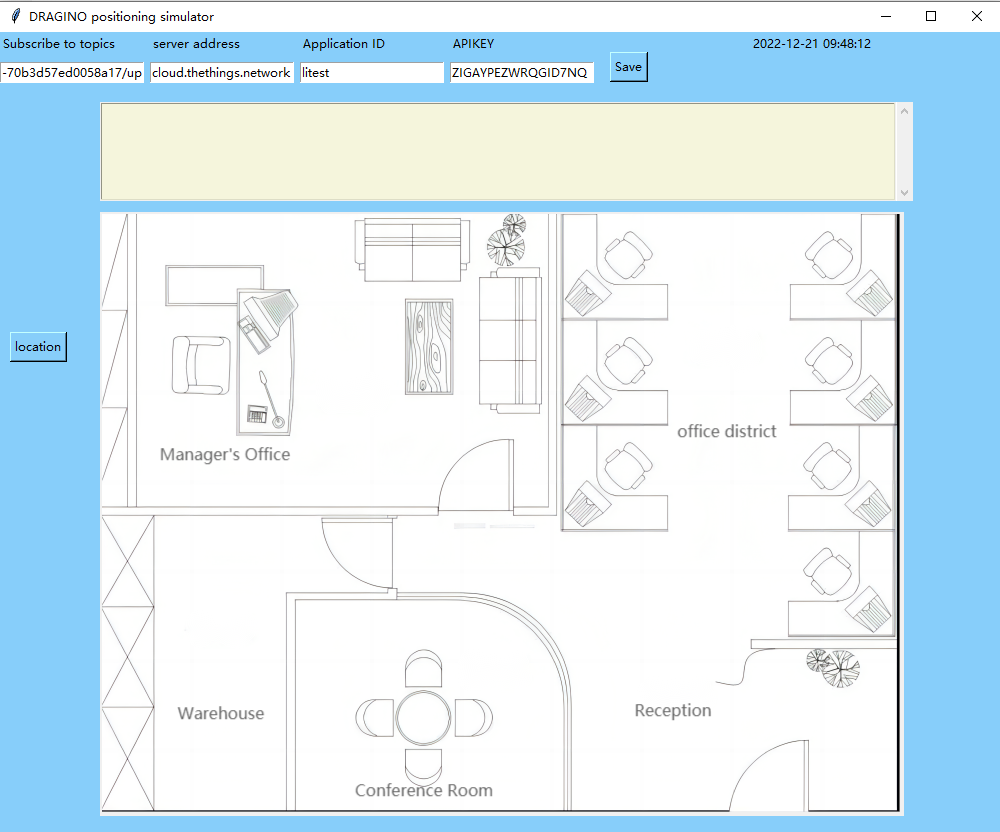
Step 2: Click the save button after writing
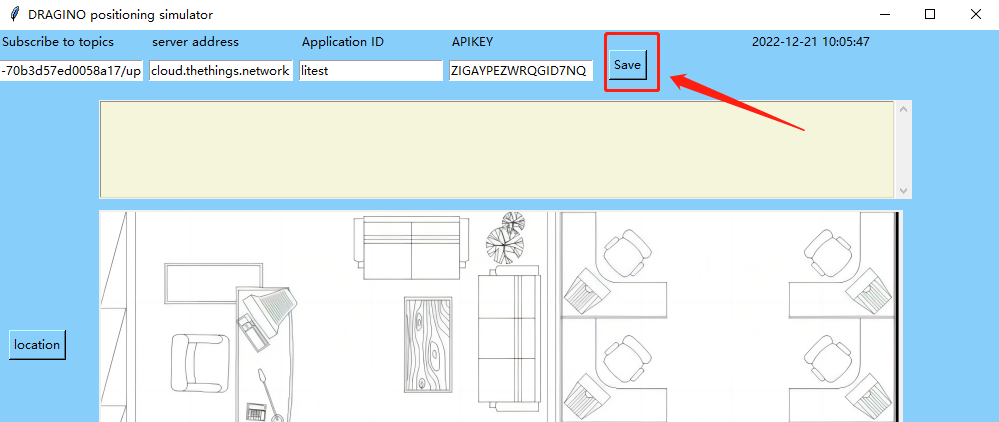
Warning:
When the save button is pressed, it cannot be pressed again to prevent data confusion.
If you want to modify the subscription topic, you need to restart the application.
Step 3: Click the location button
Just press once
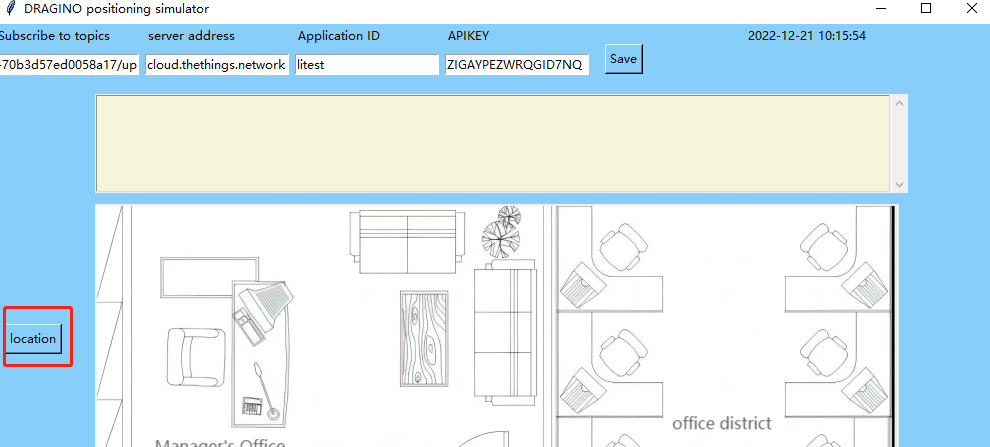
When the BLE node sends information, the application will display the located base station.
Step 4: About how to set the base station point and insert the floor plan
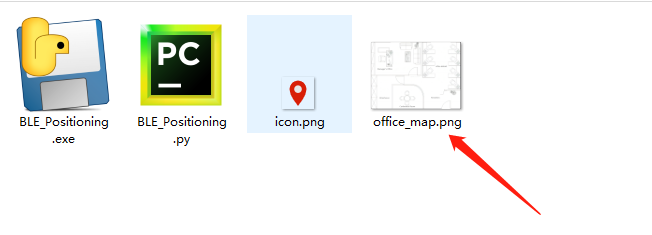
Place the floor plan in the same path as the python script
Change the file name to office_map(The picture pixel is 800x600)
Open source code

Remove comments
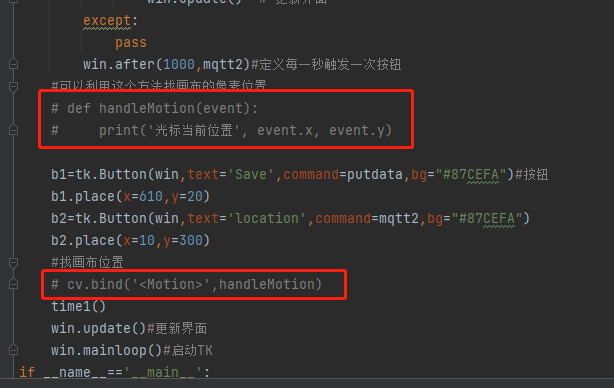
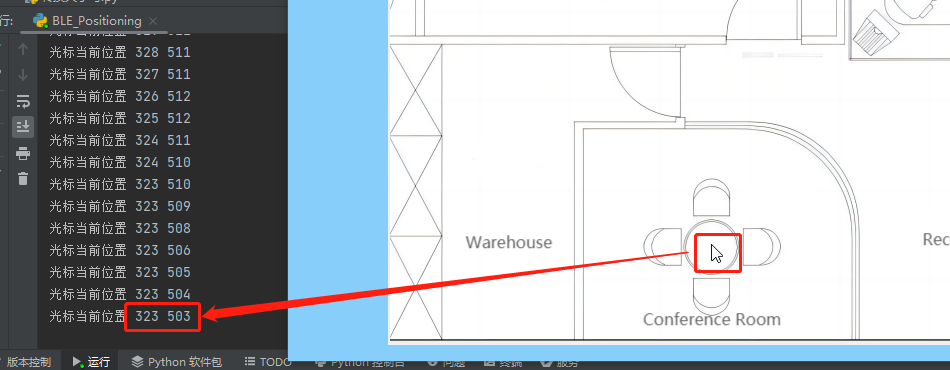
Run Script
The cursor position is the data pointed by the arrow, x=323 y=503
cv. create_ Image is changed to (323,483)--(x y-20 above)
cv. create_ Image is changed to (323,503)---(x y above)
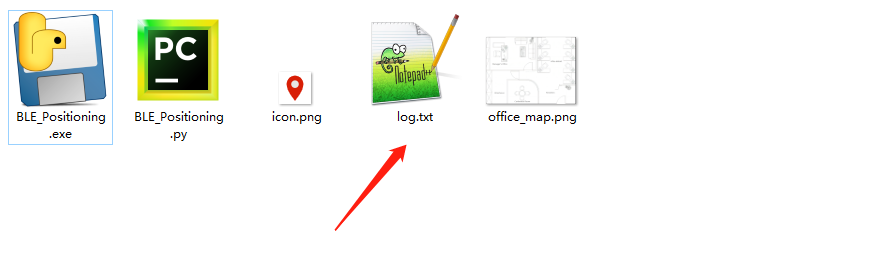
After clicking Save, a log.txt will be generated in the same directory as the script

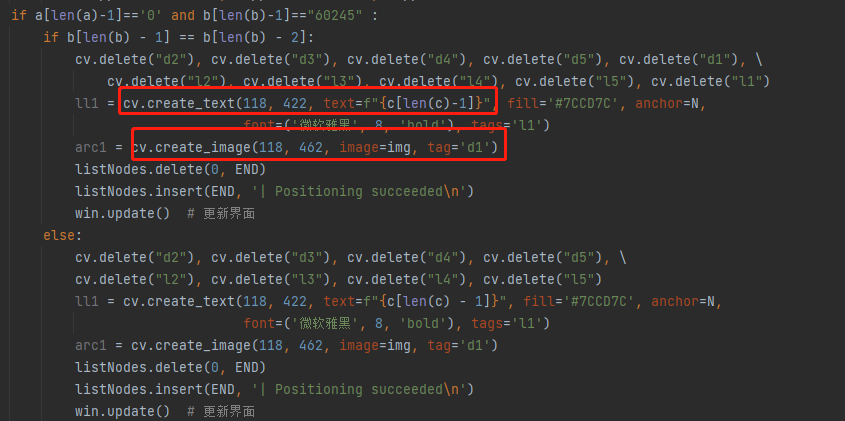
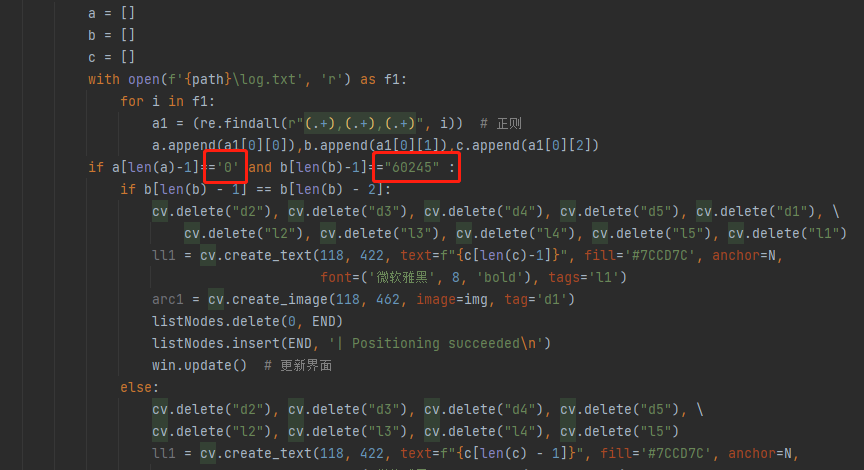
Back to script
Modify the data obtained in log.txt to the script
“0” Changed to “10006”
“60245” Changed to “79”
Step 5: Package the py file into an exe
Step 1:Installing the pyinstaller module
Step 2:Open cmd and switch to the directory where the script is located
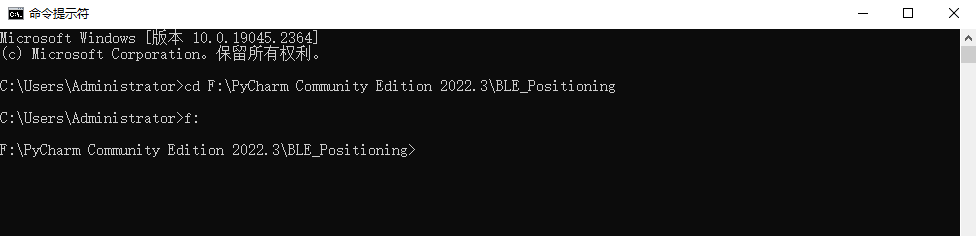
Step 3:Enter the following command
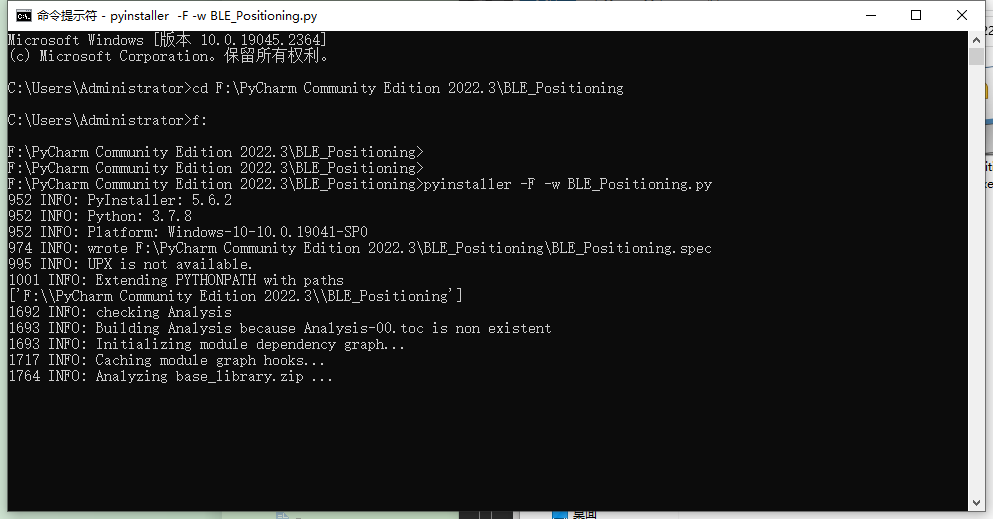
See the following certificate packaging completed.

The following files will be generated in the same directory of the script.
In addition to dist, the other two files can be deleted.
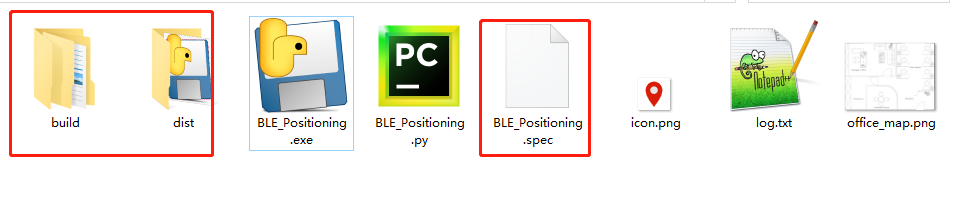
Finally, put the office_ Map.png and icon.png Put the into the dist folder.
Just run the program in dist.