Table of Contents:
- 1. Introduction
- 2. Use TrackerD in LoRaWAN network
- 3. Update Firmware
- 4. FAQ
- 5. Order Info
- 6. Packing Info
- 7. Reference
1. Introduction
1.1 OverView
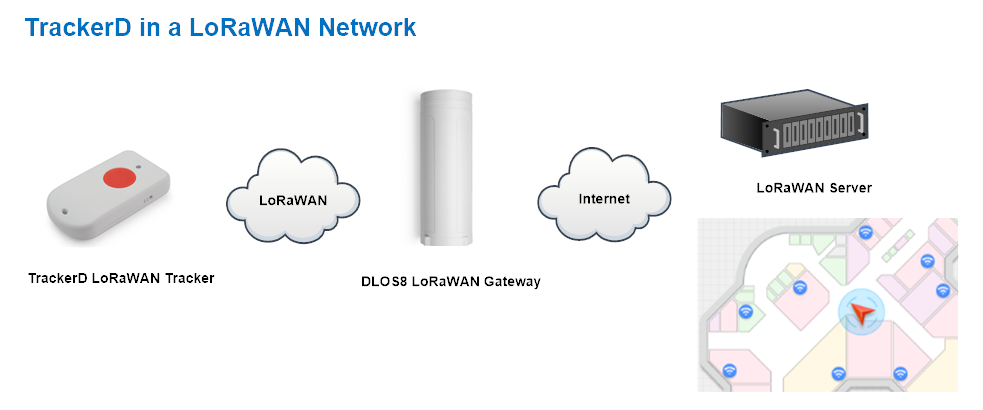
TrackerD is an Open Source LoRaWAN Tracker based on ESP32 MCU and Semtech LoRa Wireless Chip.
There are various sensors such as GPS, WiFi, BLE, Temperature, Humidity, Motion Detection, and Buzzer in TrackerD. Make it useful for different kinds of applications.
TrackerD is program friendly. Developers can use Arduino IDE to customize the software of TrackerD to fit their IoT solution.
The LoRa wireless technology used in TrackerD allows the user to send data and reach extremely long ranges at low data-rates.It provides ultra-long range spread spectrum communication and high interference immunity whilst minimising current consumption. It targets professional tracking services.
TrackerD is equipped with a 1000mAh Li-on rechargeable battery. Each TrackerD has a worldwide unique OTAA keys to join the LoRaWAN network.
1.2 Features
- LoRaWAN v1.0.3 Class A protocol.
- Frequency Bands: CN470/EU433/KR920/US915/EU868/AS923/AU915/IN865/RU864
- Track position via GPS / BLE or WiFi
- Temperature & Humidity
- Motion detection
- Built-in Buzzer
- AT Commands to change parameters
- Remote configure parameters via LoRa Downlink
- Uplink on periodically
- Datalog feature
- Firmware upgradable via program port
- Programable via Arduino IDE
- 1000mAh li-on rechargeable battery
1.3 Applications
- Logistics and Supply Chain Management
- Human tracking
2. Use TrackerD in LoRaWAN network
2.1 LED
2.2 Button
3. Update Firmware
3.1 Method 1: Update BIN file
Step1: Connect TrackerD and PC via TypeC cable directly.
Step2: Install CH9102 driver in the PC.
After installation of the driver and plug in TrackerD, user should be able to see com port in PC's device manager.
Step3: Download and Install Flash Tool from :
https://www.espressif.com.cn/en/support/download/other-tools?keys=Flash%2BDownload%2BTools
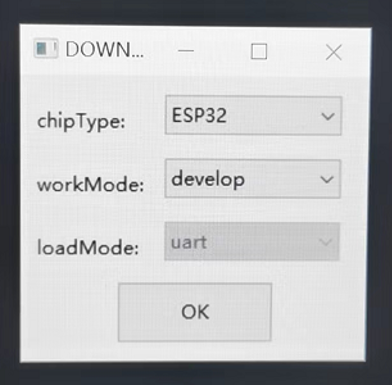
Step4: Run Flash Download Tool and configure chip type to ESP32

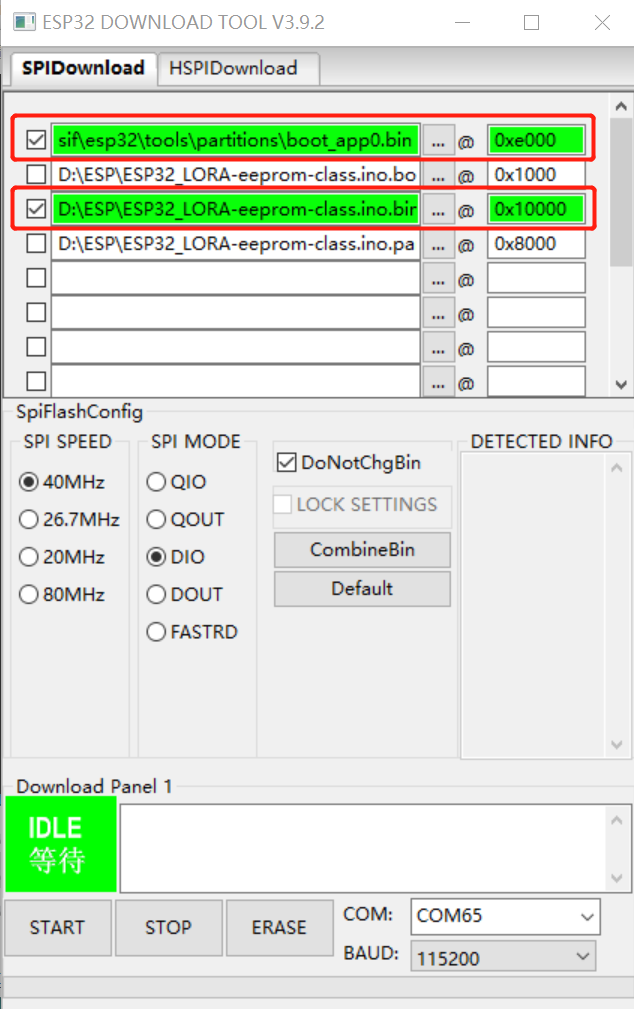
Step5: Select the bin file , com port and proper SPI configure. and click Start.
Bin file can be downloaded from: https://www.dropbox.com/sh/733s8xlwahhqg1d/AABxDz80lBVX_to8zNuUQWFja?dl=0
Users need to use below files:
- boot_app0.bin @0e000
- ESP_LORA-eeprom-class.bin @ 0x10000
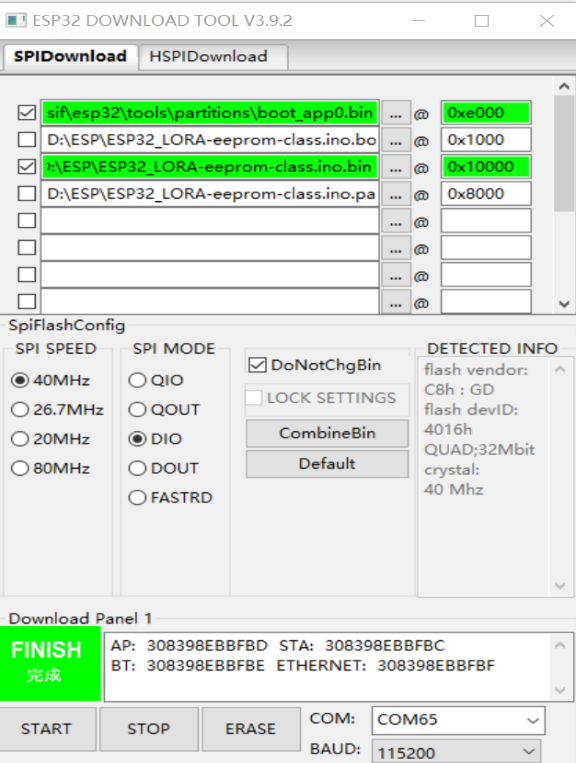
After upgrade finish, it will shows below:
4. FAQ
4.1 Where can i find the source files for TrackerD?
Software & Hardware Source: https://github.com/dragino/TrackerD
5. Order Info
Part Number: TrackerD-XXX
XXX: The default frequency band
- EU433: Default frequency band EU433
- CN470: Default frequency band CN470
- EU868: Default frequency band EU868
- IN865: Default frequency band IN865
- KR920: Default frequency band KR920
- AS923: Default frequency band AS923
- AU915: Default frequency band AU915
- US915: Default frequency band US915
6. Packing Info
Package Includes:
- TrackerD x 1
- Rechargeable cable x 1
- Program Cable x 1
Dimensions and Weight:
- Device Size: 85 x 48 x 15 mm/pcs
- Weight: 55g/pcs