Contents:
1. My devices
1.1 Introduction
The Dragino LoRaWAN gateway amd end node can commuicate with Mydevices LoRaWAN Network Server: Mydevices
1.2 Gateway Registered
Step 1: Get the GWID of the gateway and set the correct service address
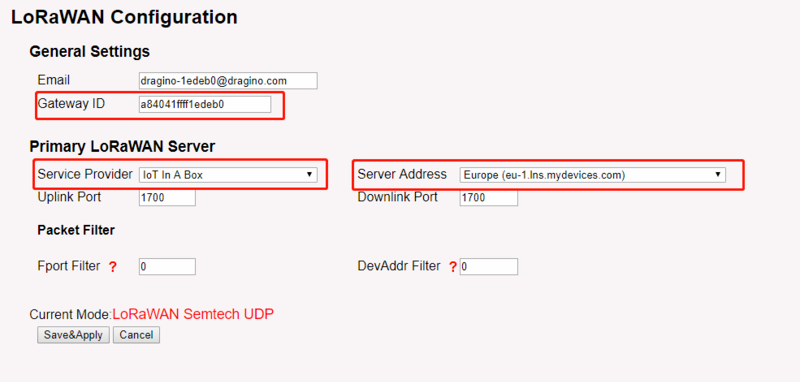
Configure the gateway
Step 2: Select Gateway in the mydevice console
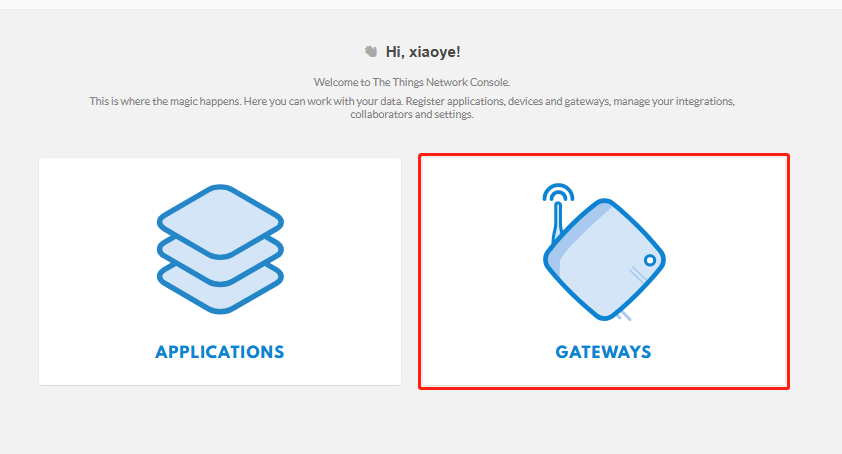
Select Gateway
Step 3: Registered gateway for mydevice
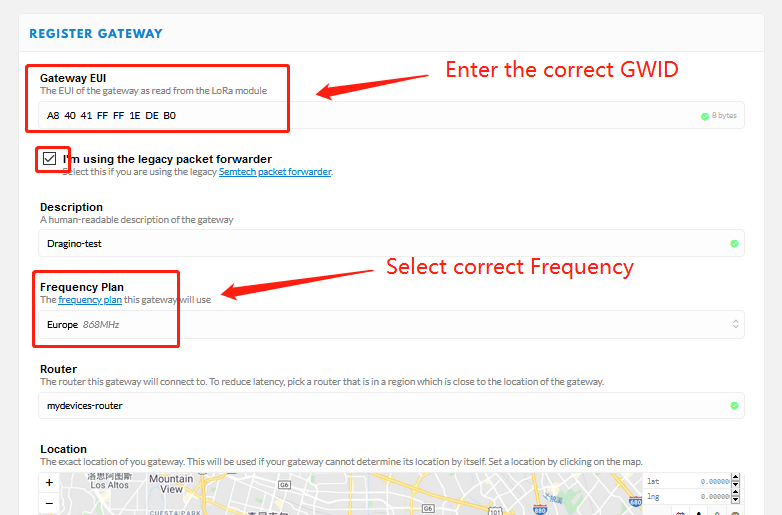
Registered gateway for mydevice
1.3 Check Gateway connection
Users can check if the gateway is properly connected according to 'Satus' or check the gateway WEB like below
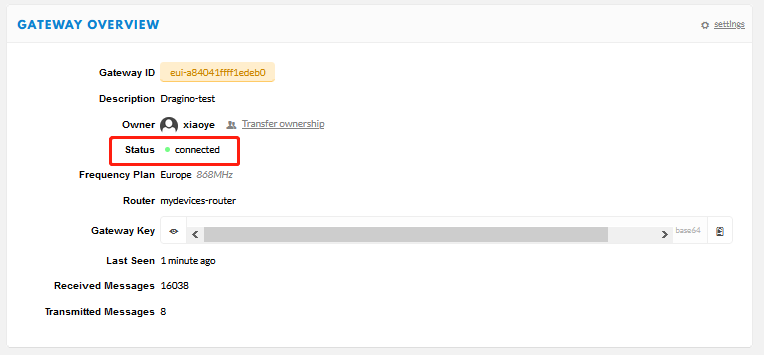
Check Status1
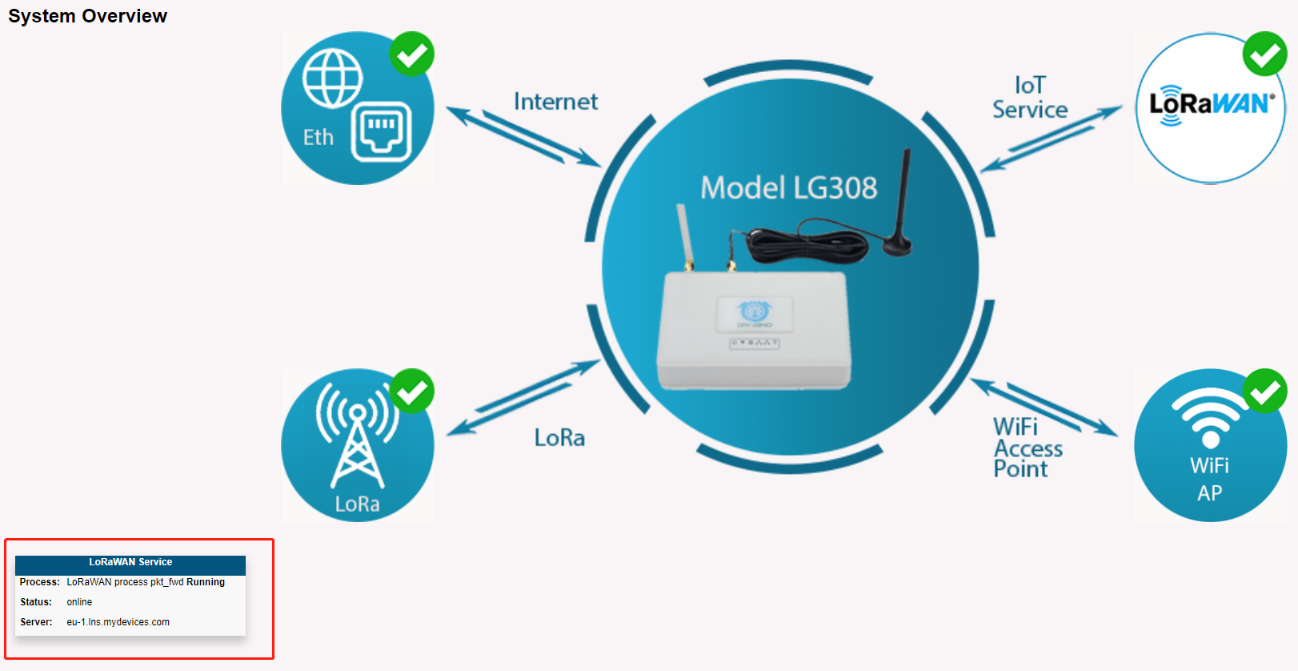
Check statis2
1.4 Check Gateway traffic from Mydevie
user can see the gateway traffic

Gateway trafiic
1.5 Add up End node for mydevice
Step 1 :Create a device in TTN with the OTAA keys from LT IO controller. Each end node is shipped with a sticker with the default device EUI as below:
User can enter this key in their LoRaWAN Server portal. Below is mydevice screen shot: Add APP EUI in the application.
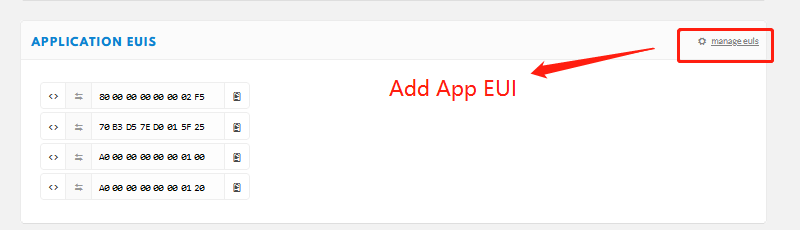
Add App EUI
Add APP KEY and DEV EUI
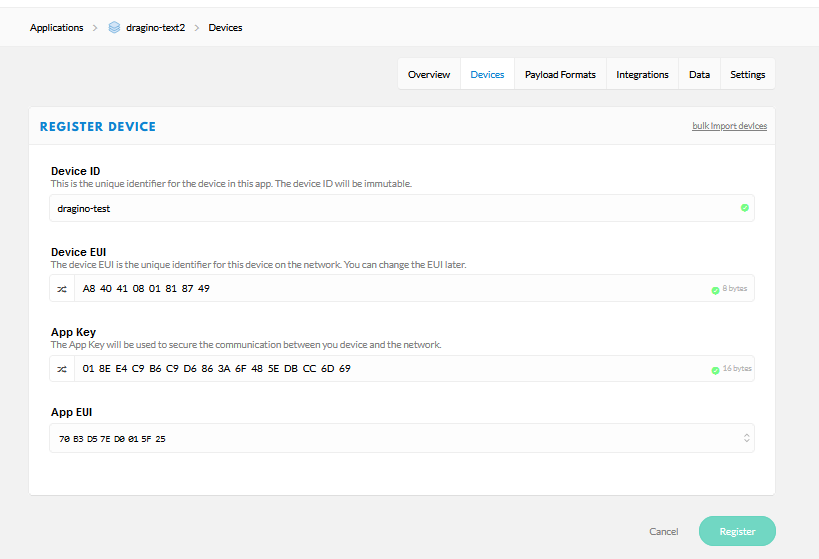
Add App key and App DEUI
Step 2 :Power on end node and it will auto join to the TTN network. After join success, it will start to upload message to Mydevice and user can see in the panel and analyze the data
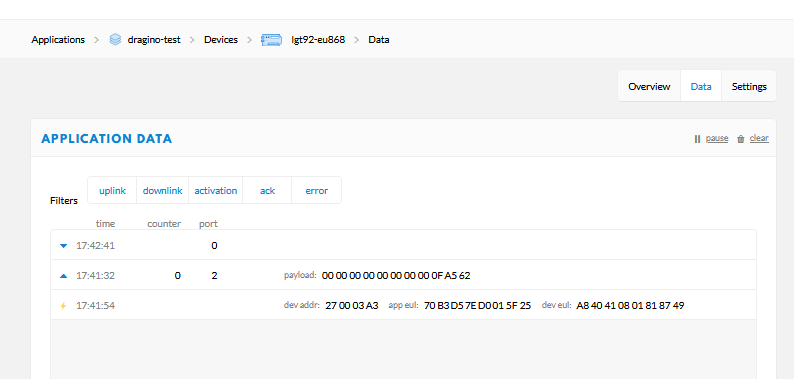
Join mydevice of end node