Losant
Table of Contents:
1. Indoor Tracking Examples base on iBeacon
1.1 Create a Losant Webhook
If you do not have a Losant Account, you can sign up for a free Losant Developer Sandbox account. Once you have an account, create a new application. You can start from a blank application or from a Losant Application Template, like The Things Network Application Template.
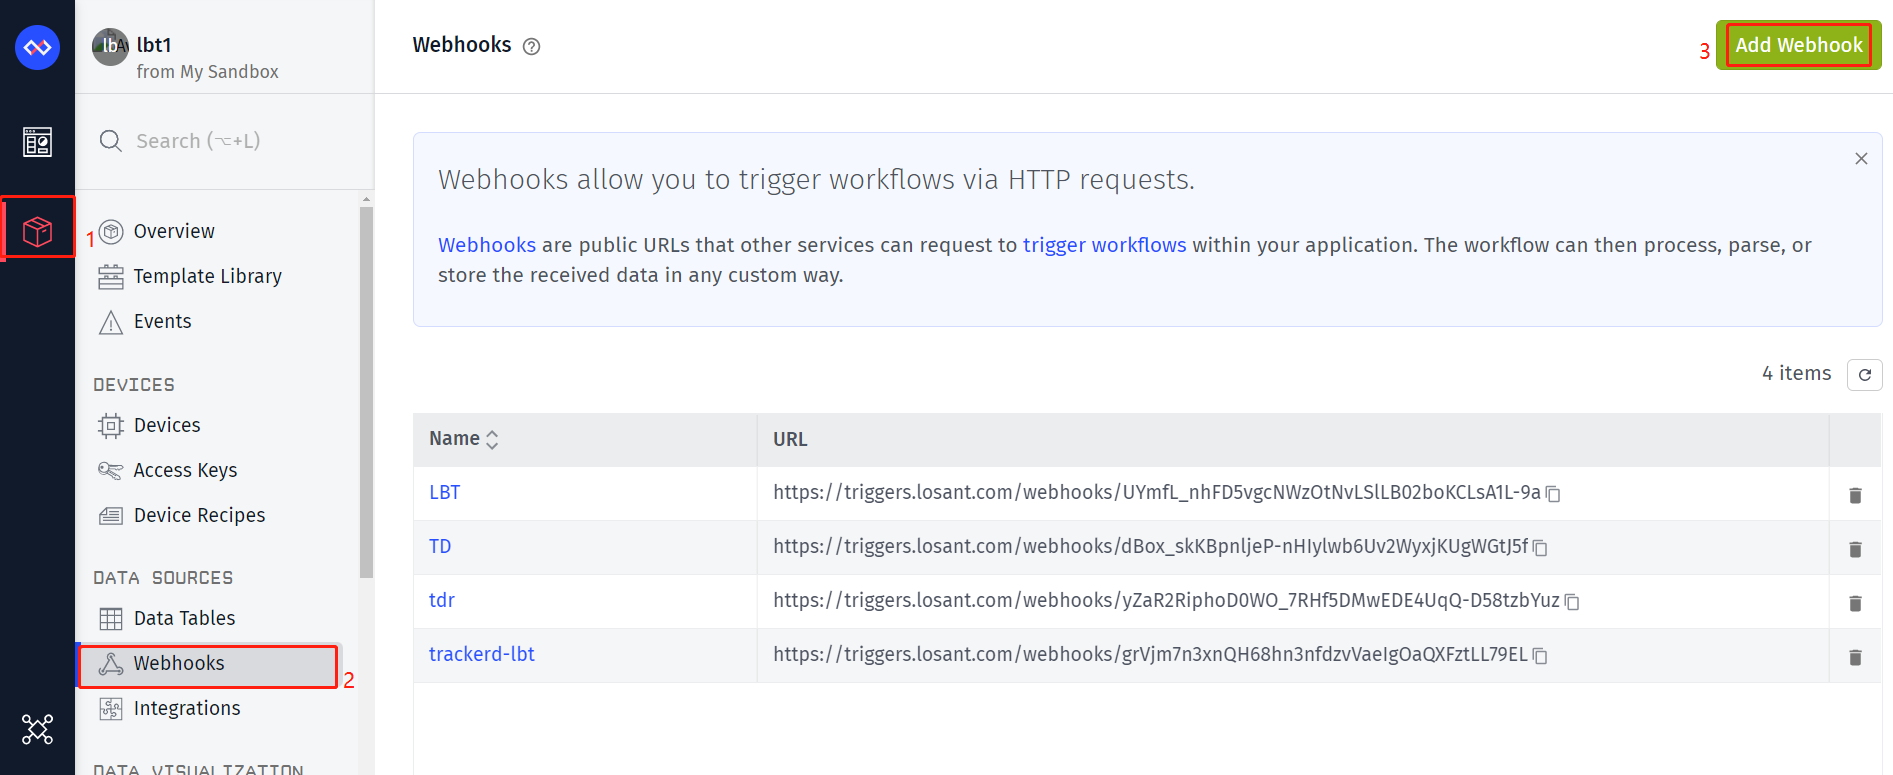
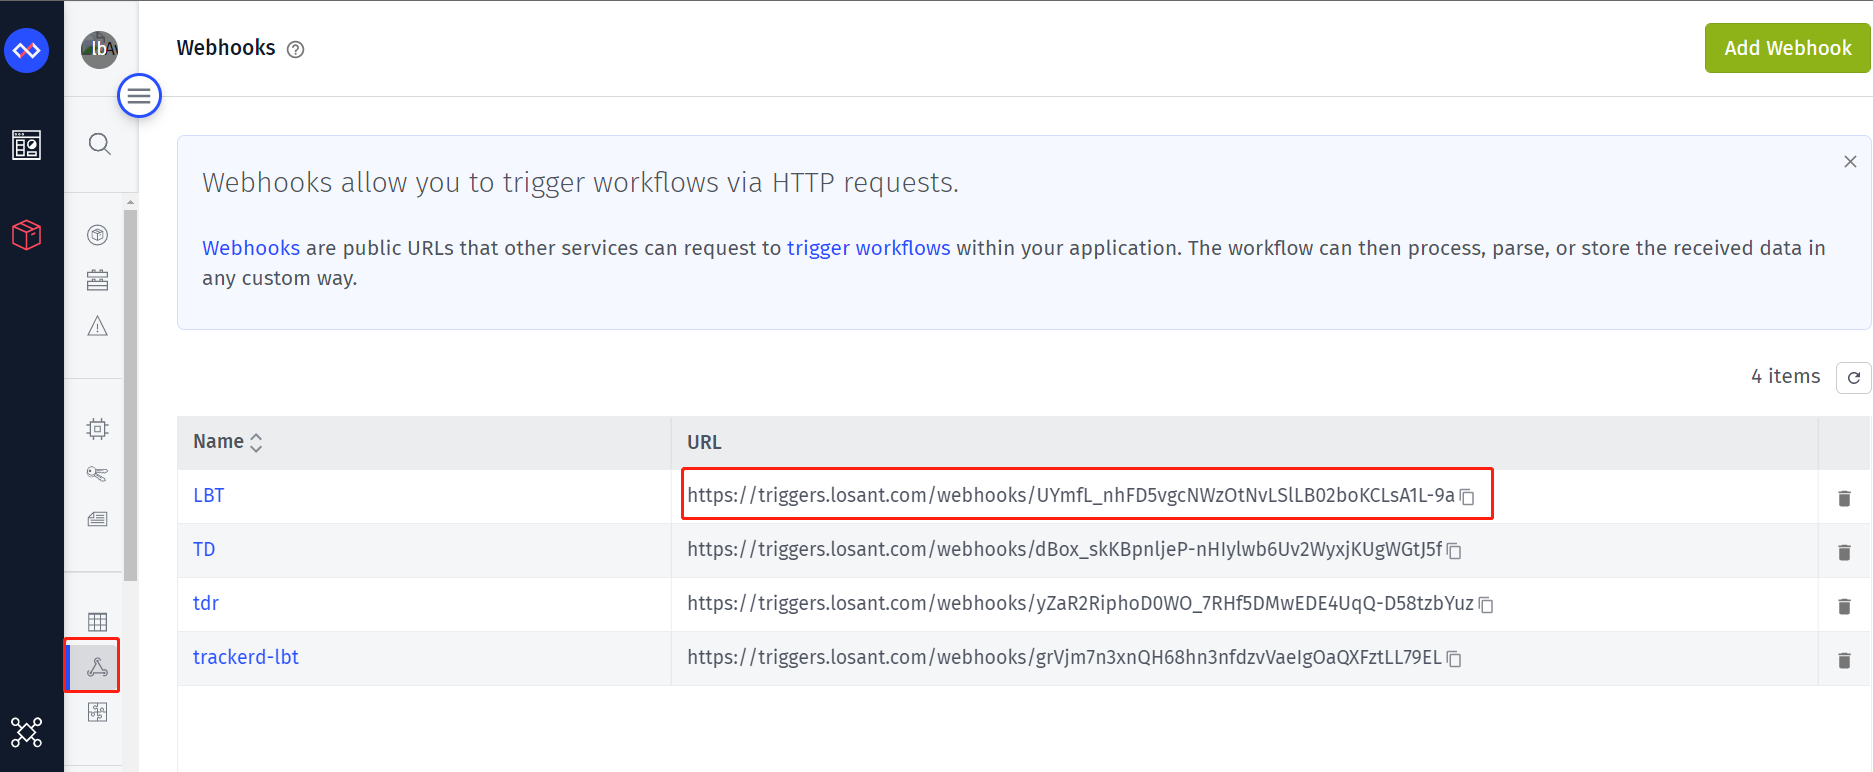
Once you've created a new application, click Webhooks and then Add Webhook.
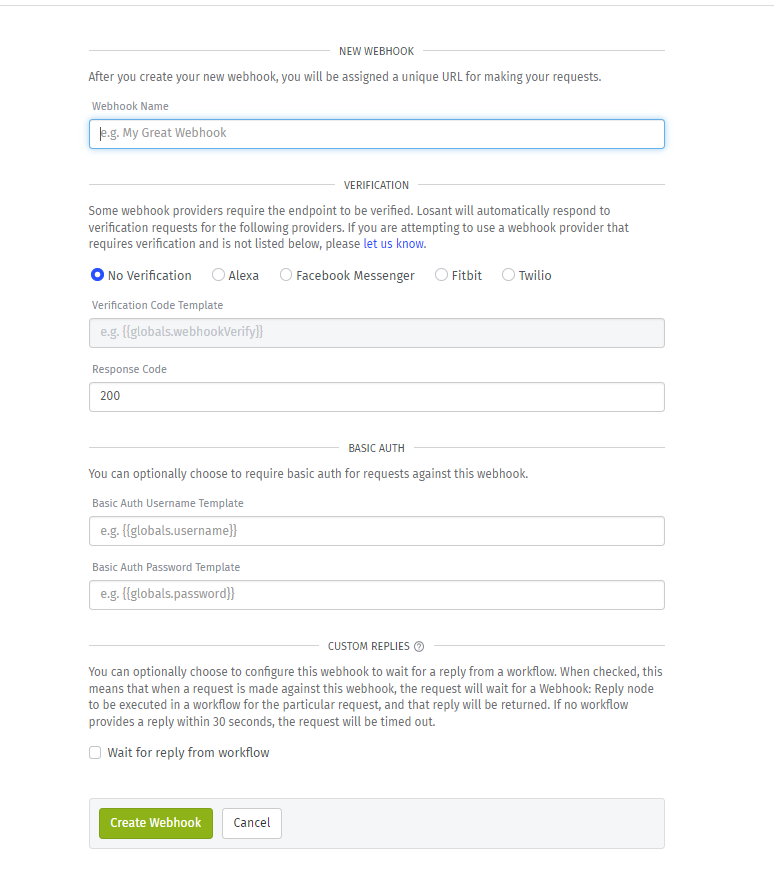
Enter a Webhook Name and then click Create Webhook. You may also enter a username and password to use Basic Auth. If you use Basic Auth, you will need to edit your Losant Webhook in TTS.
Once the Webhook is created, copy the unique identifier from the URL that comes after https://triggers.losant.com/webhooks/.
1.2 Configure TTS to Use the Losant Webhook
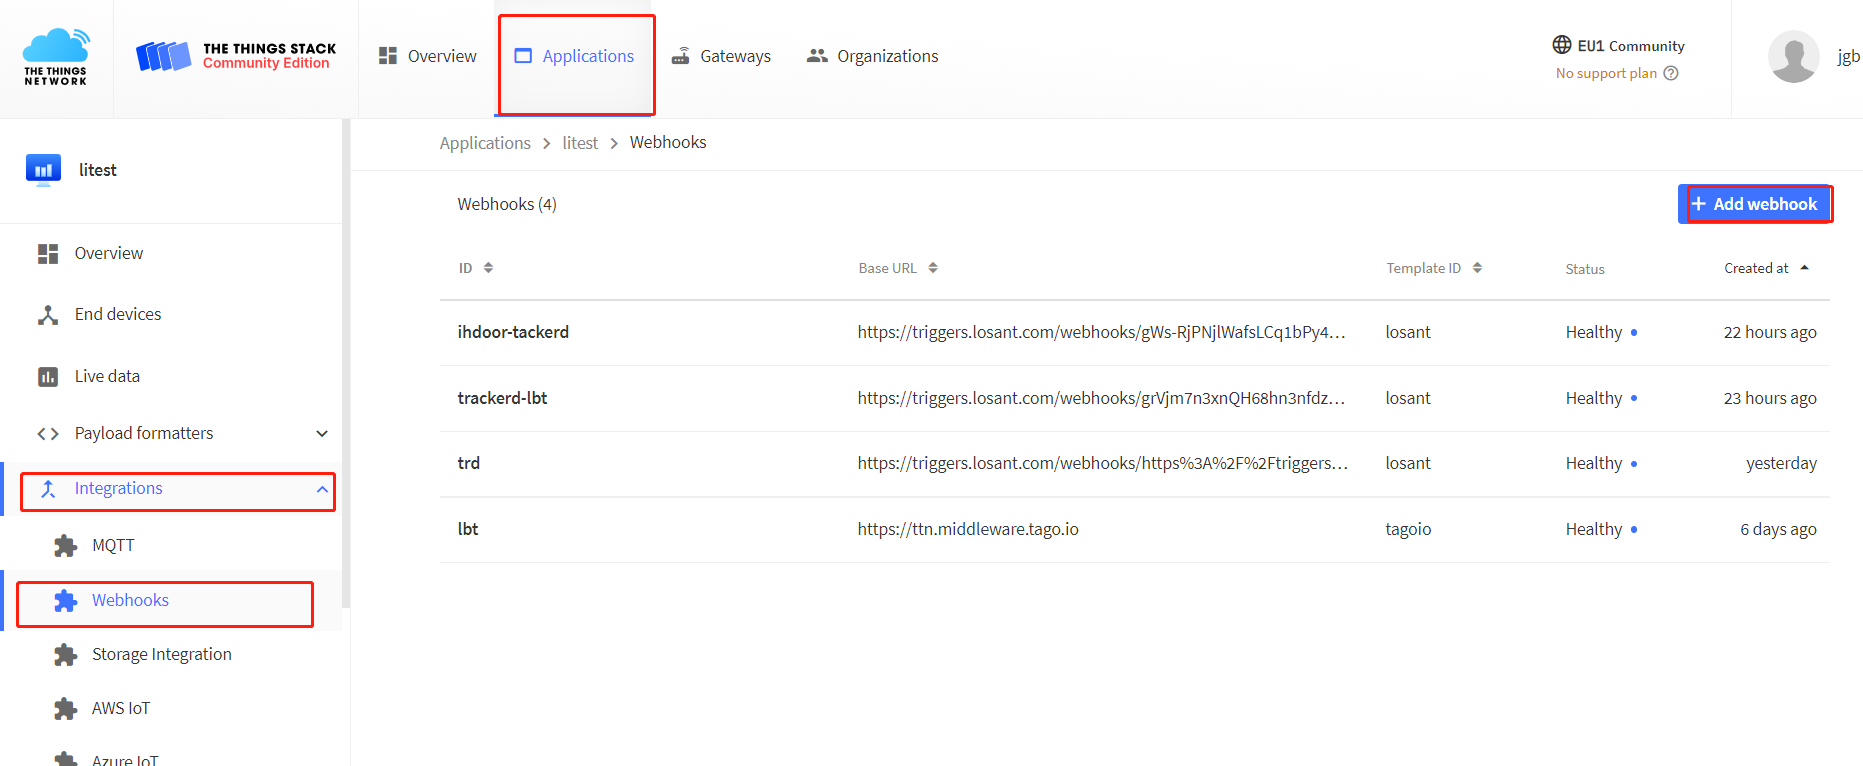
In the TTS application , click on Integrations, then Webhooks, and then Add webhook.
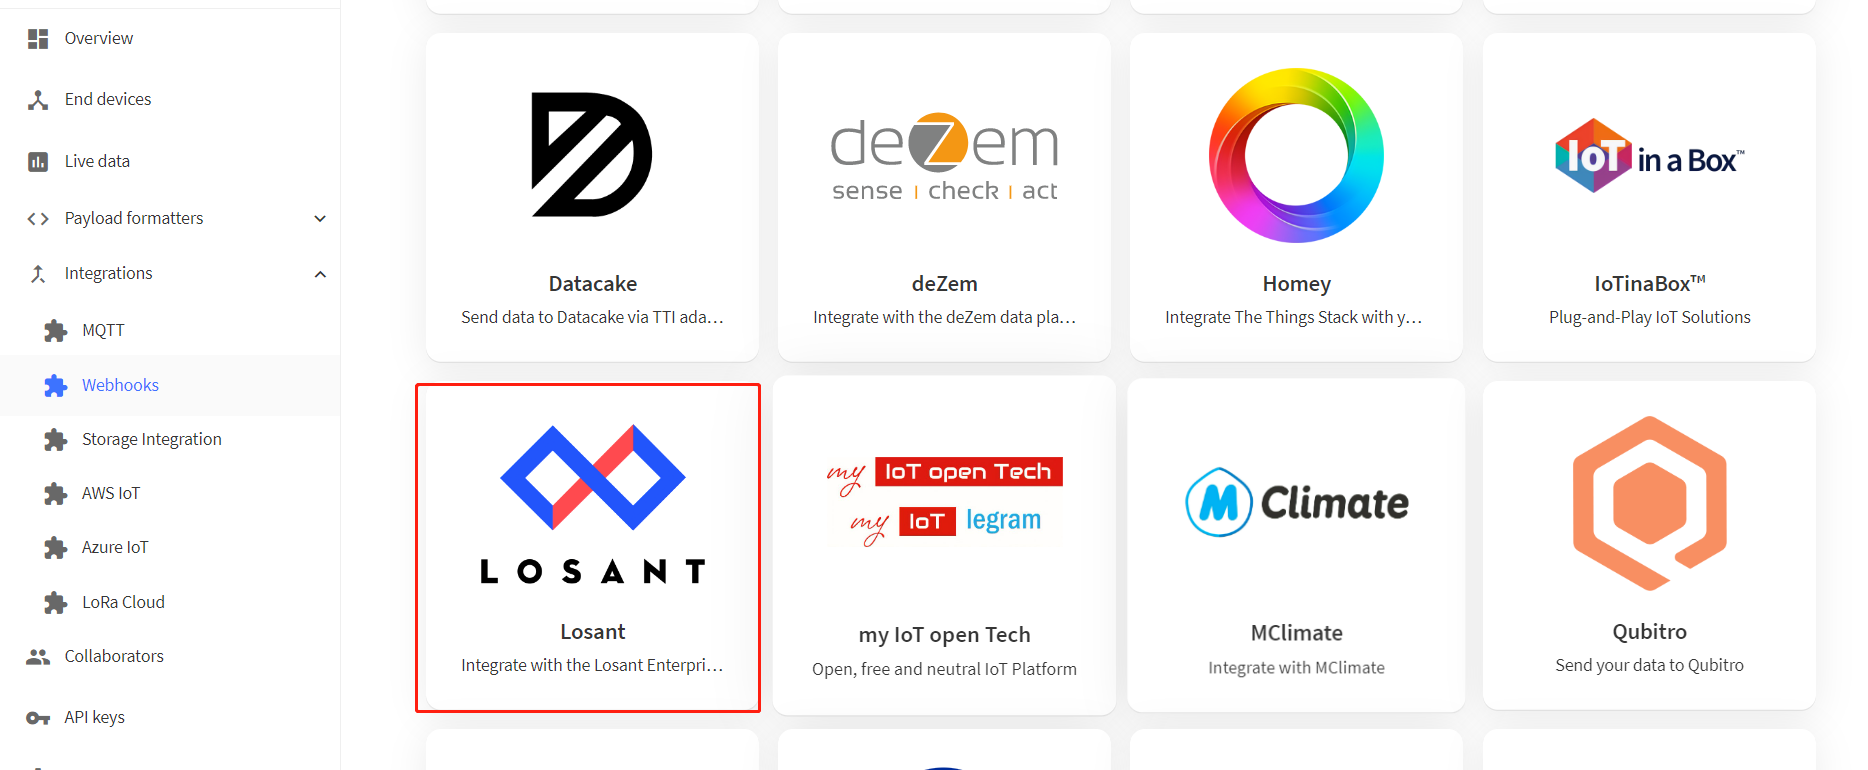
Click on the Losant Webhook tile. If you are using Basic Auth for this Webhook or need to subscribe to more than just uplink messages, then please review the end of this How-To Guide in the section named Editing Your Losant Webhook in TTS.
Enter the following information into the Losant Webhook configuration:
- Webhook ID: Make up any name that you would like. This does not have to be the ID of the webhook as it is stored in Losant.
- Unique ID of Losant Webhook URL: This is the Losant Webhook unique ID that was copied to the clipboard in LOSANT Webhooks.
Finally, click Create Losant webhook. If you need to configure additional options (e.g. Basic Auth or additional messages to subscribe to), use the TTS Custom Webhook Template or add these options once the Webhook in TTS is created by following the last section of this guide, Editing Your Losant Webhook in TTS.

1.3 Create a Losant Application Workflow to Receive Data from the LoRaWAN Sensor and Confirm Data Flow to Losant via Uplinks
Since TTS is now configured to forward data to the Losant Webhook, let's create a Losant Application Workflow to receive the data from TTS.
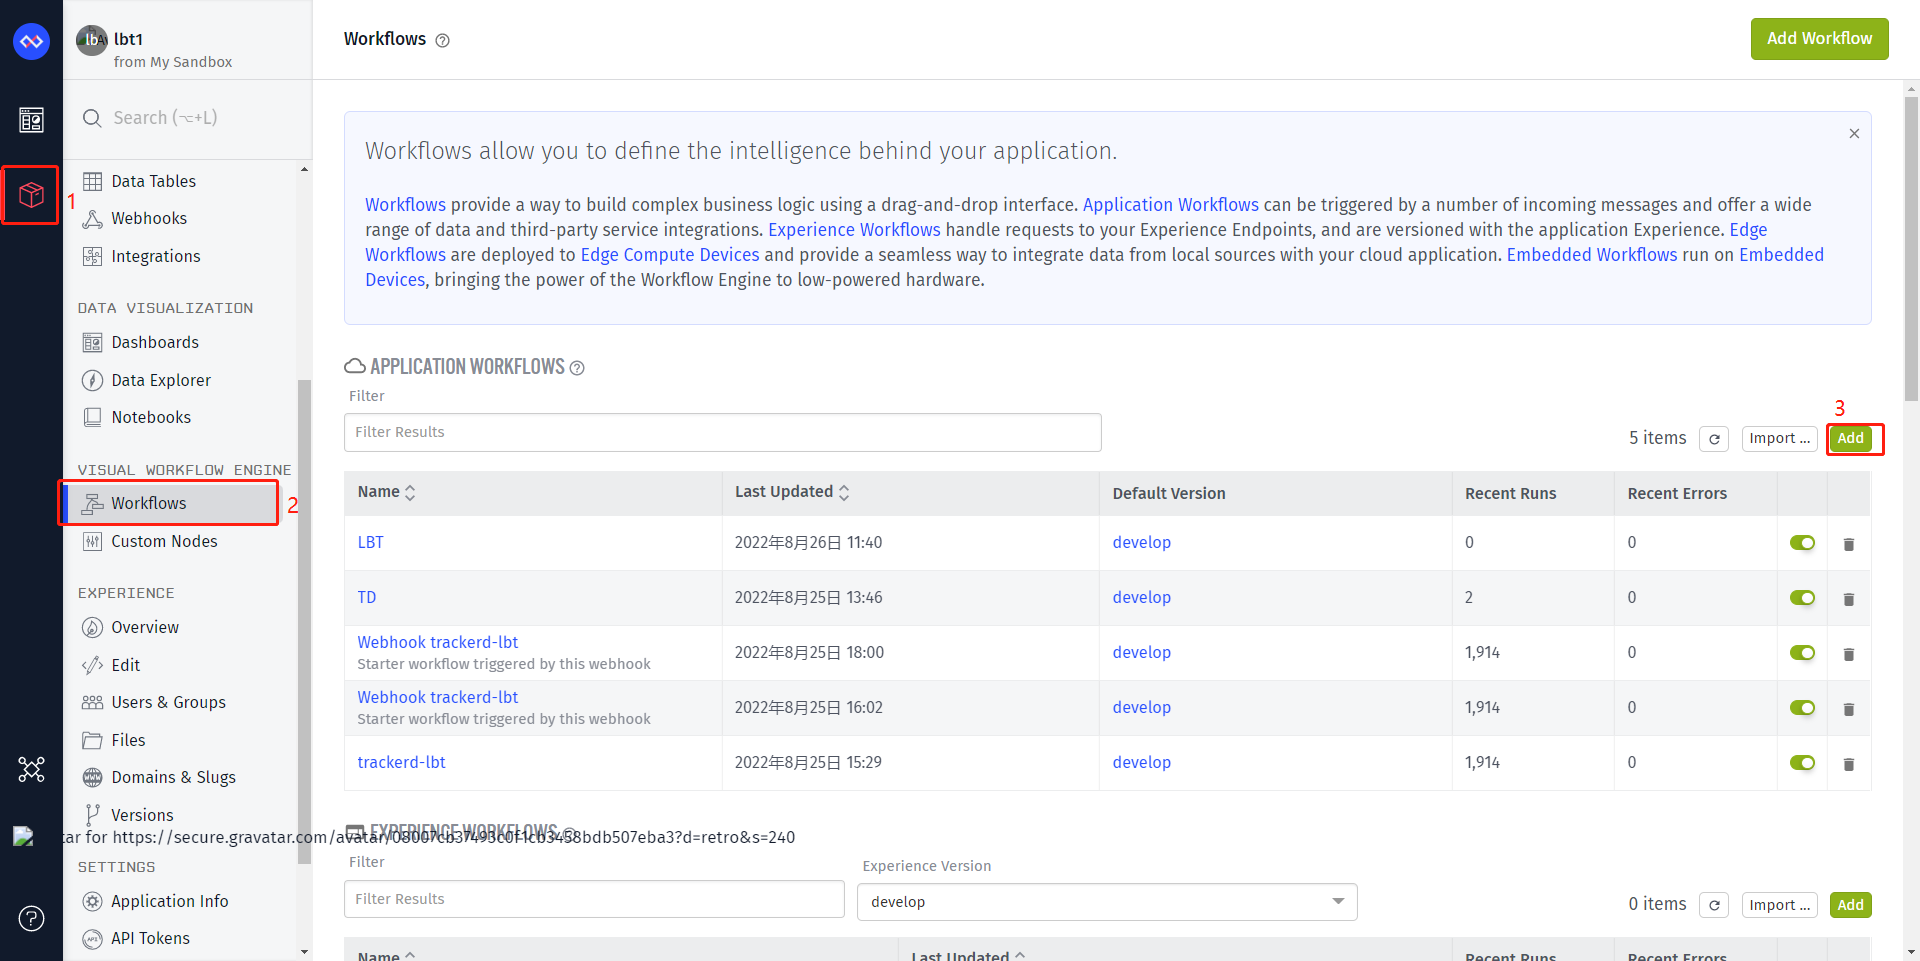
Click on Workflows and then in the Application Workflow section, click Add to create a new Application Workflow.
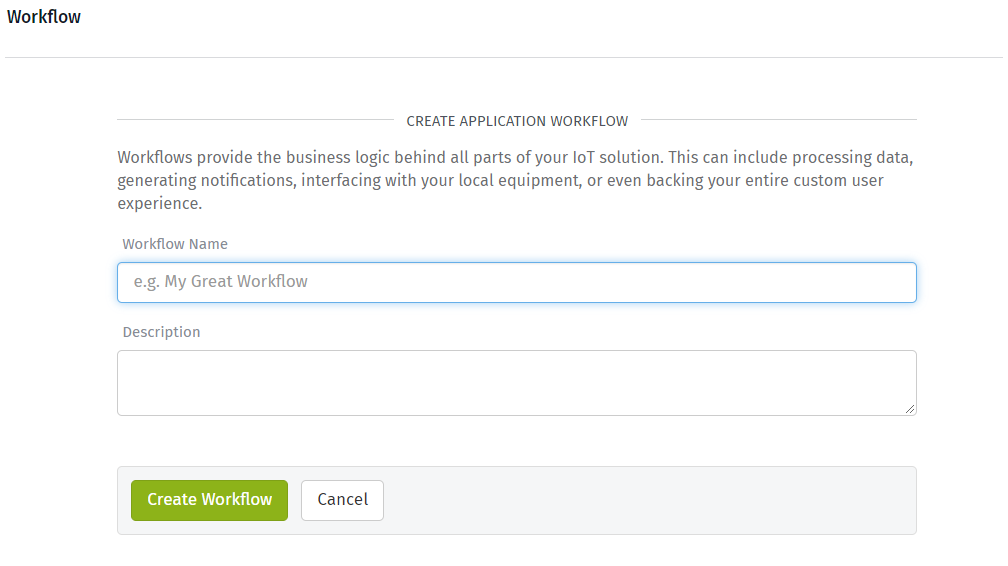
Enter a name for your Application Workflow (as well as a description if you'd like) and click Create Workflow.
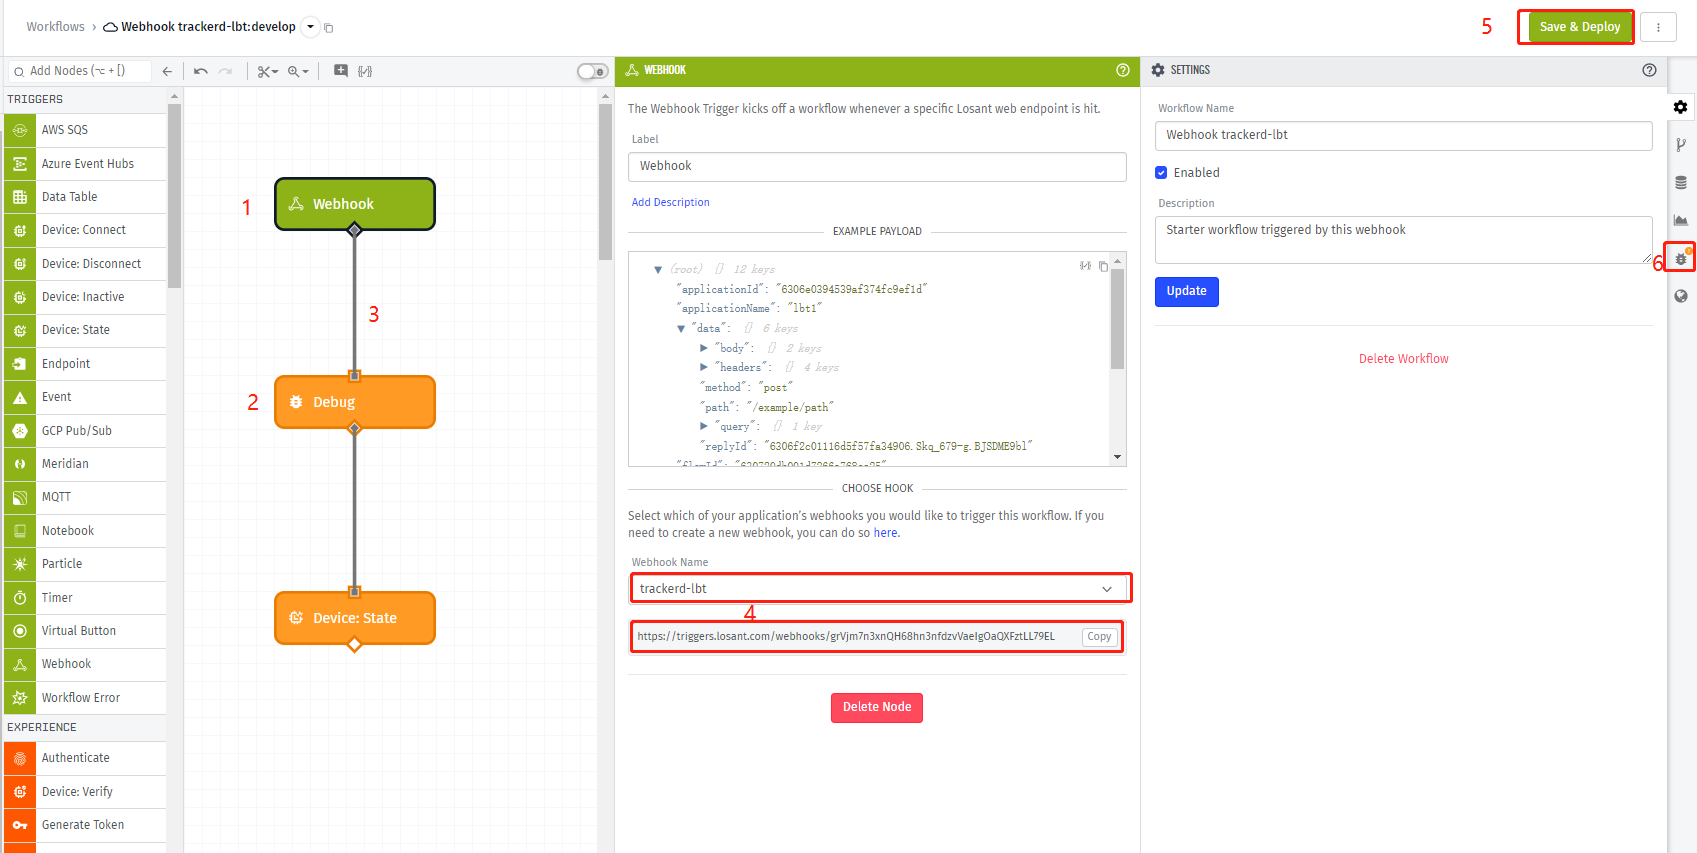
Drag and drop the Webhook Trigger Node and the Debug Node onto the visual workflow engine's canvas and connect them together. If you have only one webhook in this Losant application, it will be automatically selected for the Webhook Trigger. If you have multiple webhooks, select the one that was created in Webhook. Next, click Save and Deploy. Now that this workflow is deployed, click on the Debug Panel.
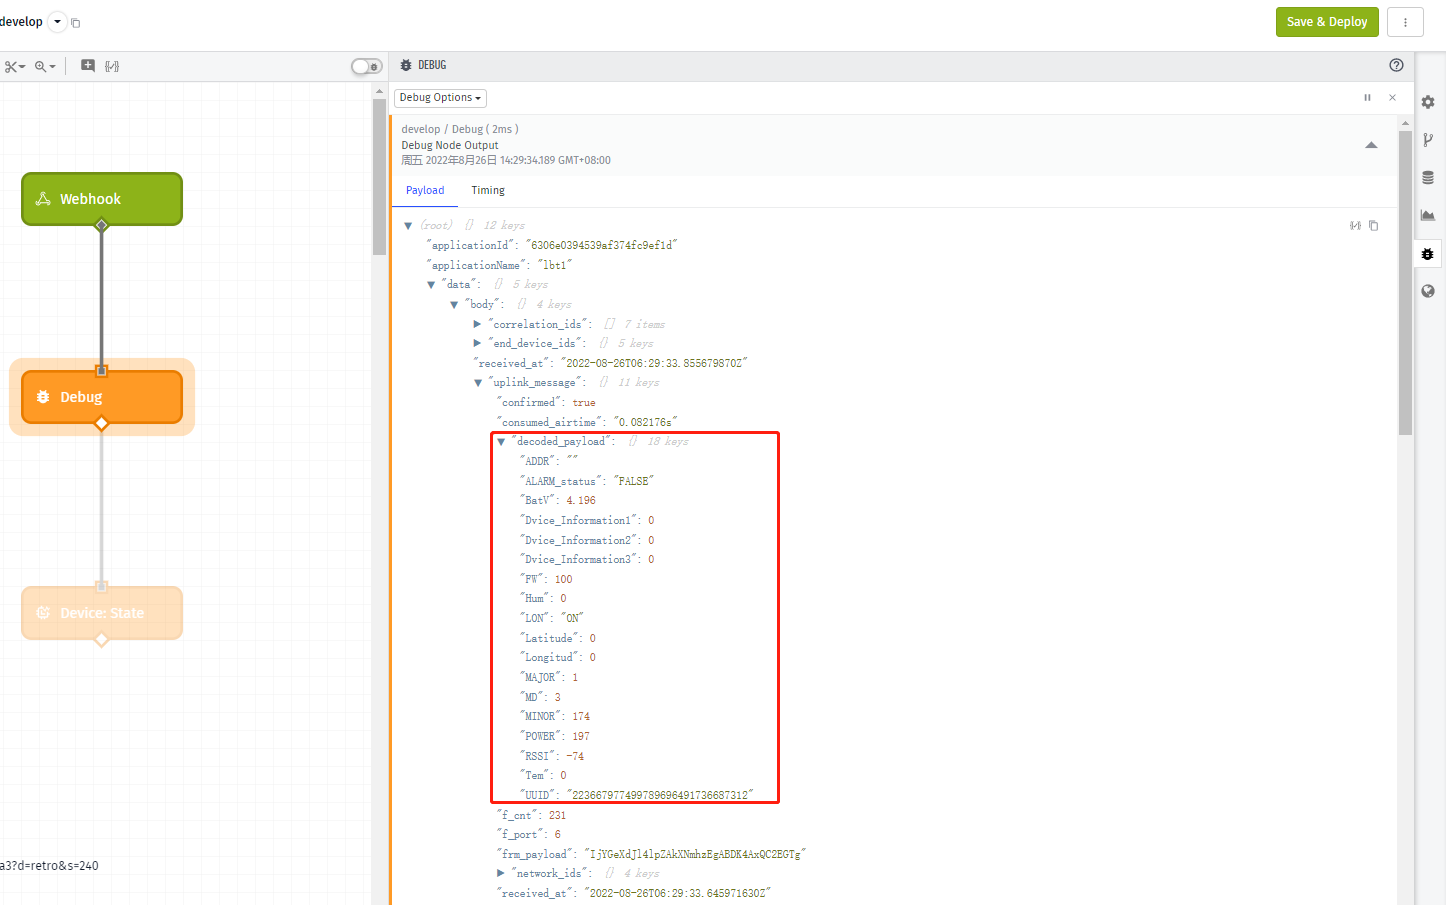
When TTS receives new data from the sensor, it will send that data to Losant over the Losant Webhook and trigger this workflow. Each time this workflow runs, new data will be displayed in the Debug Panel as shown below.
Note: If TTS is not automatically decoding your data as shown below in data.body.uplink_message.decoded_payload, then you can decode your LoRaWAN device data in this Losant Application Workflow. Check out the blog post How To Decode and Visualize Your LoRaWAN Sensor Data Using TTS and Losant to learn more about decoding LoRaWAN data in Losant.
1.4 Create a device
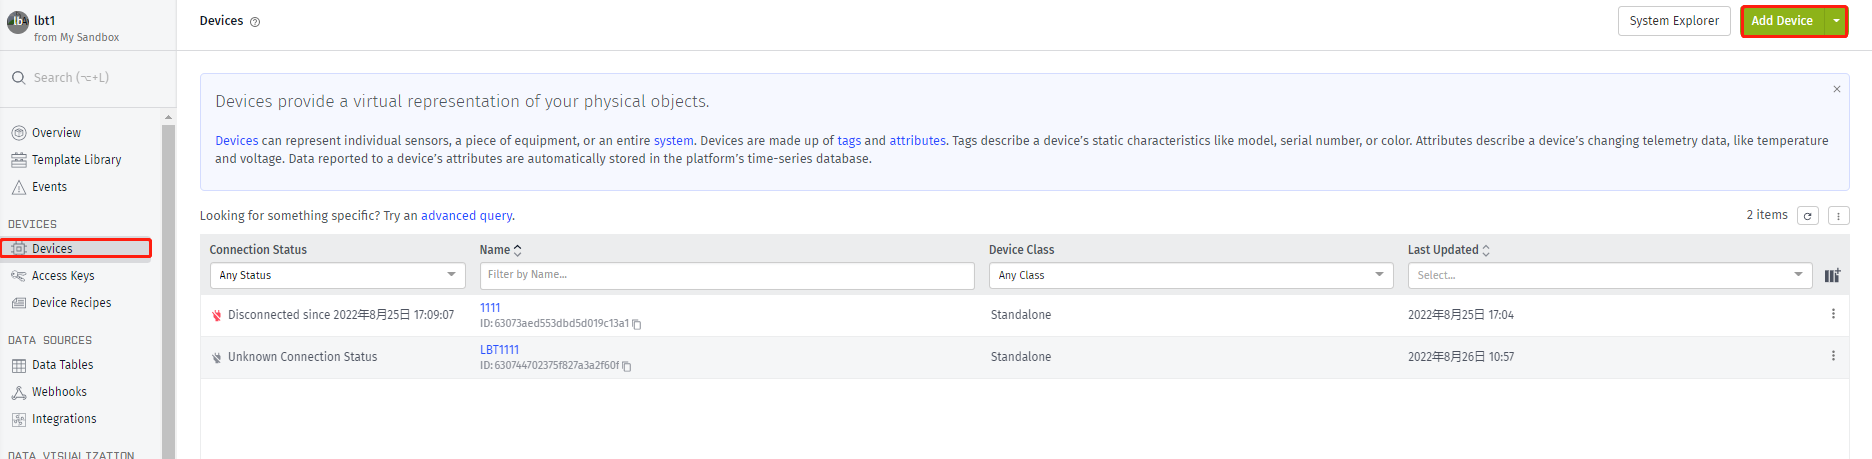
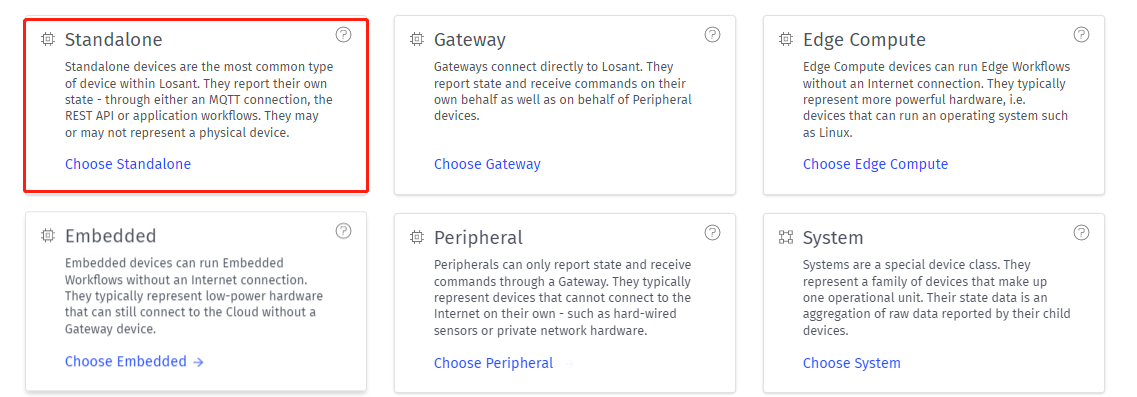
Select the appropriate equipment. In this example, select a Standalone equipment
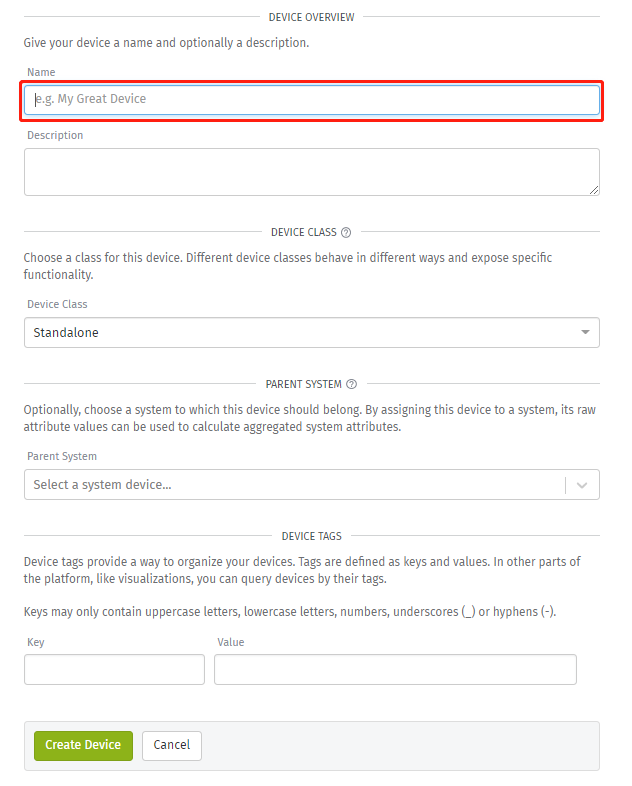
Name is required, others can be added later
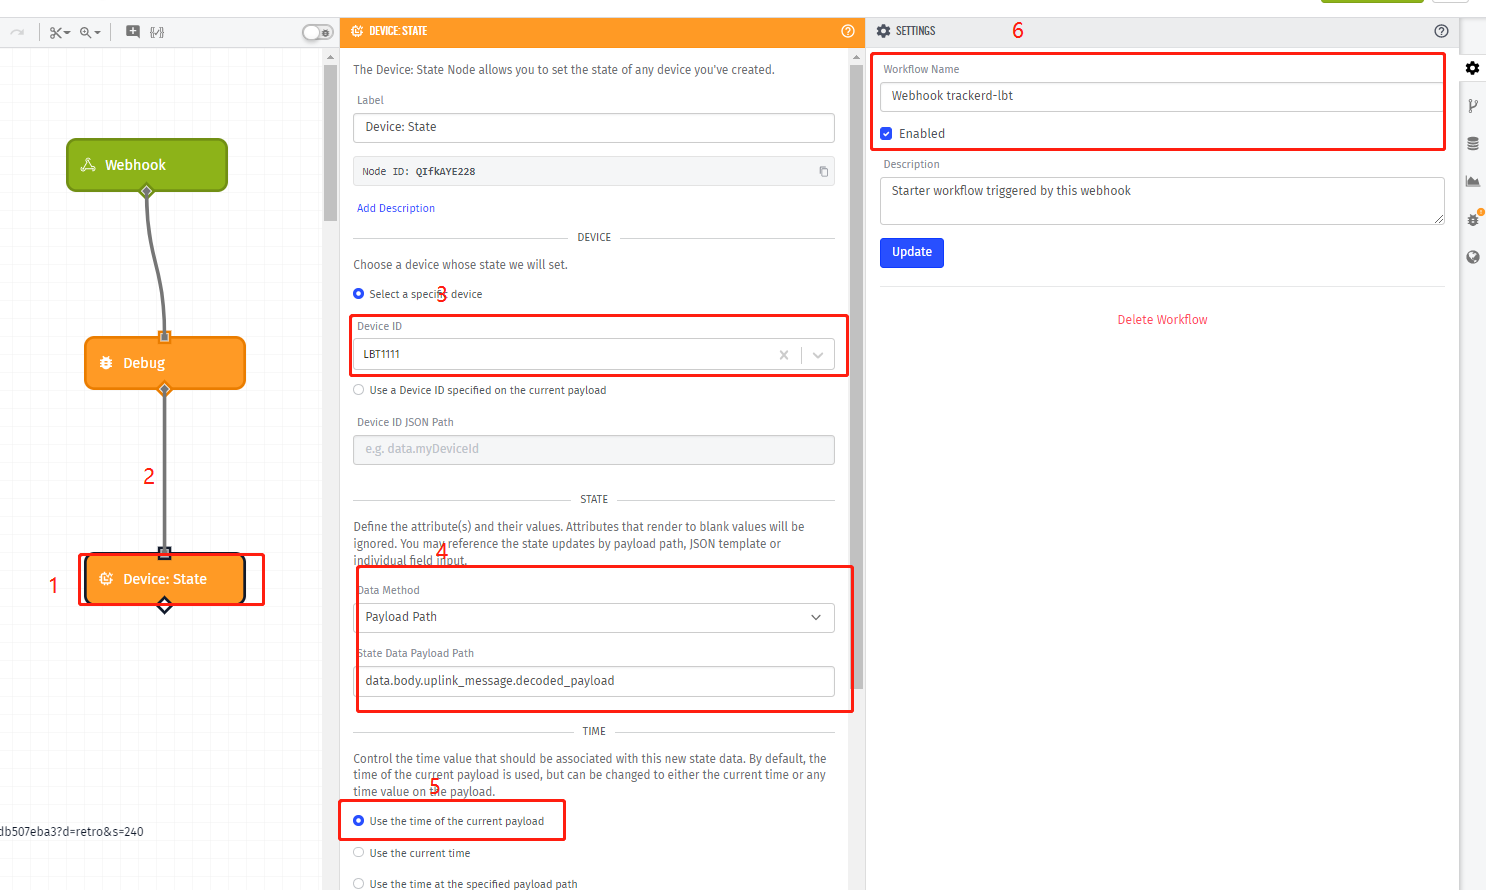
Add equipment in the workflow so that data can flow to the equipment
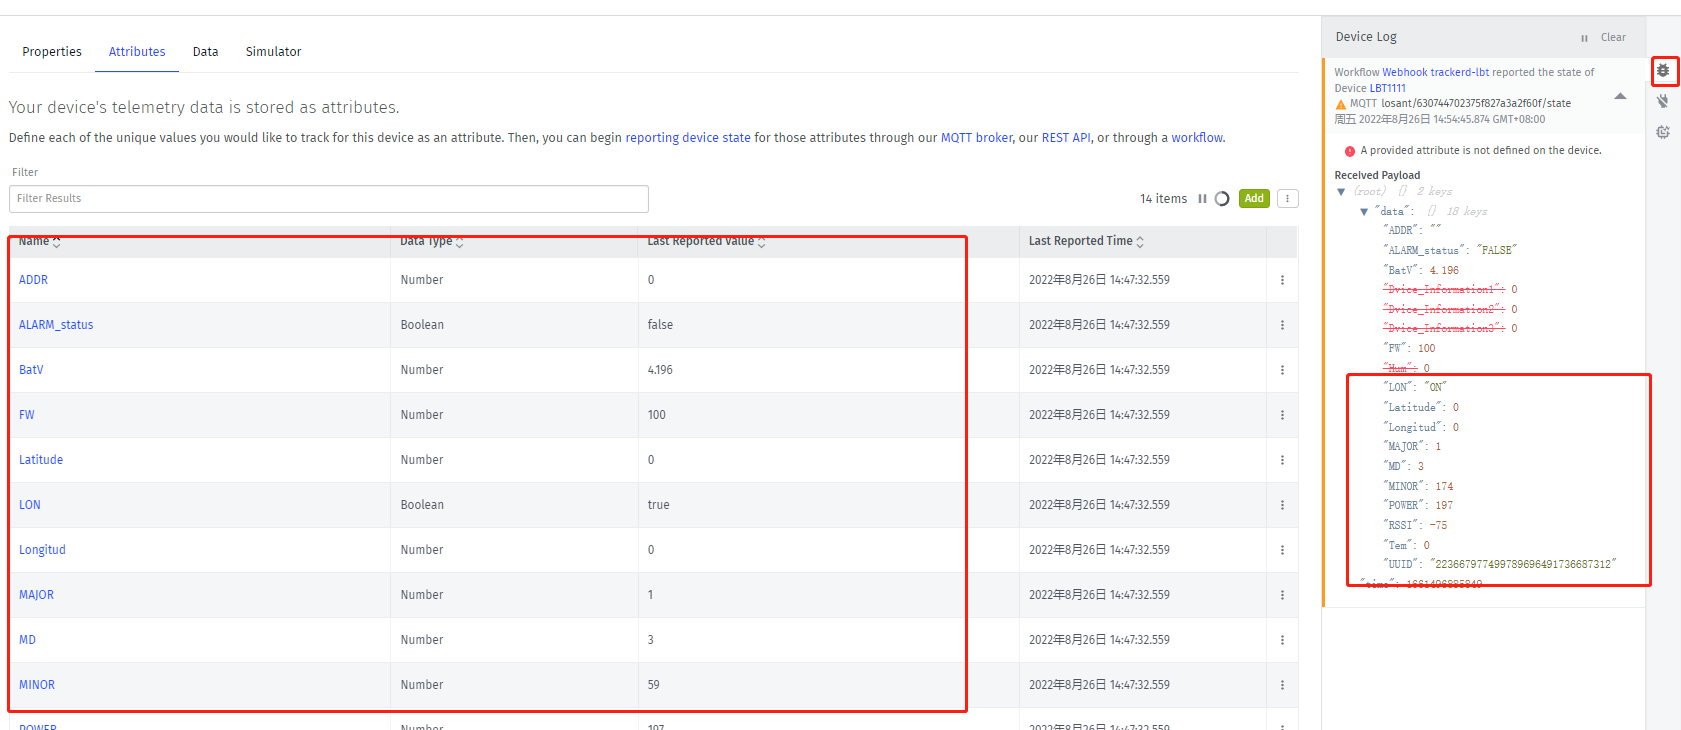
Refer to the data in debug and add parameters to the device.
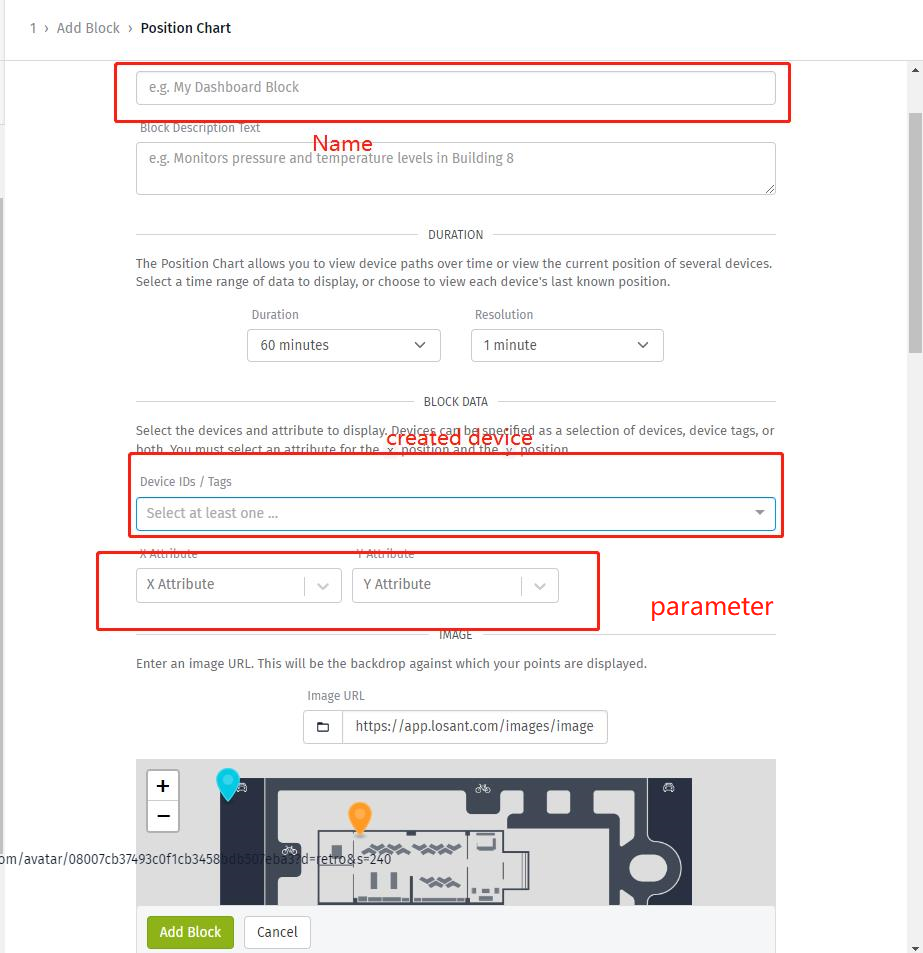
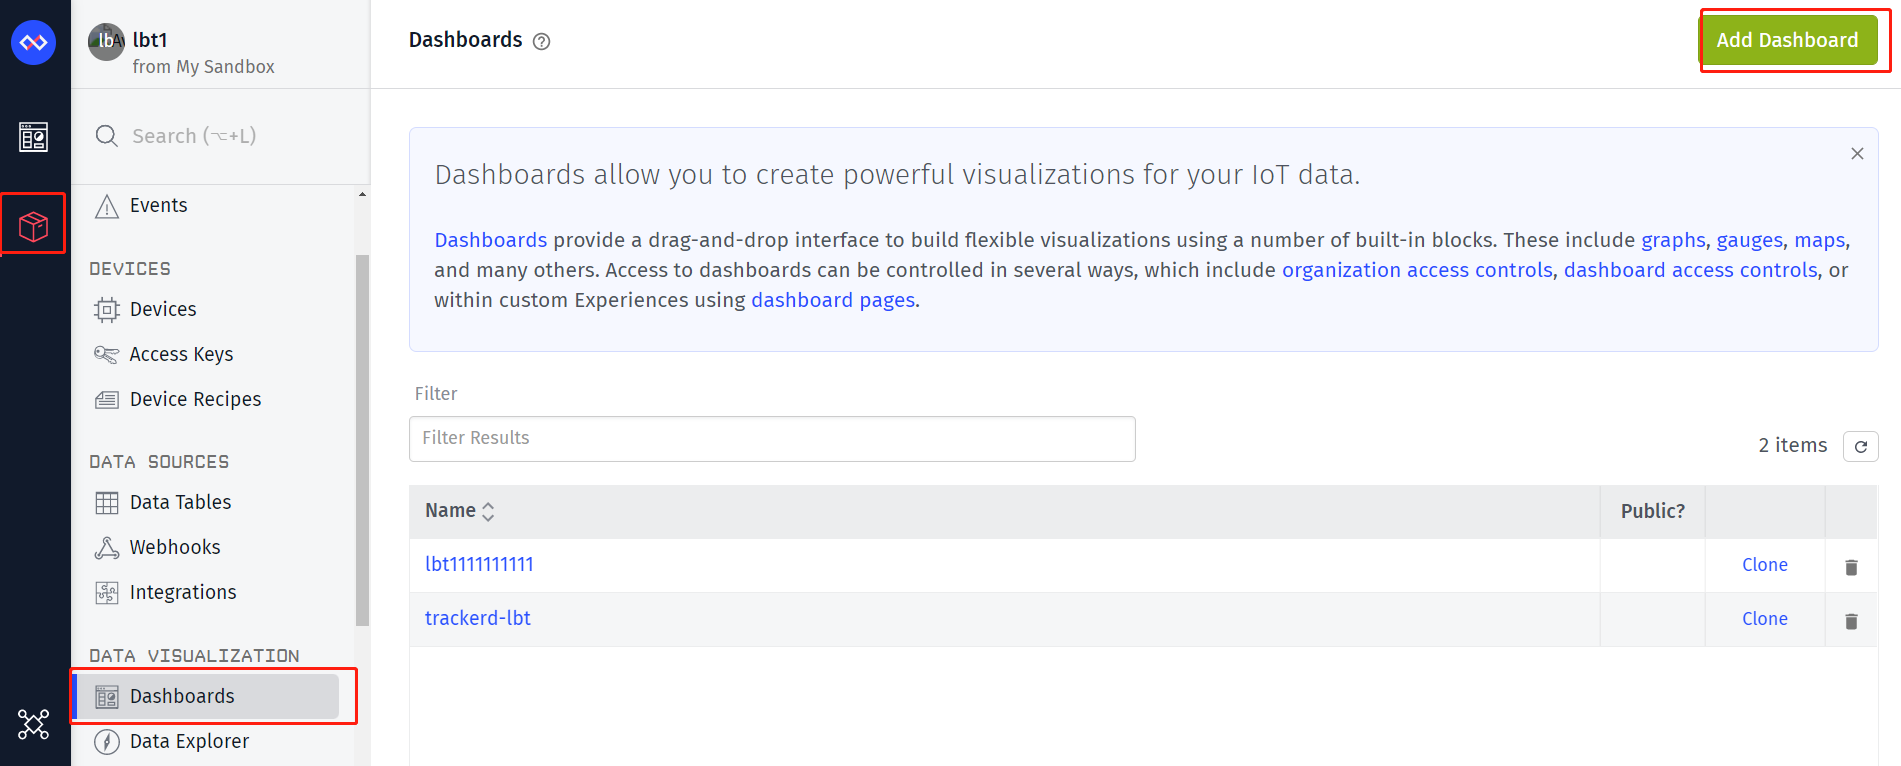
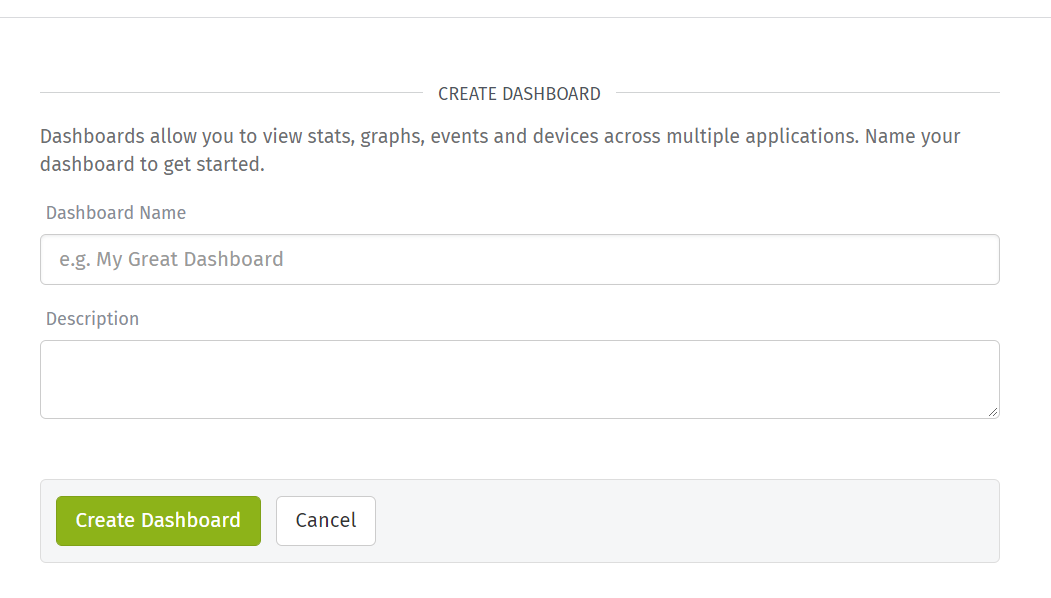
Create a new dashboard.
Select the appropriate template.
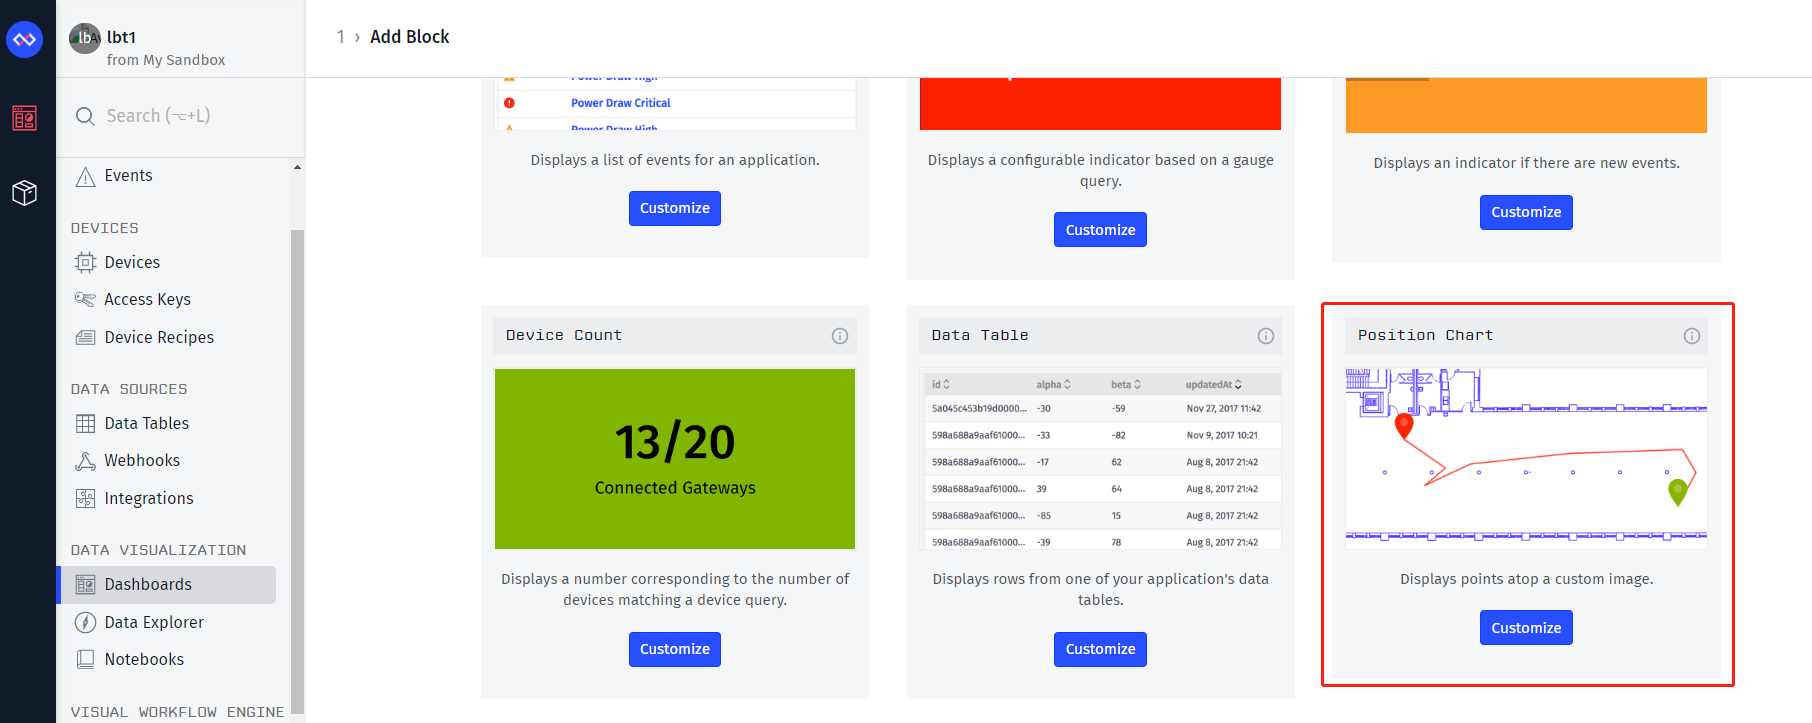
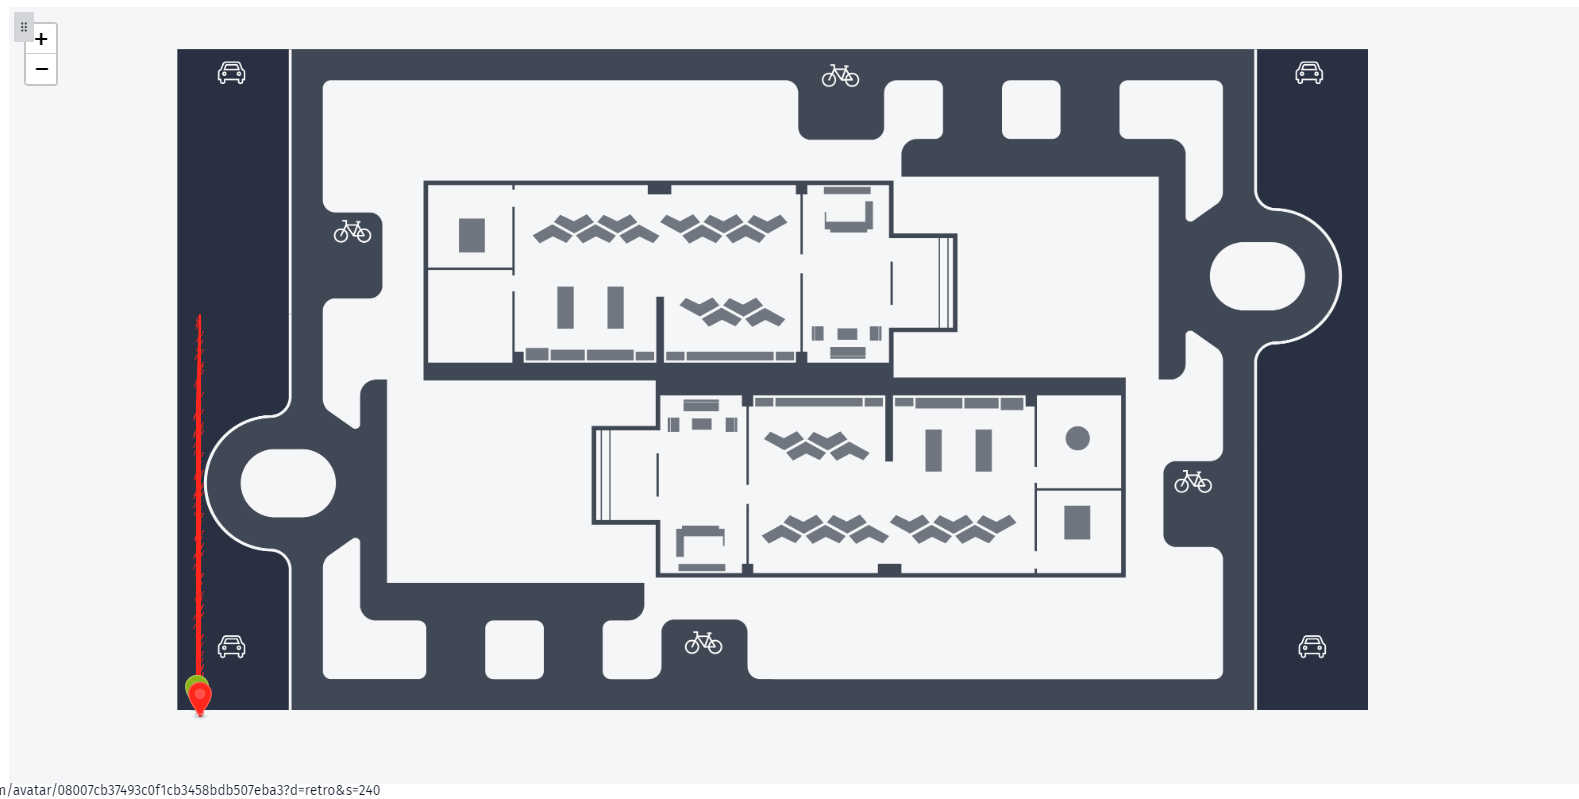
Set beacon and position.