Connection to Senet
Table of Contents:
- 1. Introduction
- 2. Semtech UDP
- 3. Semtech Basic Station
- 4. Gateway and device sending and receiving situation
- 5. Downlink
- 6. Create LHT65 node
1. Introduction
Here list some notice when connect to Senet
2. Semtech UDP
Here is how to create a gateway on senet. Here are the steps to create a gateway.
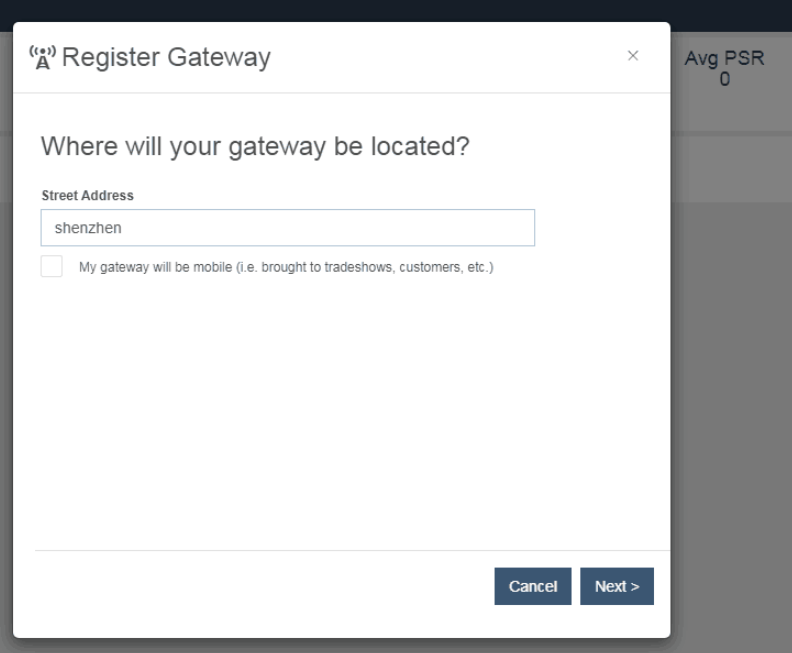
Location address
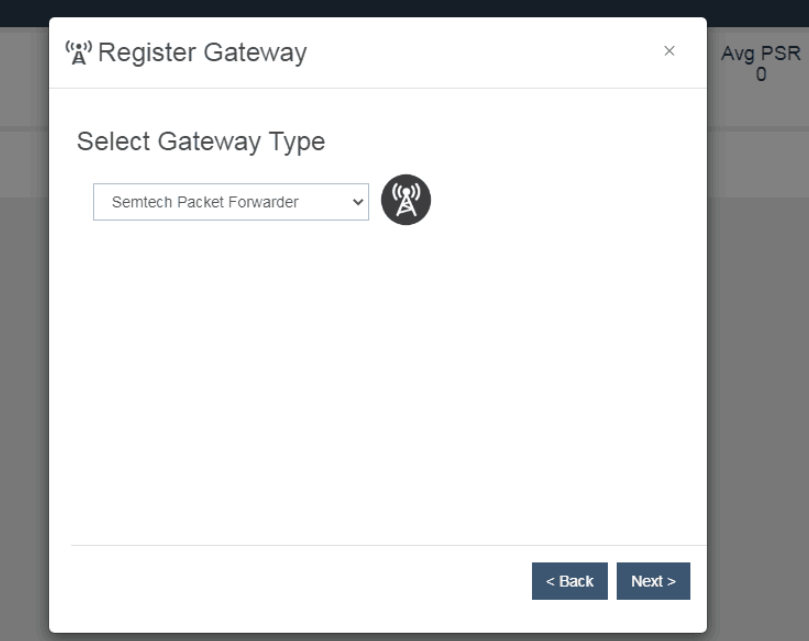
Gateway type
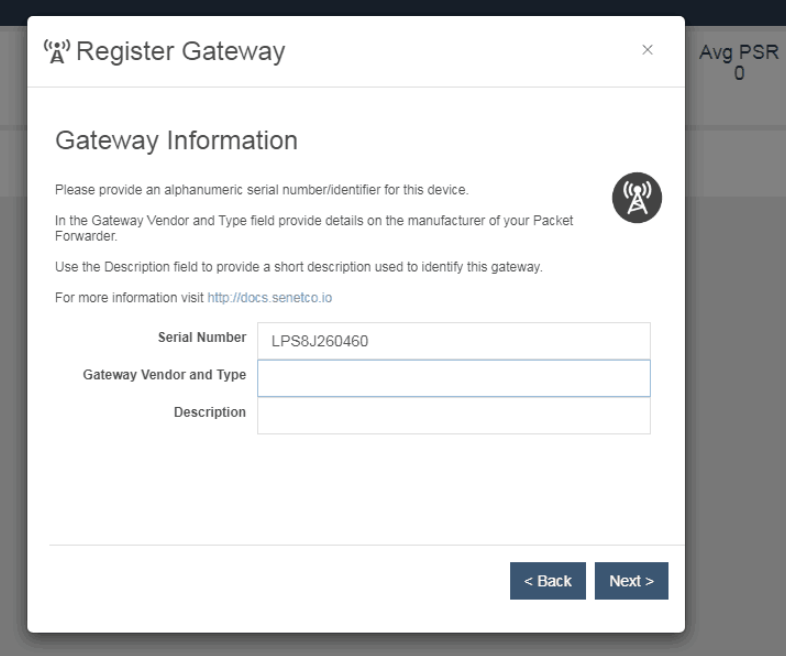
Gateway information
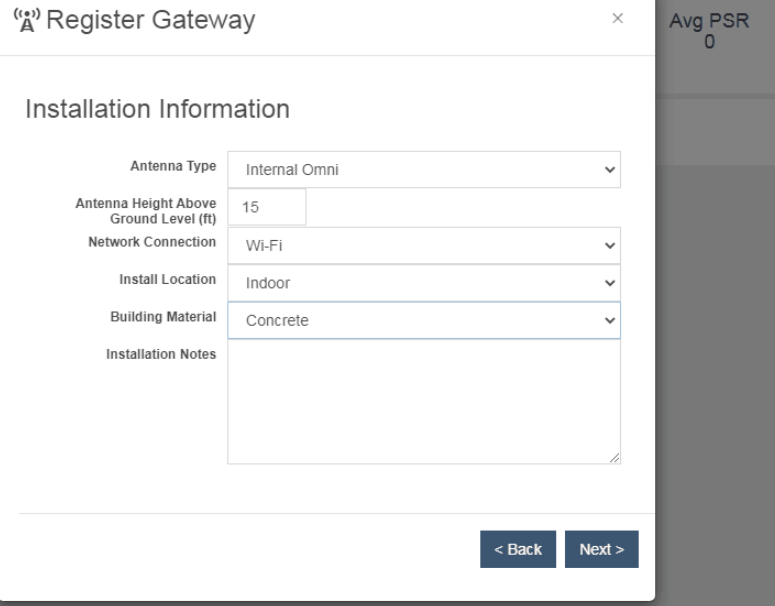
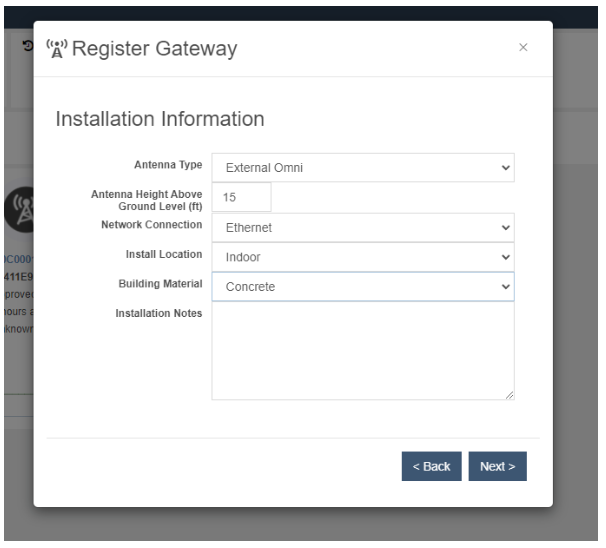
Installation information
Note: After the gateway is created, the gateway EUI has not been obtained. You need to wait for the server to allocate the gateway EUI. At this time, you may need to wait several hour.

When you get the gateway EUI, you can see it in the mail or server.

Then enter the LORAWAN configuration, fill in the gateway ID and server address.

LORAWAN Configuration
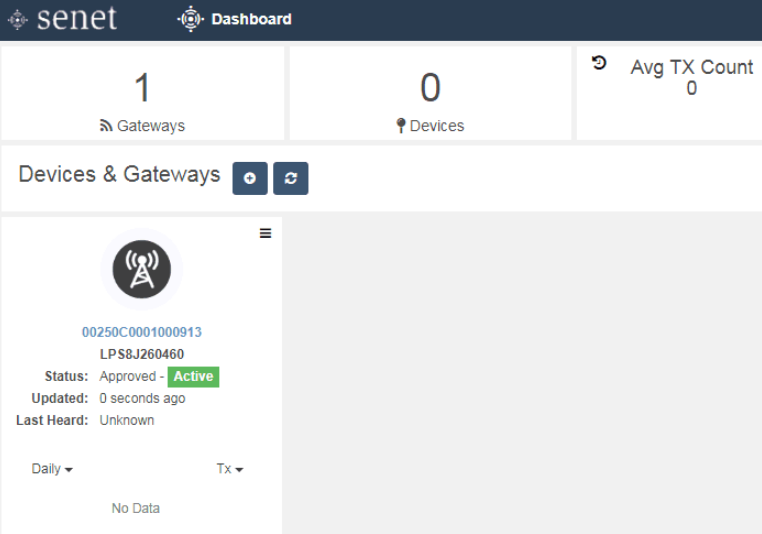
Server successfully connected to gateway.
3. Semtech Basic Station
3.1 Introduction
The Senet Network supports LoRa Gateway's running the Semtech BasicStation forwarder. This is a great place to start with development and initial integration.
Firmware version since: lgw-build-v5.4.1651822913
What do you need to prepare: A gateway that can access the internet normally
3.2 Register Gateway
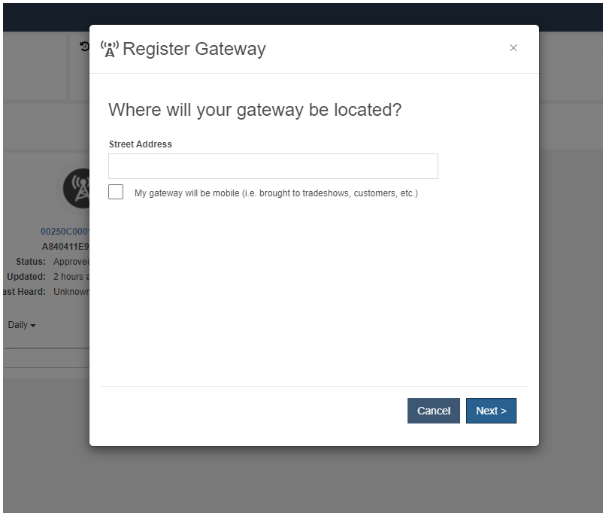
Here is how to register a basic station gateway on senet. Here are the steps to create a gateway.
Enter your gateway located (custom)
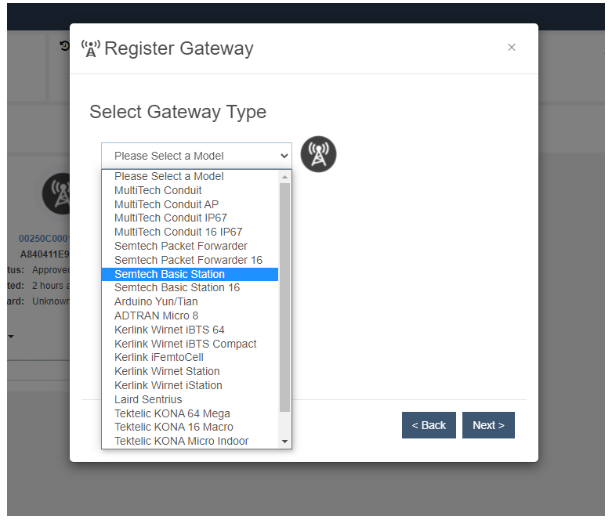
Select the type of gateway: Semtech Basic Station
Enter Gateway EUI and select the desired frequency
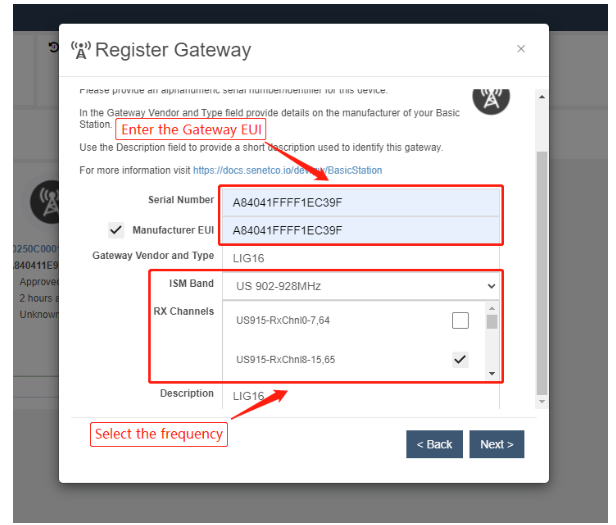
Gateway information
Check the information about the register gateway
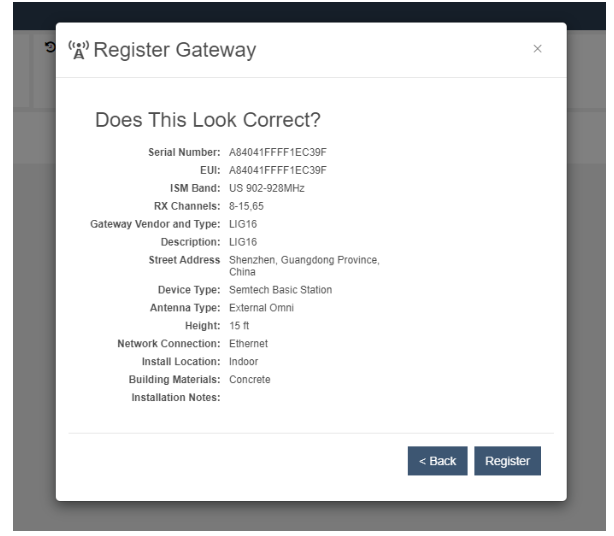
Click "Register", here been complete to register
3.2 Access the gateway GUI
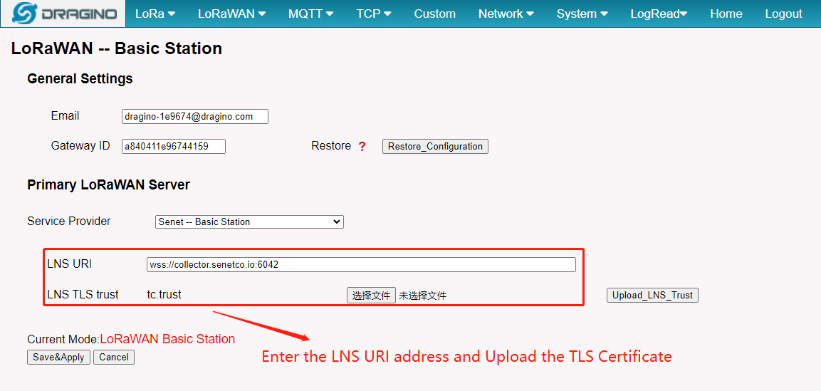
Access the gateway GUI interface of LoRaWAN-->LoRaWAN -- Basic Station
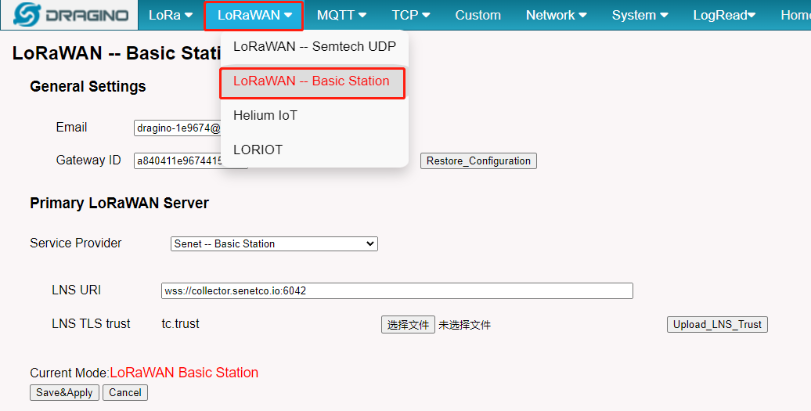
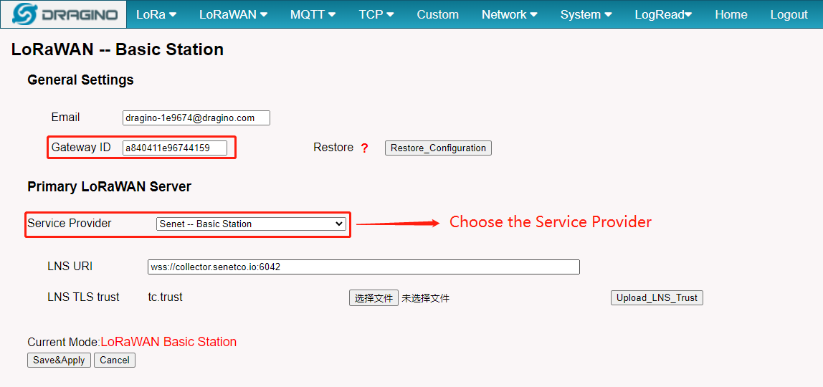
User need to Choose the Senet , input Server URI and Upload the TLS Certificate
Service Provider --> Choose the Senet -- Basic Station
LNS URI --> Enter the LNS URI address: wss://collector.senetco.io:6042
LNS TLS trust --> Upload the TLS Certificate
This is the TLS certificate that the user needs to download
For more information, see the Senet BasicStation documentation
3.3 Start Station
When the user has finished the configuration, Please click Sace&Apply to start station to connect Senet
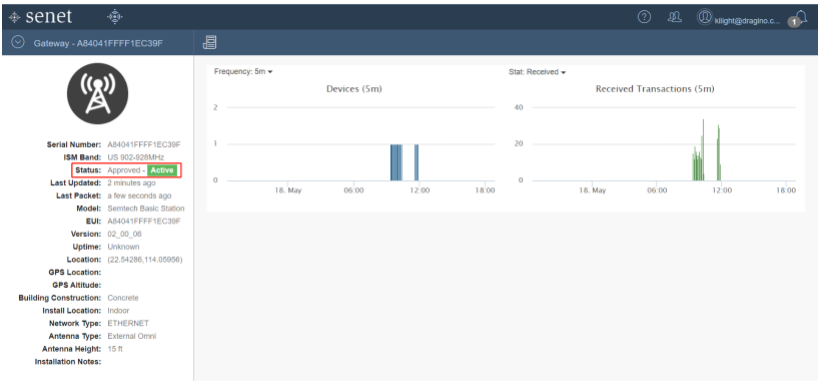
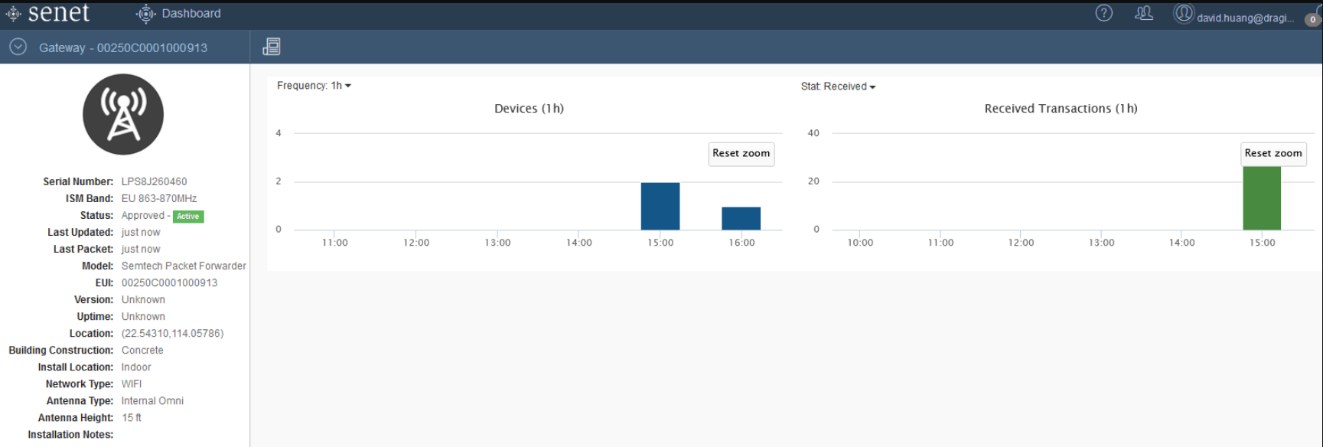
3.4 Successful Connection
If user completes the above steps, which will see live date in the Senet.
3.5 Trouble Shooting
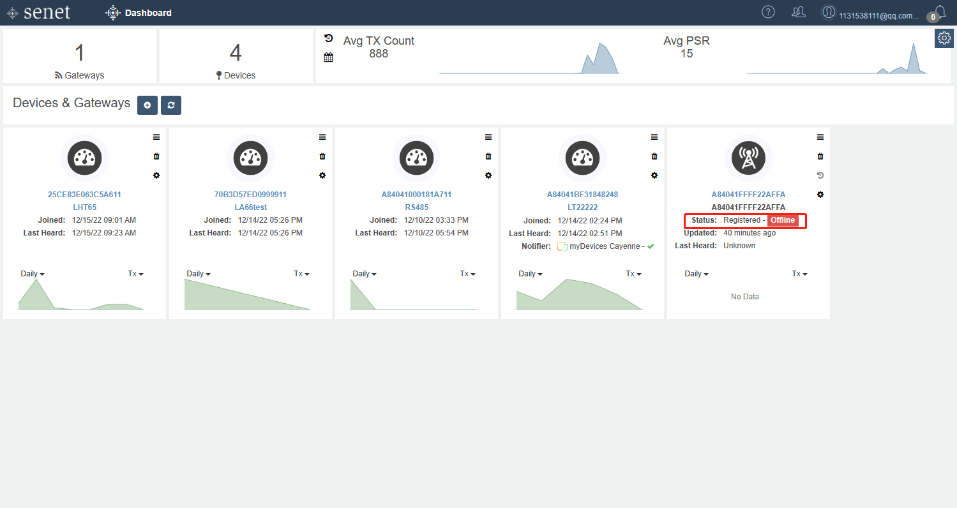
3.5.1 Why my gateway is showing offline on the Senet Console UI?
If the gateway does not receive any data packet within 10 minutes, the gateway status in the Senet platform is displayed as Offline.
This does not affect the normal use of the gateway, and when the node sends the packet again, the gateway status reshows as Active。
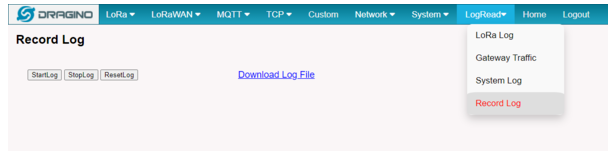
User can check the station log in the logread/system log page.
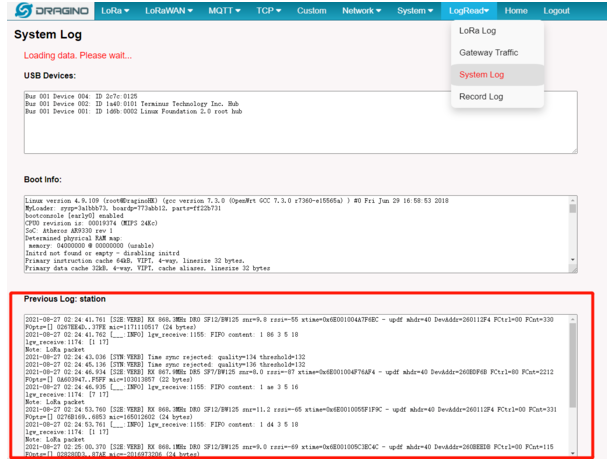
and recode the station log in the system/Recode log page.
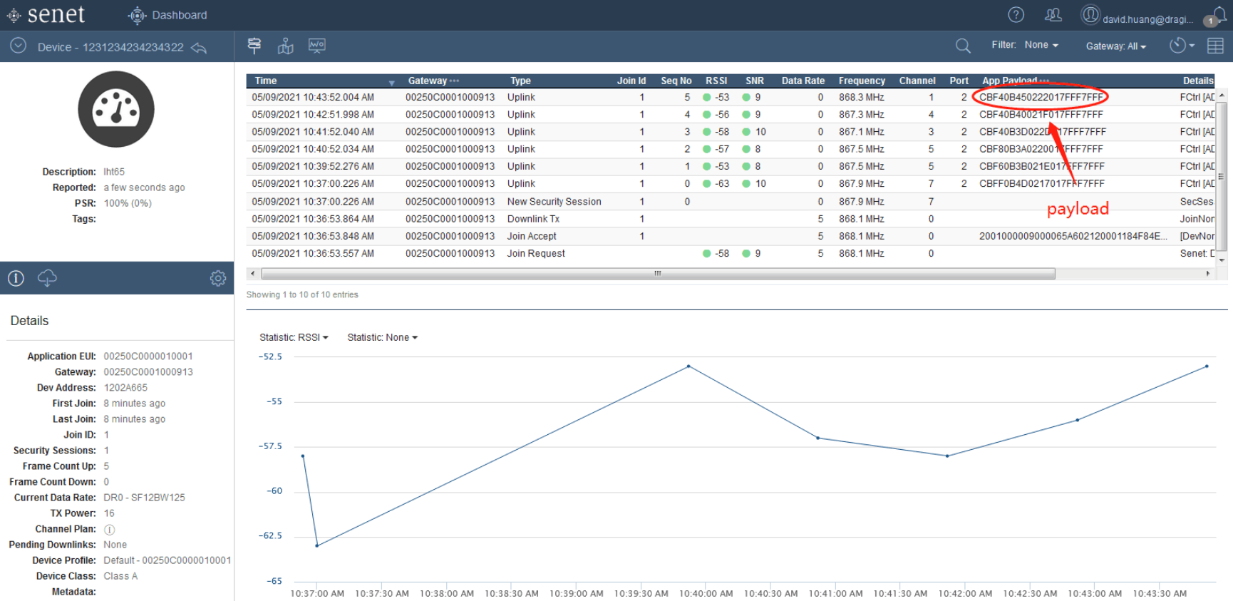
4. Gateway and device sending and receiving situation
Detailed status of the device sending and receiving packets
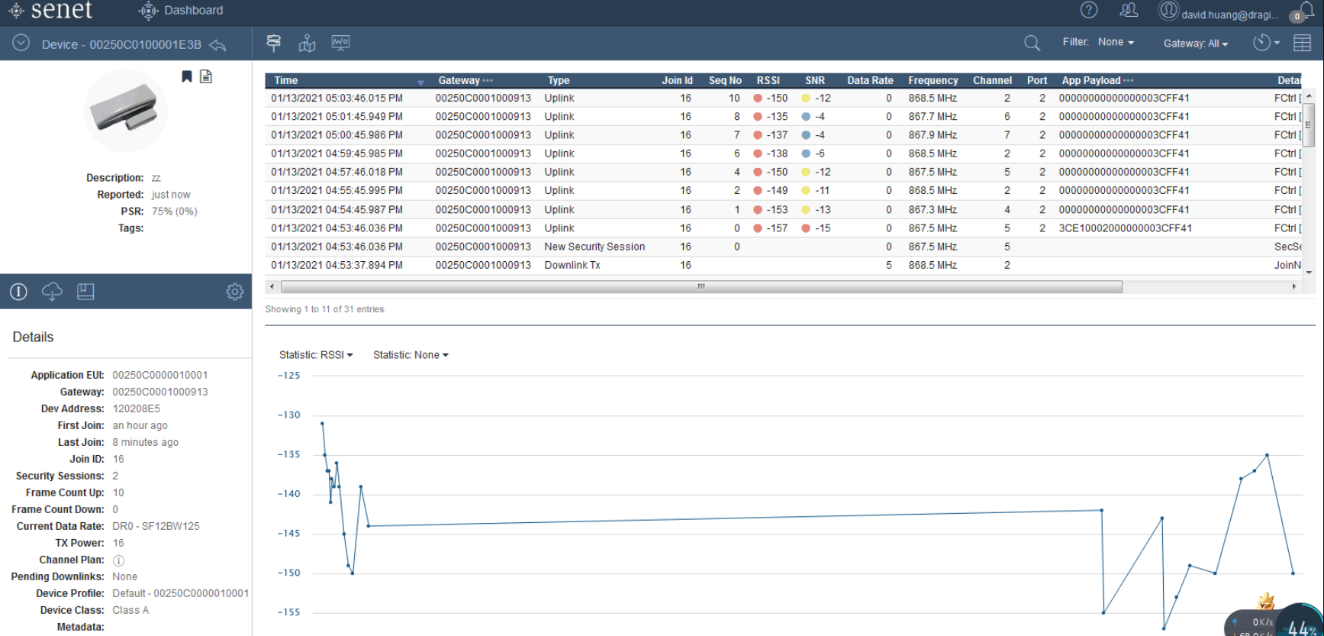
status
Channel frequency
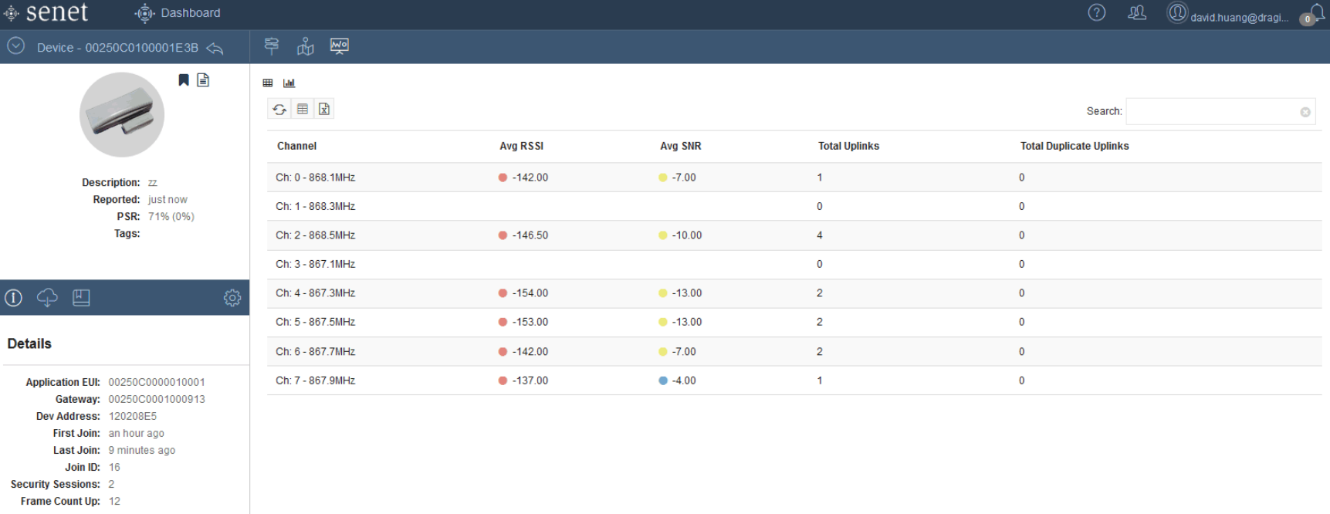
channel
5. Downlink
Downlink payload
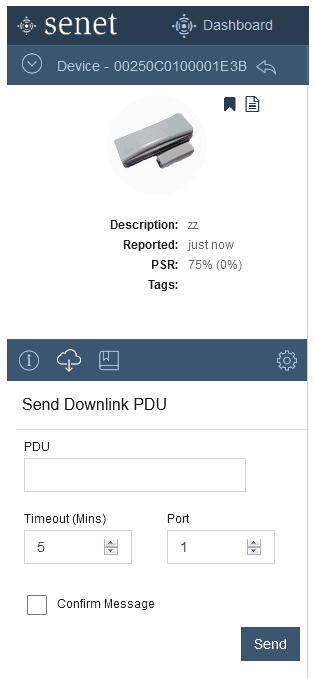
Downlink
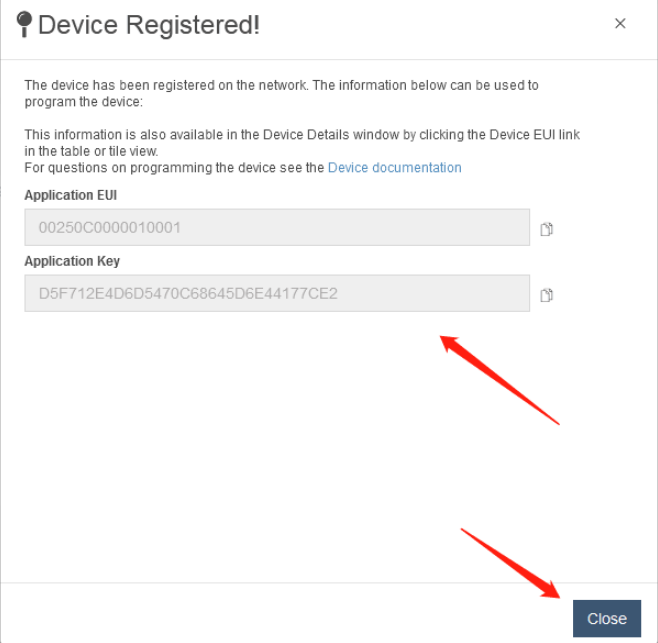
6. Create LHT65 node
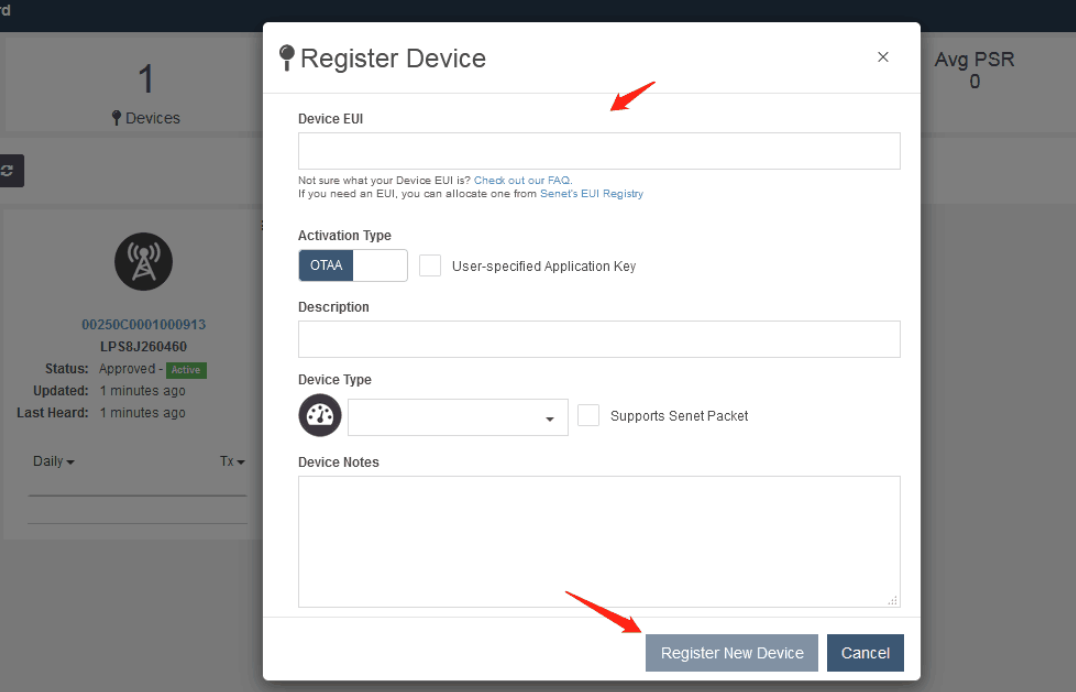
lht65
lht65
lht65
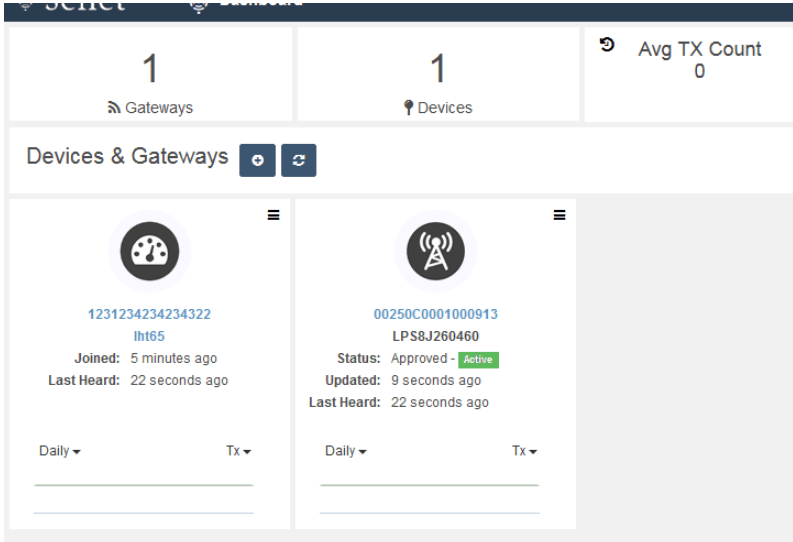
Payload uploaded by LHT65.
lht65