Chirp Wireless
Table of Contents:
- 1. Chirp Wireless
- 2. Configure Gateway connection to Chirp Wireless
- 3. Configure node connection to Chirp Wireless
1. Chirp Wireless
1.1 Introduction
Chirp Wireless is a leading global wireless network provider that offers reliable and extensive IoT connectivity solutions, both outdoors and indoors. Chirp's main objective is to simplify IoT deployments for its clients. By providing multiple connectivity options and offering White Label business-specific modules, Chirp eliminates the need for multiple networks, platforms, and billing systems. Chirp offers its own visualization platform, empowering clients to effortlessly implement IoT devices and visualize data with a simple click.
In this guide, you will learn how to connect a dragino gateway to the LNS solution provided by Chirp Wireless
2. Configure Gateway connection to Chirp Wireless
Below list the support products and Requirements:
2. Firmware version since :
What do you need to prepare?
A gateway that can access the internet normally
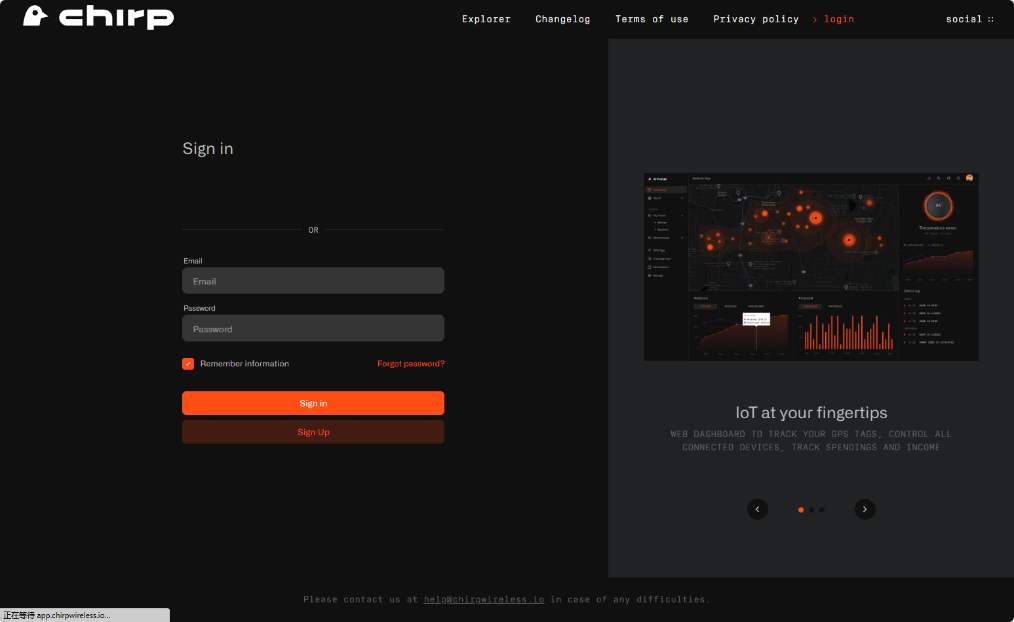
Step 1. Log in and register for Chirp Wireless
Log in to your dashboard at https://app.chirpwireless.io.
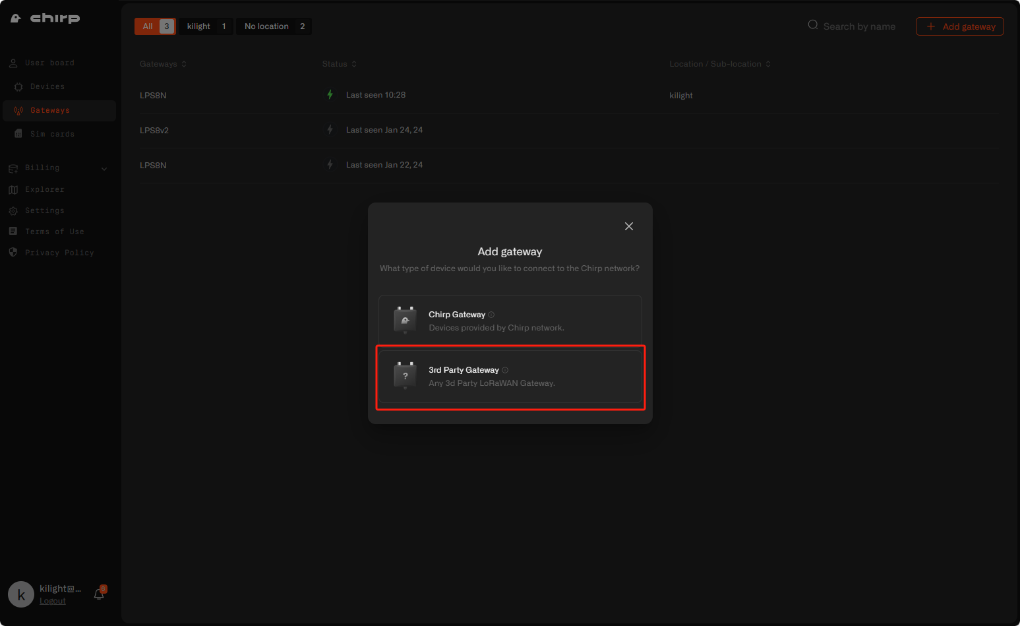
Step 2. Add Gateway
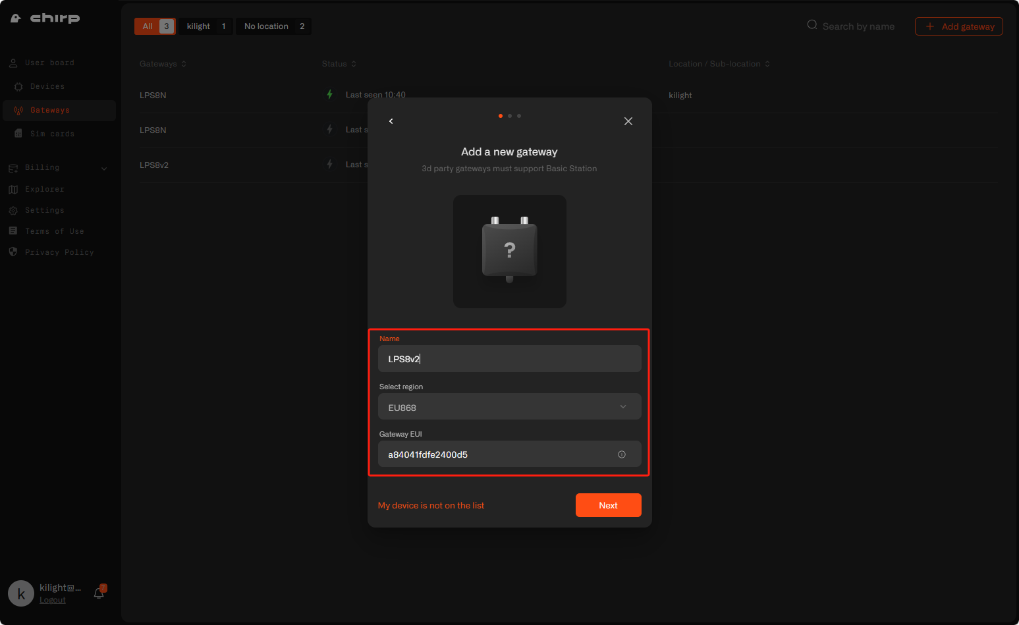
Once logged in, click on "Gateways" in your dashboard. Select "Add gateway" in the upper right, click on "3rd Party Gateway".
Name - Enter a name for the gateway that will help you identify it easily.
Region – This is the LoRaWAN region of the gateway. For this example, we will be using the EU868.
Gateway EUI – This is the EUI of the gateway. You can find it either on a sticker at the back of the device or in the Web UI > LoRaWAN--Basic station
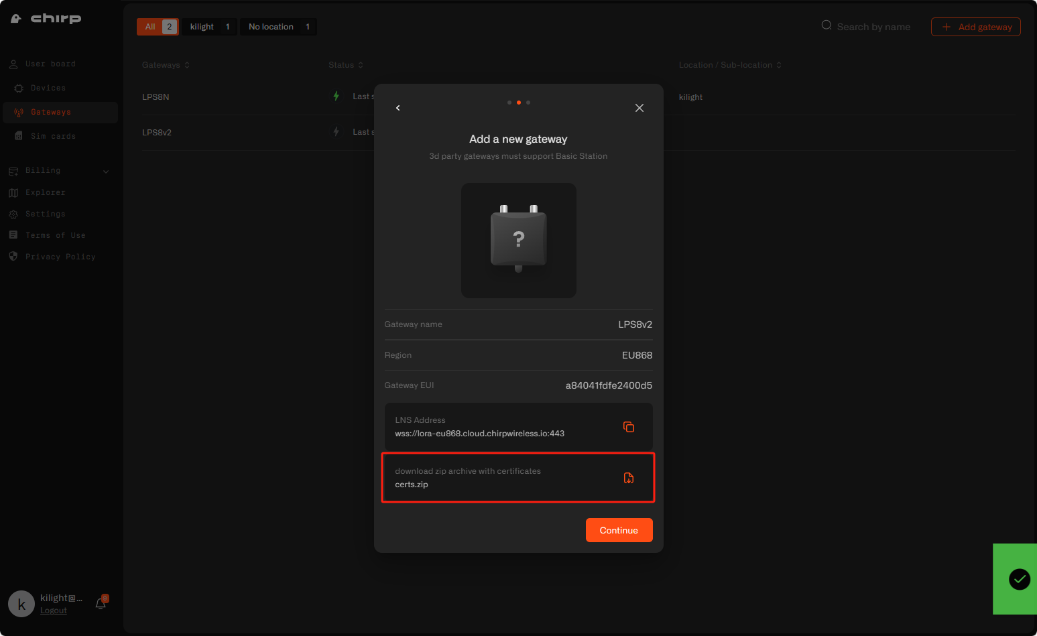
Step 3. Download certificate
After adding the gateway, you'll receive a confirmation message. Copy and save the LNS Address, download and extract the certificates from the provided Zip file. Click Continue.
Now your gateway is successfully added to Chirp platform. Click Continue.
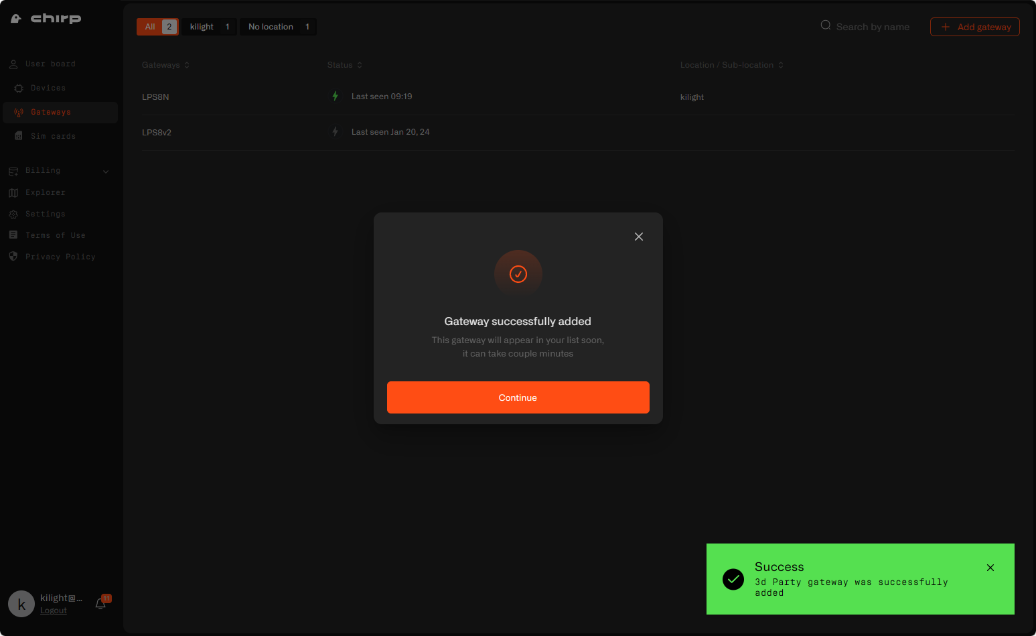
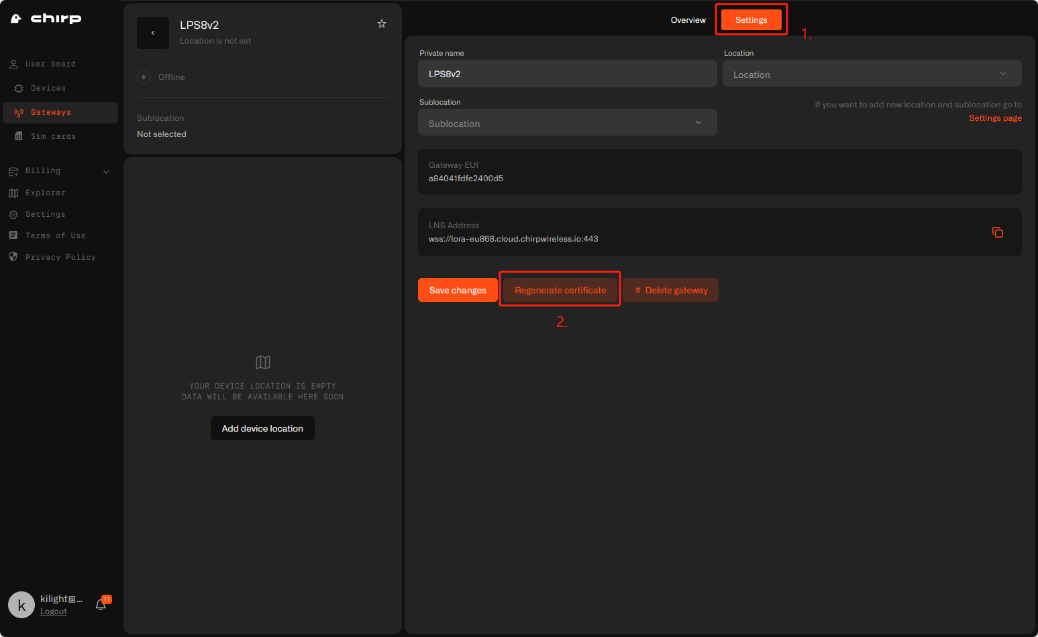
If you didn't save the certificates or LNS address, please, navigate to gateway's Settings tab.
Step 4. Access the gateway GUI
To configure the gateway, access it via the Web UI. To learn how to do that, refer to the Quick Start Guide for each gateway.
Users need to fill in the LNS URI and upload the Certificate.
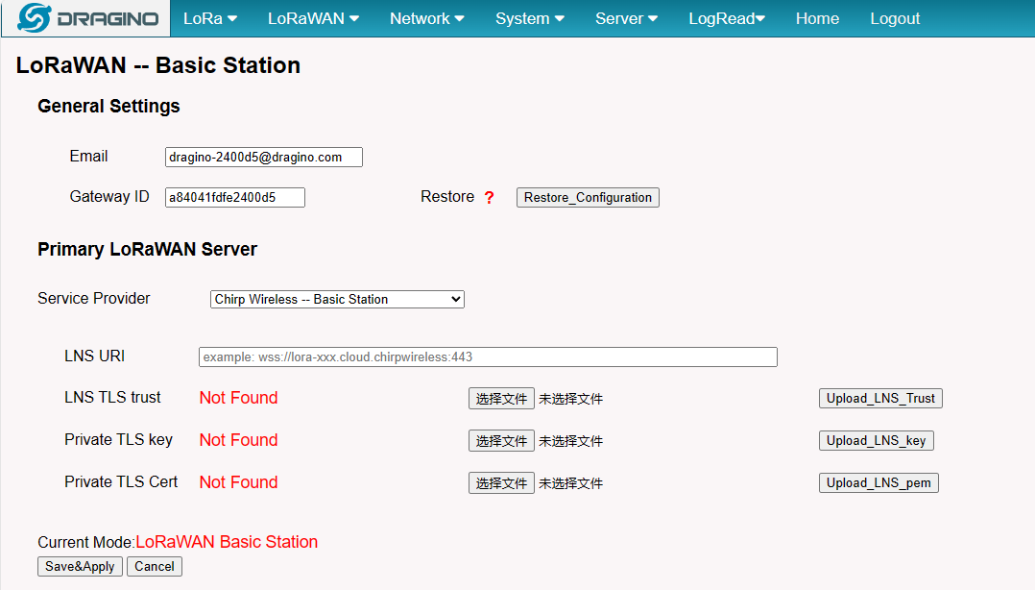
Step 5. Configure Station
Users need to fill in the LNS URI and upload the Certificate.
just to clarify:
LNS URI --> LNS Address, Example: wss://lora-eu868.cloud.chirpwireless.io:443
LNS TLS trust --> tc.trust
Private TLS key --> tc.key
Private TLS Cert --> tc.crt
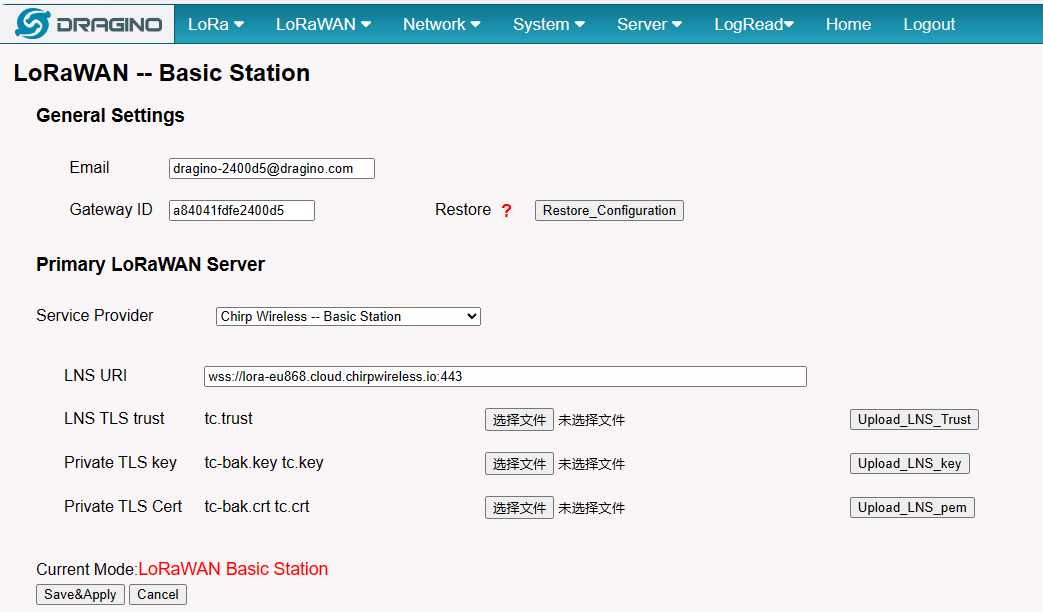
Step 6. Start Station
When the user has finished the configuration,Please click Save&Apply to start station to connect Chirp Wireless.
Step 7. Successful Connection
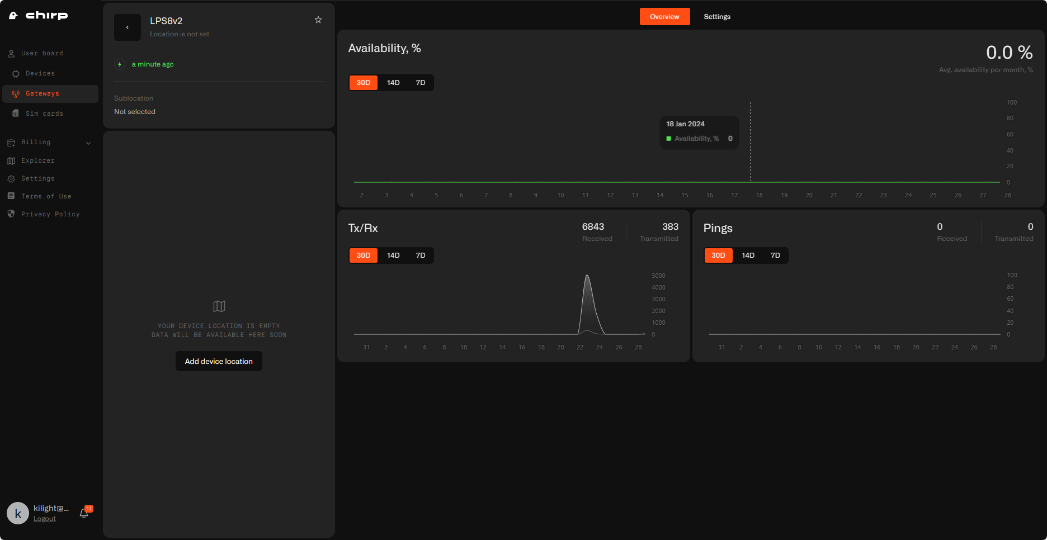
If set up correctly, gateways status on the Chirp's dashboard will show as online.
3. Configure node connection to Chirp Wireless
Following is an example for how to join the Chirp Wireless LoRaWAN Network.
The gateway is already set up to connect to the Chirp Wireless, so we now need to configure the Chirp Wireless server.
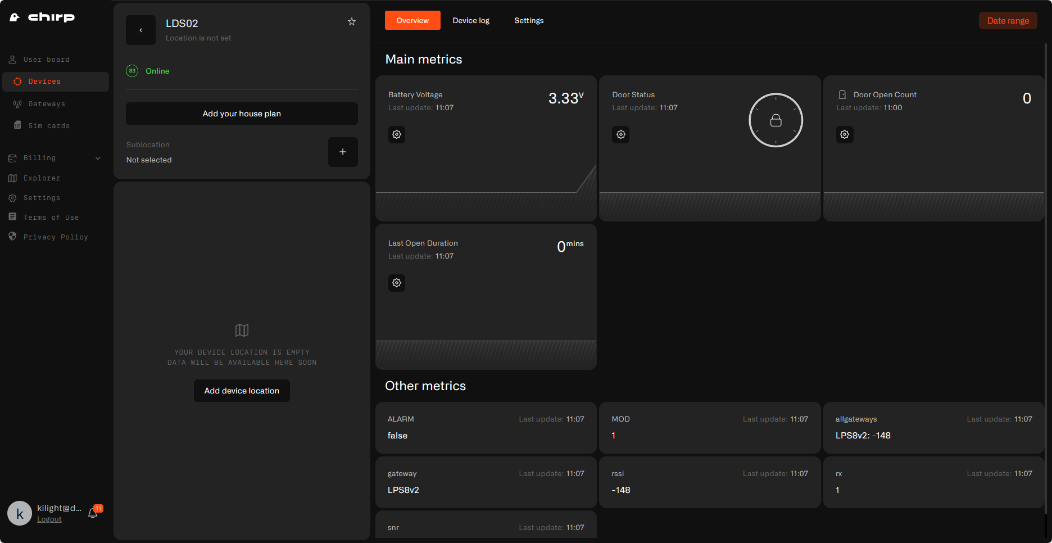
We take LDS02 as an example.
Step 1.
Create a device in Chirp Wireless with the OTAA keys from LDS02.
Each LDS02 is shipped with a sticker with the default device EUI as below:

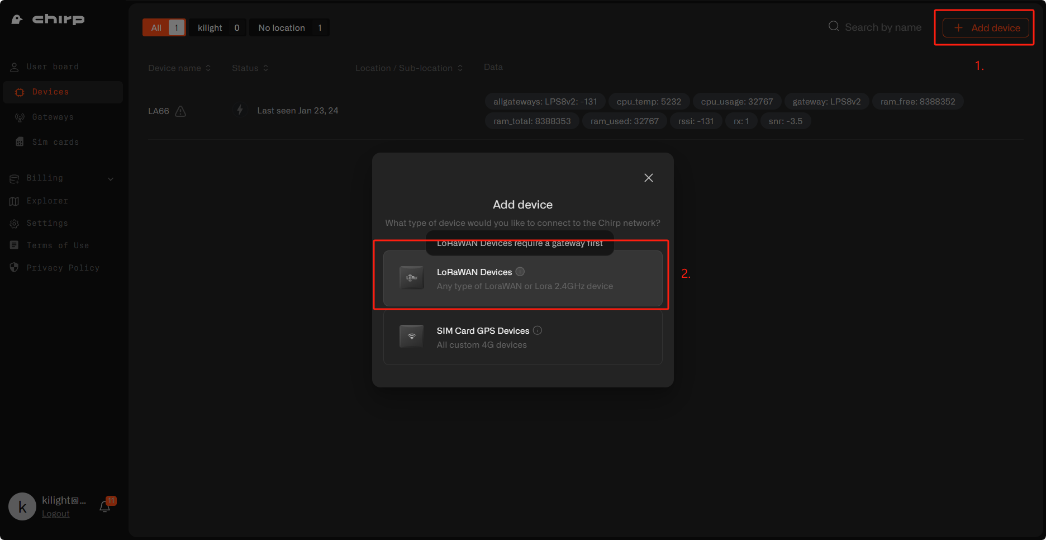
Click on "Add device" and select "LoRaWAN Devices"
Select vendor - Select the Select vendor, for this example: dragino
Select model – For this example: LDS02
Select band - This is the LoRaWAN region of the node. For this example, EU863-870
Device EUI and AppKey - Fill in the KEY on the LDS02 label
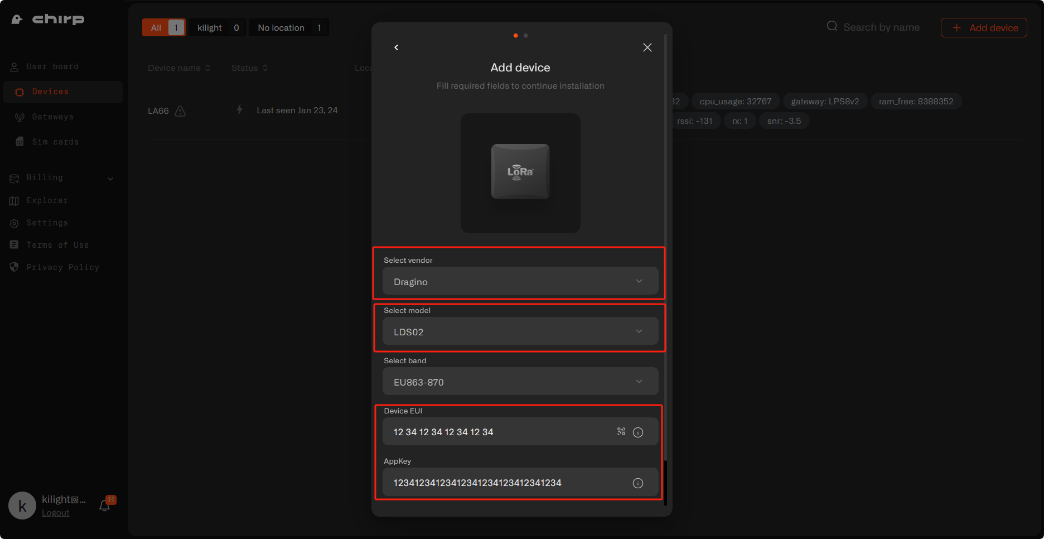
Click "Next" after configuration
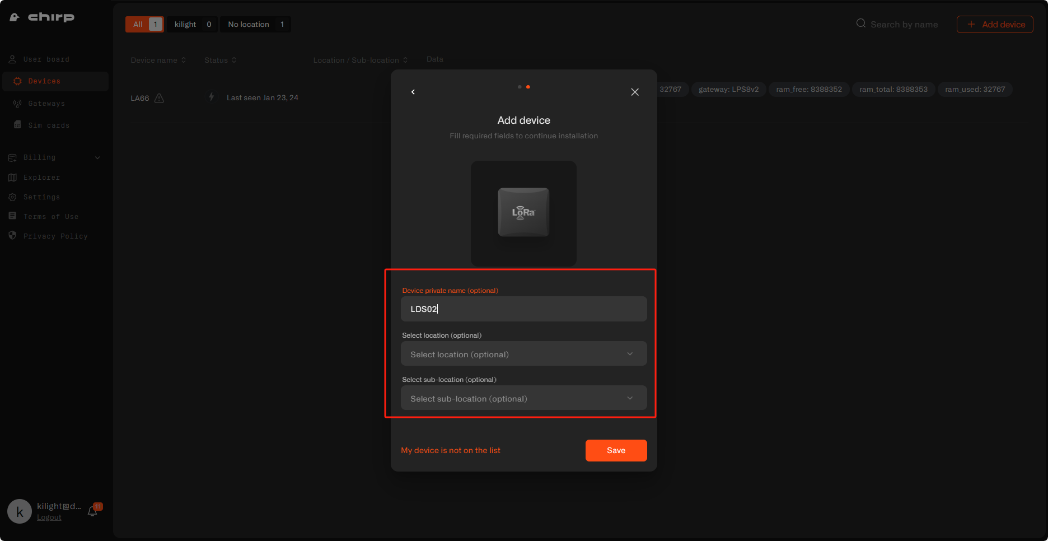
The following information can be customized:
Step 2.
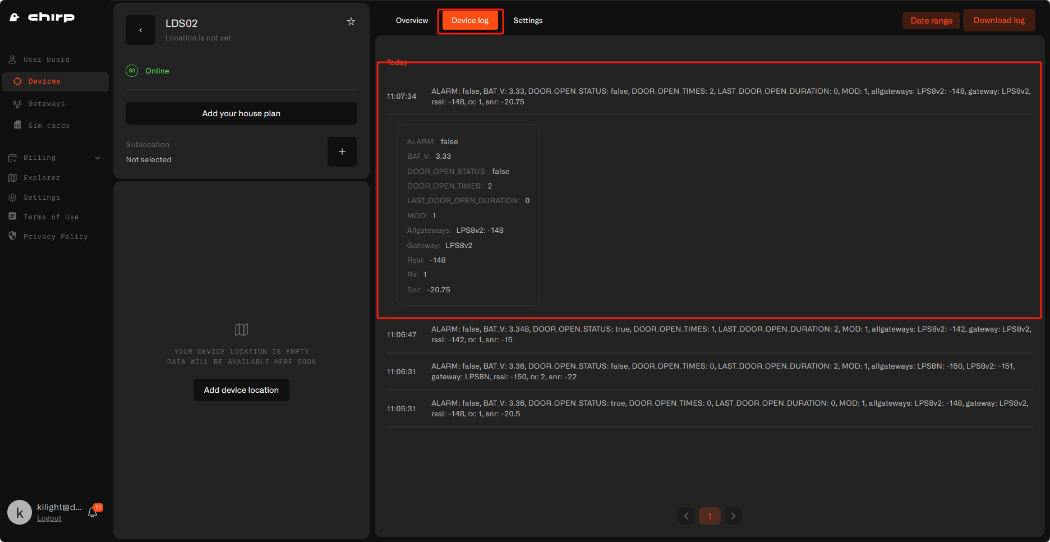
Power on LDS02 and it will auto join to the Chirp Wireless network. After join success, it will start to upload message to Chirp Wireless and user can see in the panel.