Azure IoT
Table of Contents:
1. Introduction
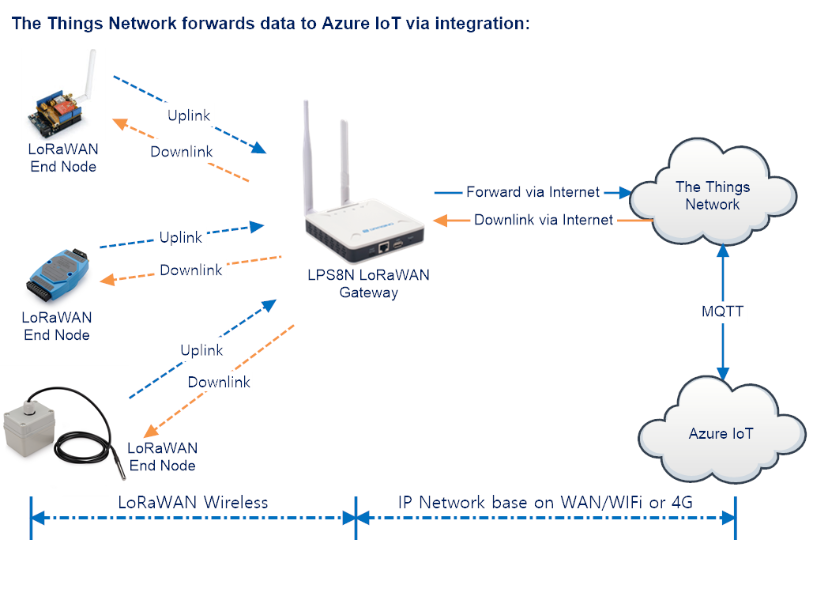
Azure IoT Hub is designed around standalone end devices communicating directly with the hub. Each end device must connect to the hub via one of the supported communication protocols (MQTT / AMQP). These protocols are inherently stateful - each individual end device must have one connection always open in order to send and receive messages from the Azure IoT Hub.
The Azure IoT Hub integration prefers to use an asynchronous, stateless communication style. When uplink messages are received from an end device, the integration connects on demand to the Azure IoT Hub and submits the message, and also updates the Device Twin. The data plane protocol used between The Things Stack and Azure IoT Hub is MQTT, and the connections are always secure using TLS 1.2.
2. Deployment Guide
Learn how to deploy the Azure IoT Hub integration for The Things Stack.
2.1 Prerequisites
1. Access to an Azure account. Create a new account
2. An application in The Things Stack. See instructions
2.2 Create API Key
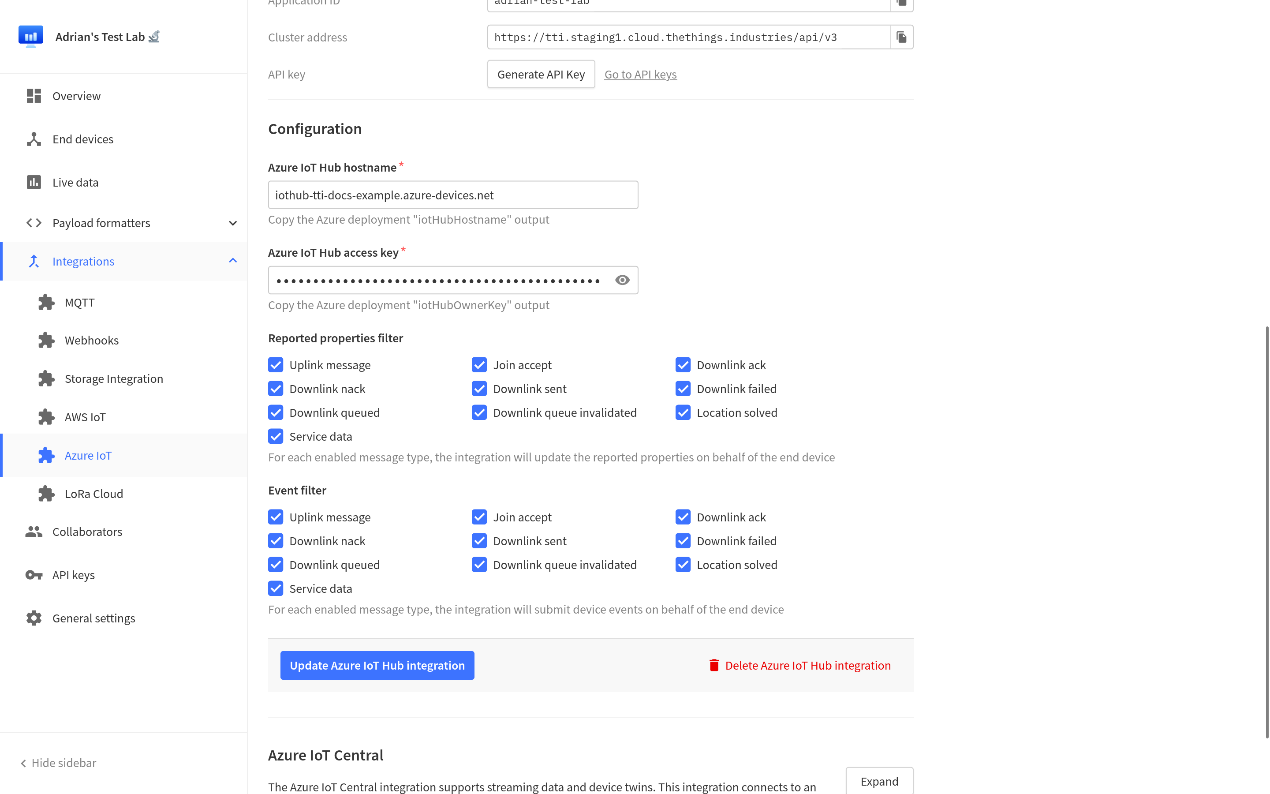
Go to your application in The Things Stack Console, navigate to Integrations → Azure IoT on the left hand menu and click on Expand next to Azure IoT Hub. Now click on Generate API Key.
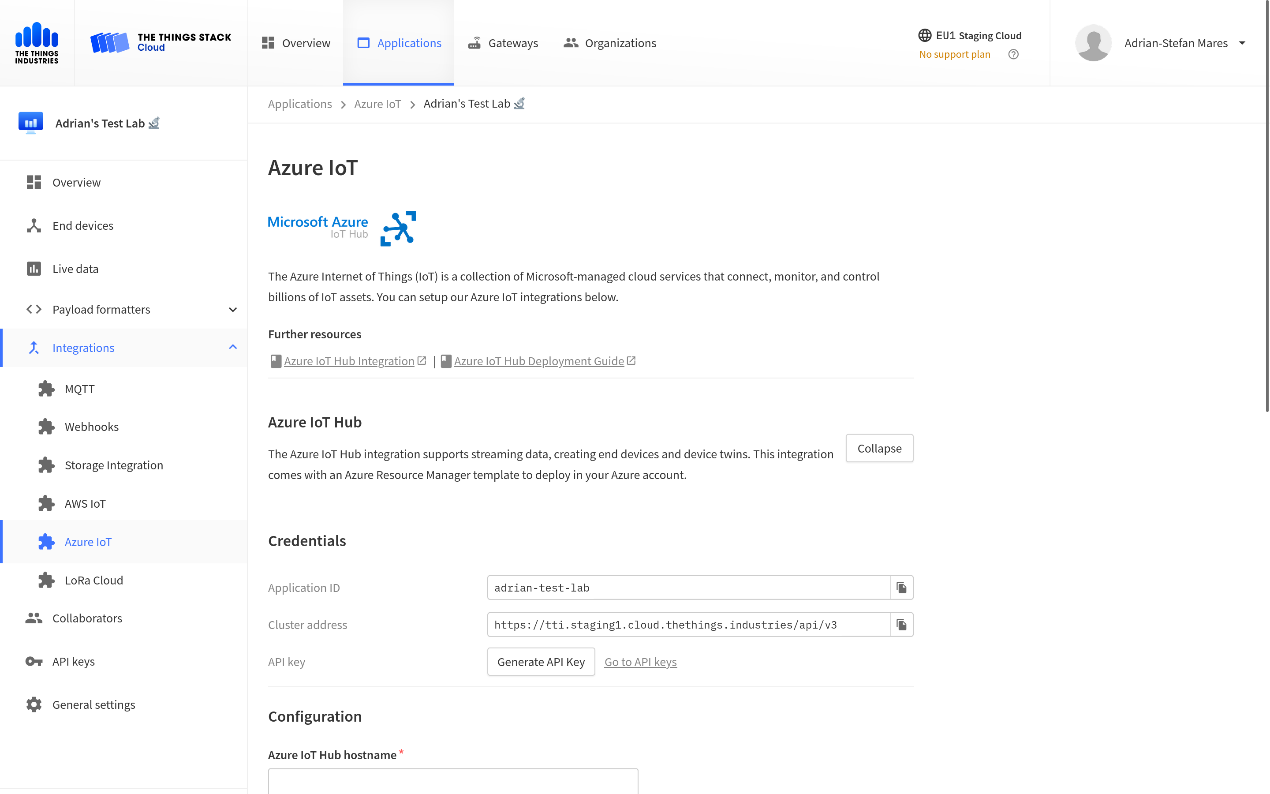
Copy the generated API key and store it in a safe place, because you will need it in the next section.
Leave the integration page open, as you will need to copy in your Azure IoT Hub hostname and Azure IoT Hub access key before saving the integration.
2.3 Deploy Azure Resource Manager Template
View template as JSON or Bicep
2.4 Settings
The following parameters configure the integration:
- Location: The region in which the Azure resources will be deployed. Defaults to the region used by the selected Resource Group.
- Name Suffix: The suffix added to the Azure Resources. Defaults to a random string.
- Stack Cluster Address: The address of your The Things Stack deployment. Can be retrieved from the Azure IoT integration page in The Things Stack (see image above).
- Stack Application ID: The application ID of your application. Can be retrieved from the Azure IoT integration page in The Things Stack (see image above).
- Stack API Key: The application API key that you generated in the previous step.
- Enable fallback route: Defines if the Azure IoT Hub fallback route should be added. If enabled, uplink messages will be submitted to the default endpoint in your Azure IoT Hub.events
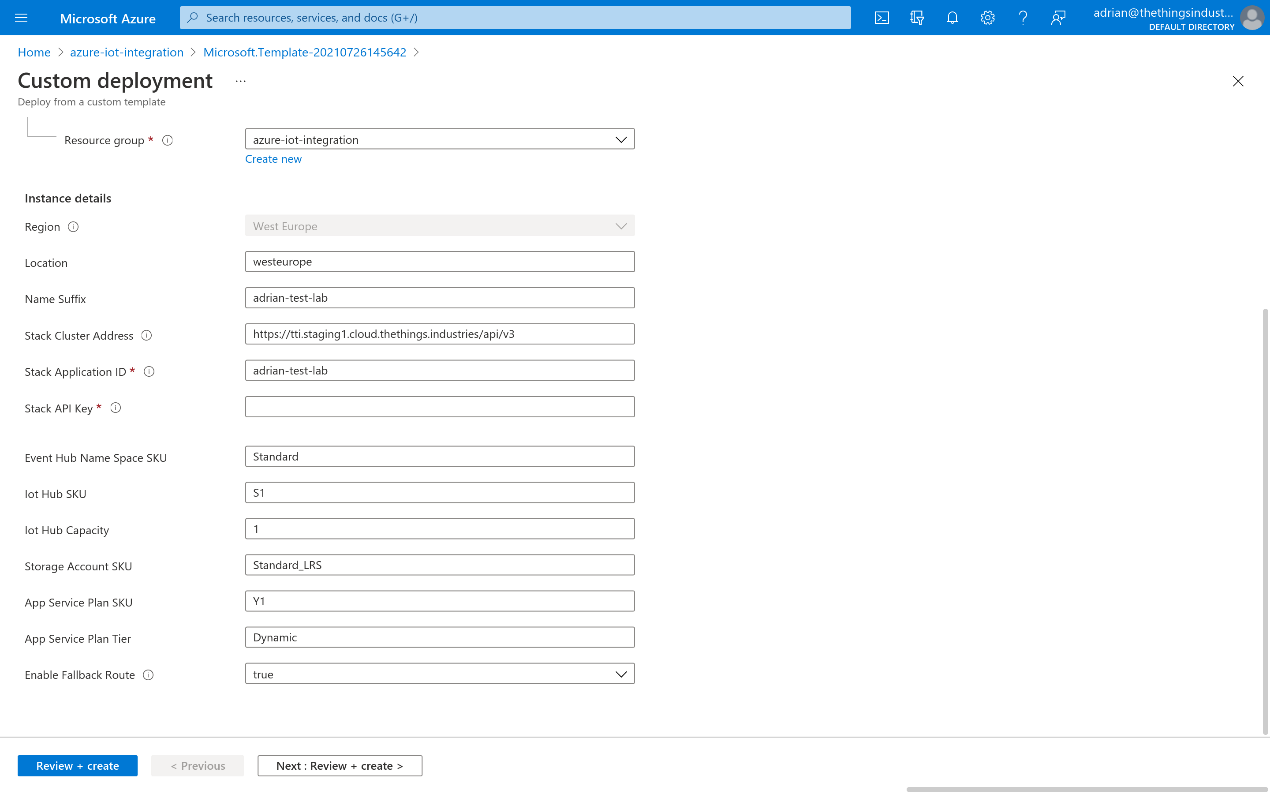
Click Review + Create, then Create.
Note:
Creating all resources can take up to five minutes. ☕
When the deployment is done, you’ll see the status .Your deployment is complete.
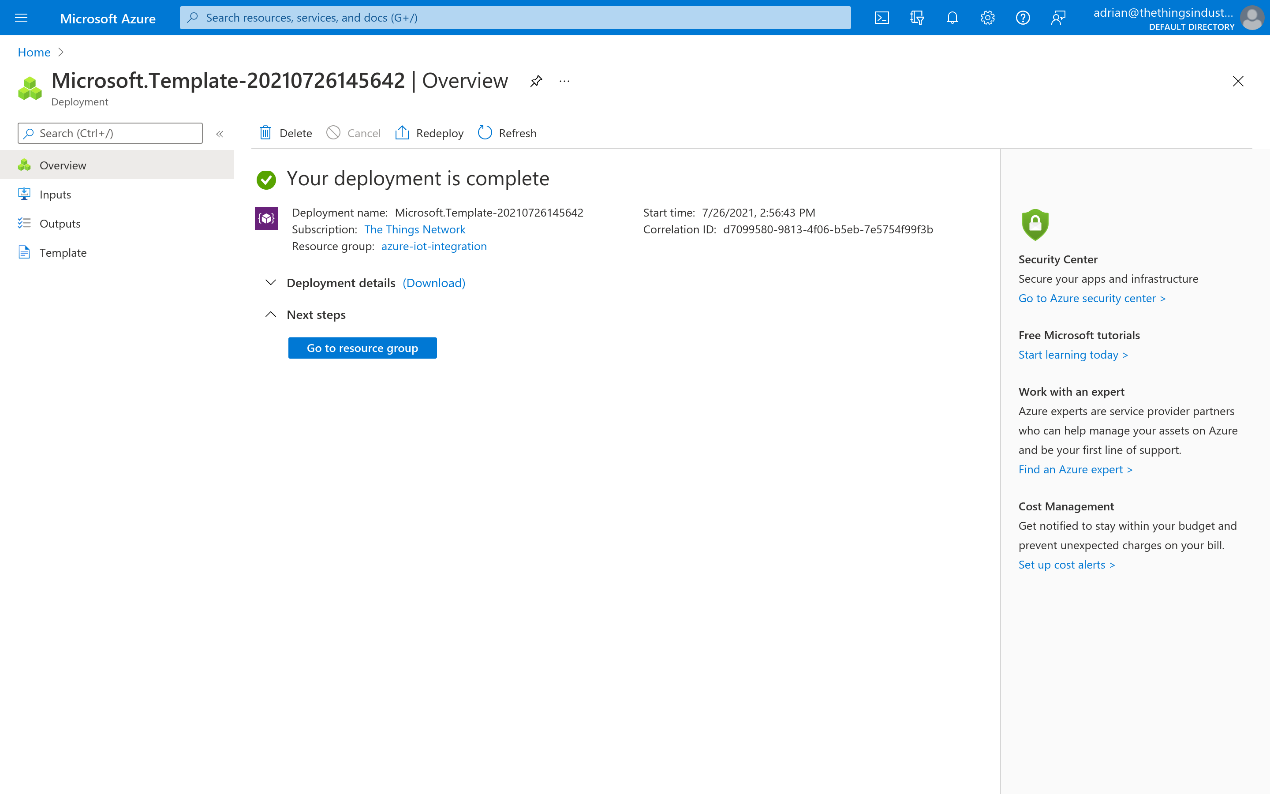
After the deployment has finished, click Outputs.
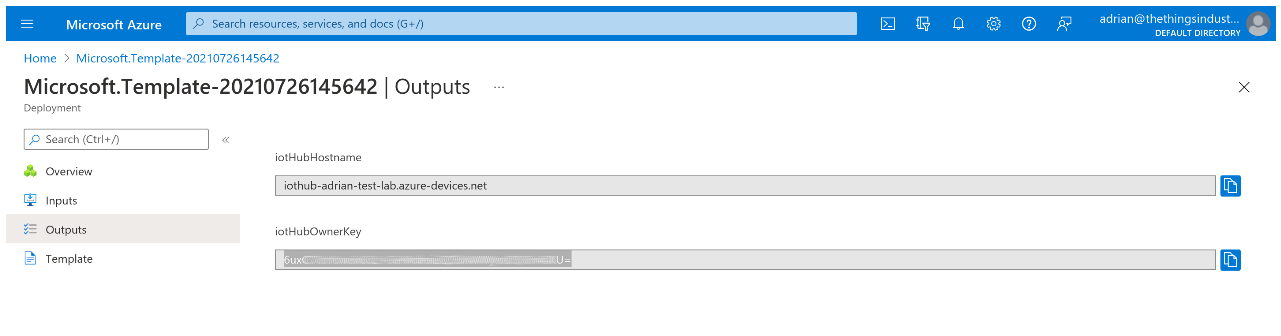
The two outputs can now be copied into your integration settings as Azure IoT Hub hostname and Azure IoT Hub access key. Click on Enable/Update Azure IoT Hub integration.
3. Managing Devices
The Azure IoT Hub integration for The Things Stack synchronizes the device registry: you can create devices in Azure IoT Hub which trigger an Azure Function that creates the device in The Things Stack.
Note:
Devices that you create in The Things Stack are automatically created as Azure IoT Hub devices as soon as they activate or send their first uplink message.
In Azure IoT Hub, create only devices that are not yet in your The Things Stack application.
Device Names:
Devices are created automatically as they join the network or send an uplink message. For the name of new devices, the end device ID in The Things Stack is used as the device ID in Azure IoT Hub.
3.1 Creating Devices
You can use Azure IoT Hub to create and claim devices in The Things Stack. This is useful to manage all your devices in one place, without having to use The Things Stack Console, CLI or API.
Creating a device allows you to add any LoRaWAN device by manually entering its information and security keys.
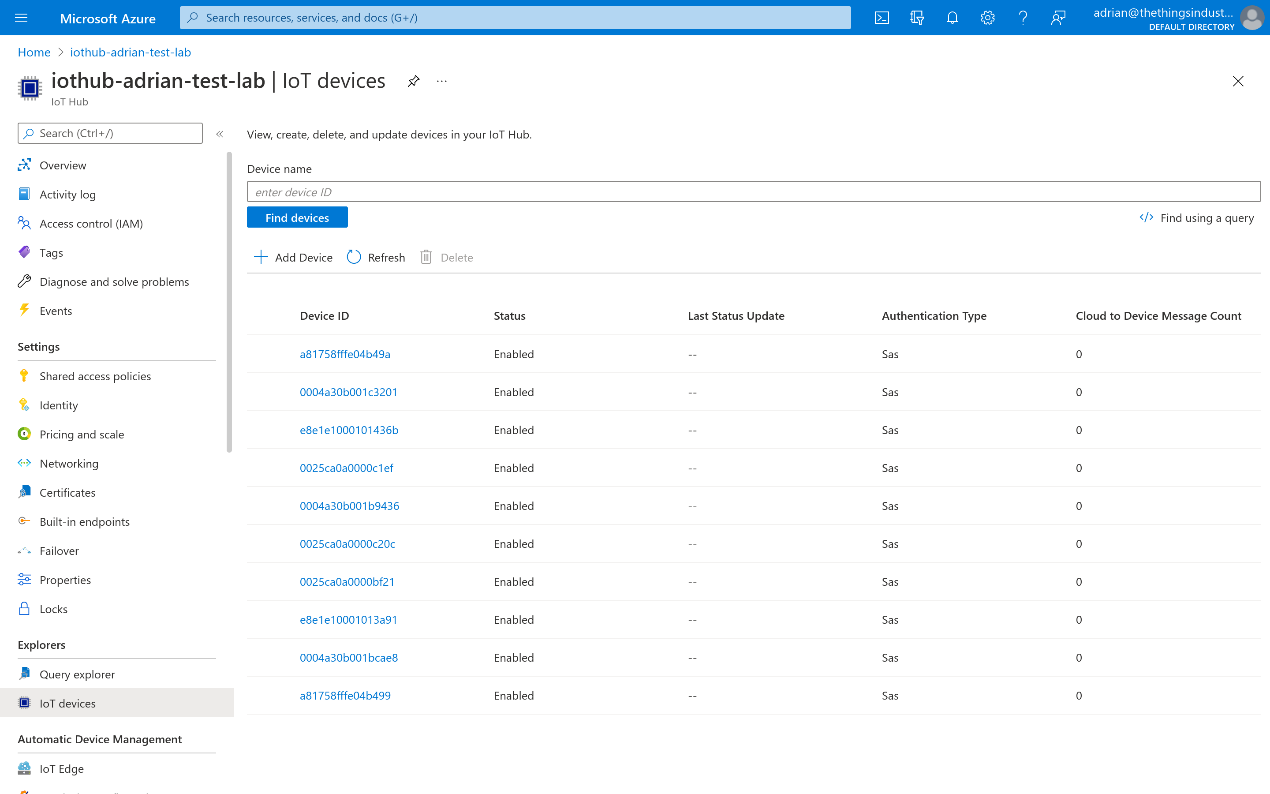
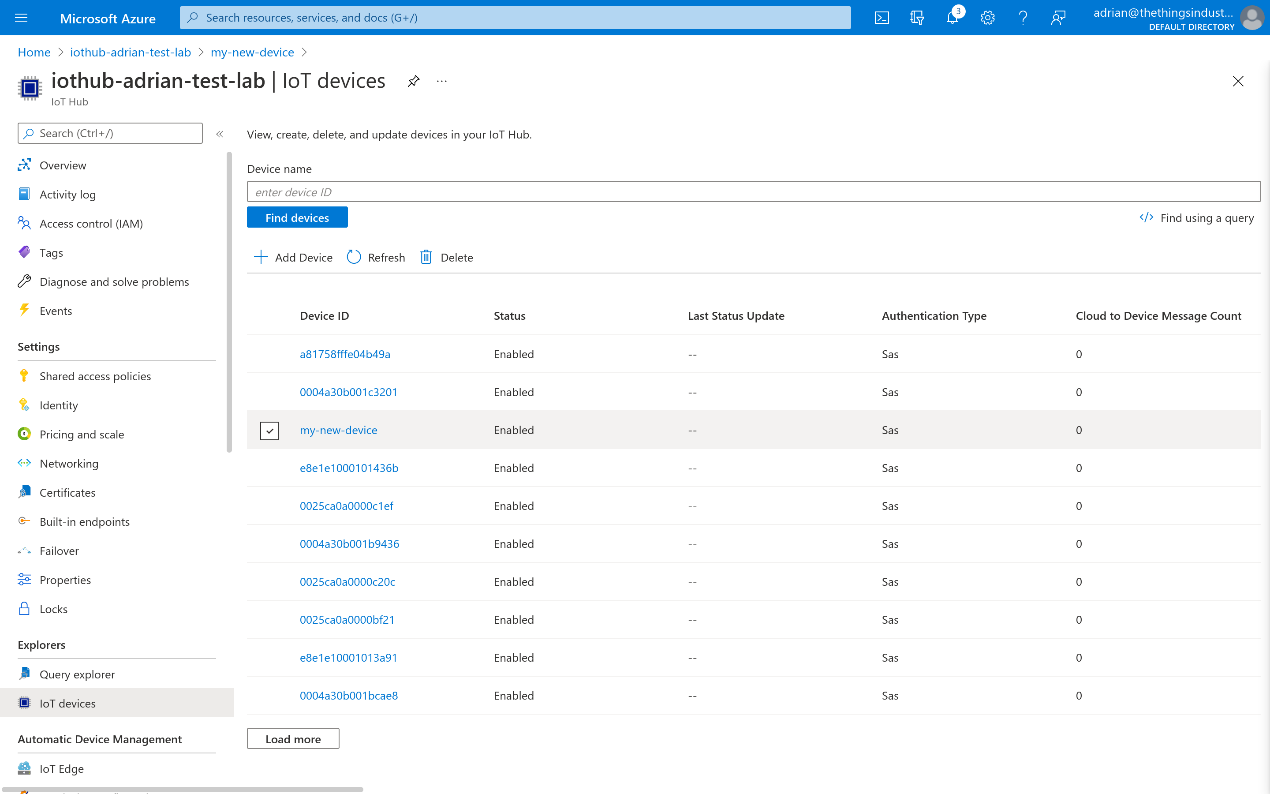
In the Azure Console, open your Azure IoT Hub resource. In the menu on the left, click IoT Devices.
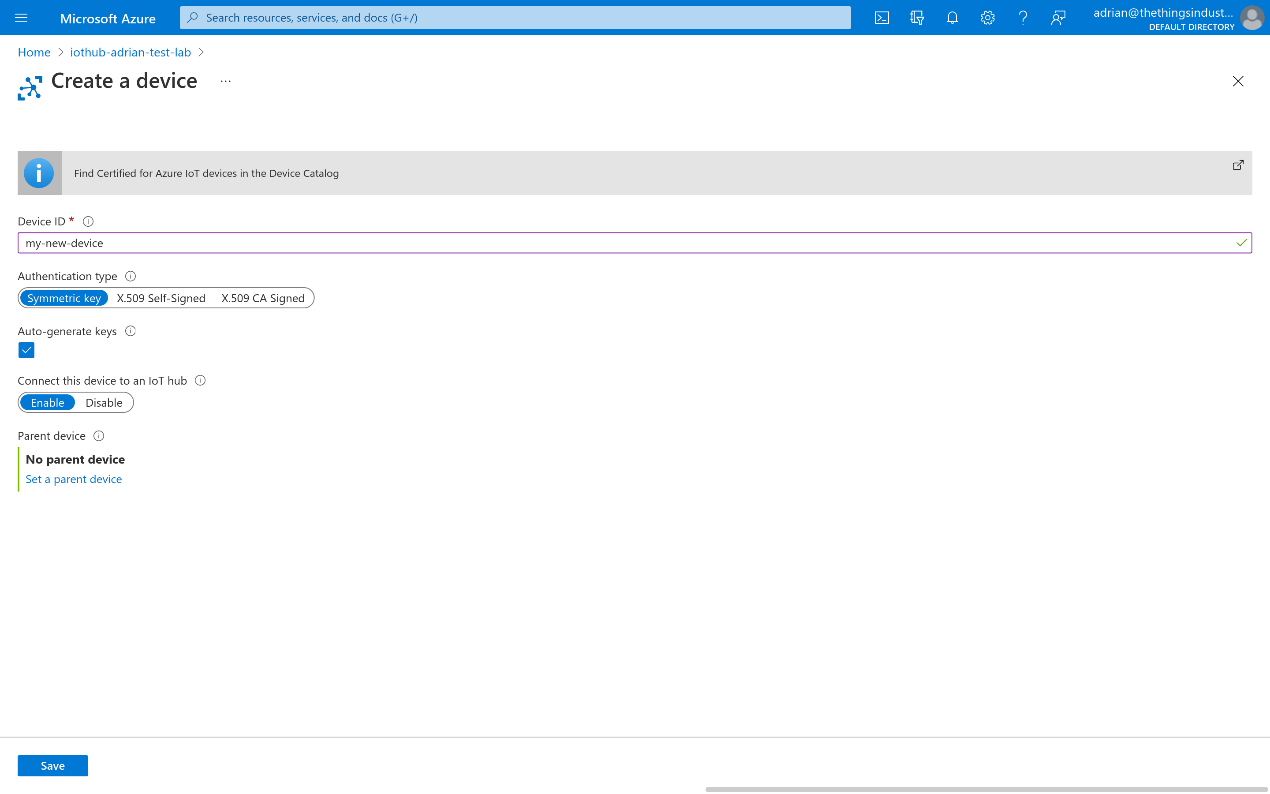
Click Add Device.
As Device ID, enter any device ID you like. Hit Save.
Note:
See ID and EUI constraints for guidelines about choosing a unique ID.
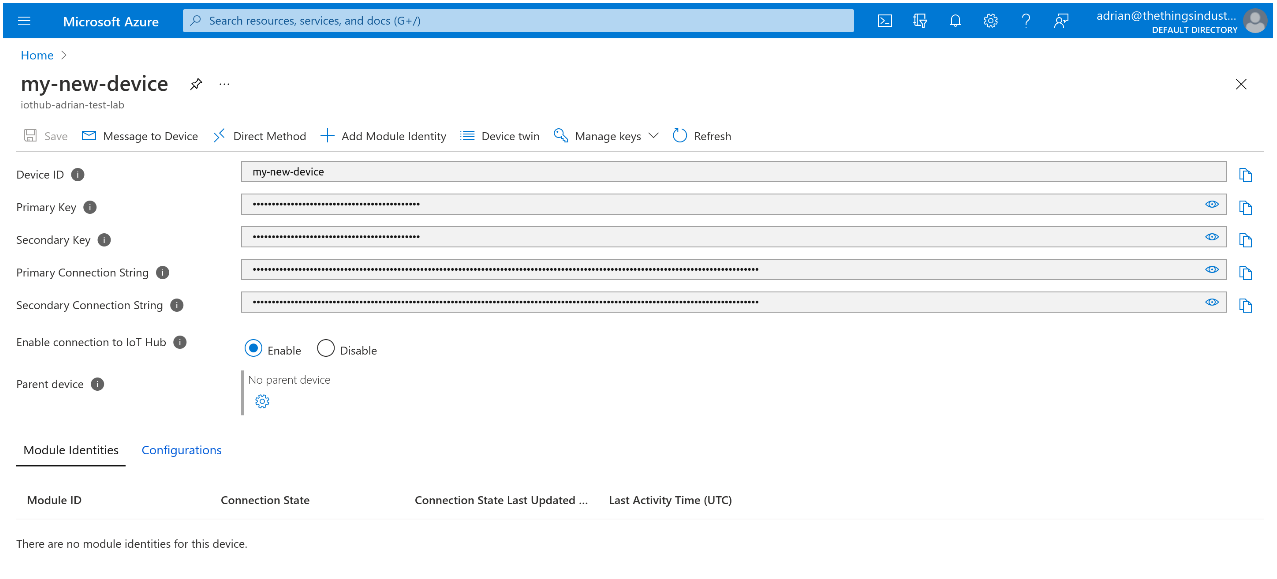
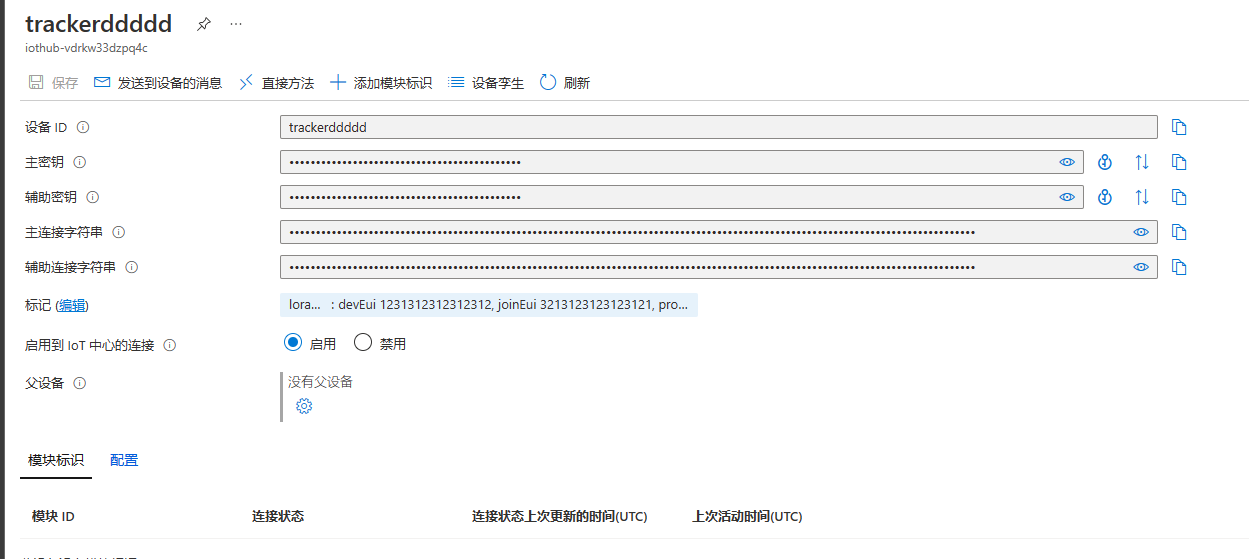
You will now have to setup the LoRaWAN specific settings of the device. Click on Device Twin.
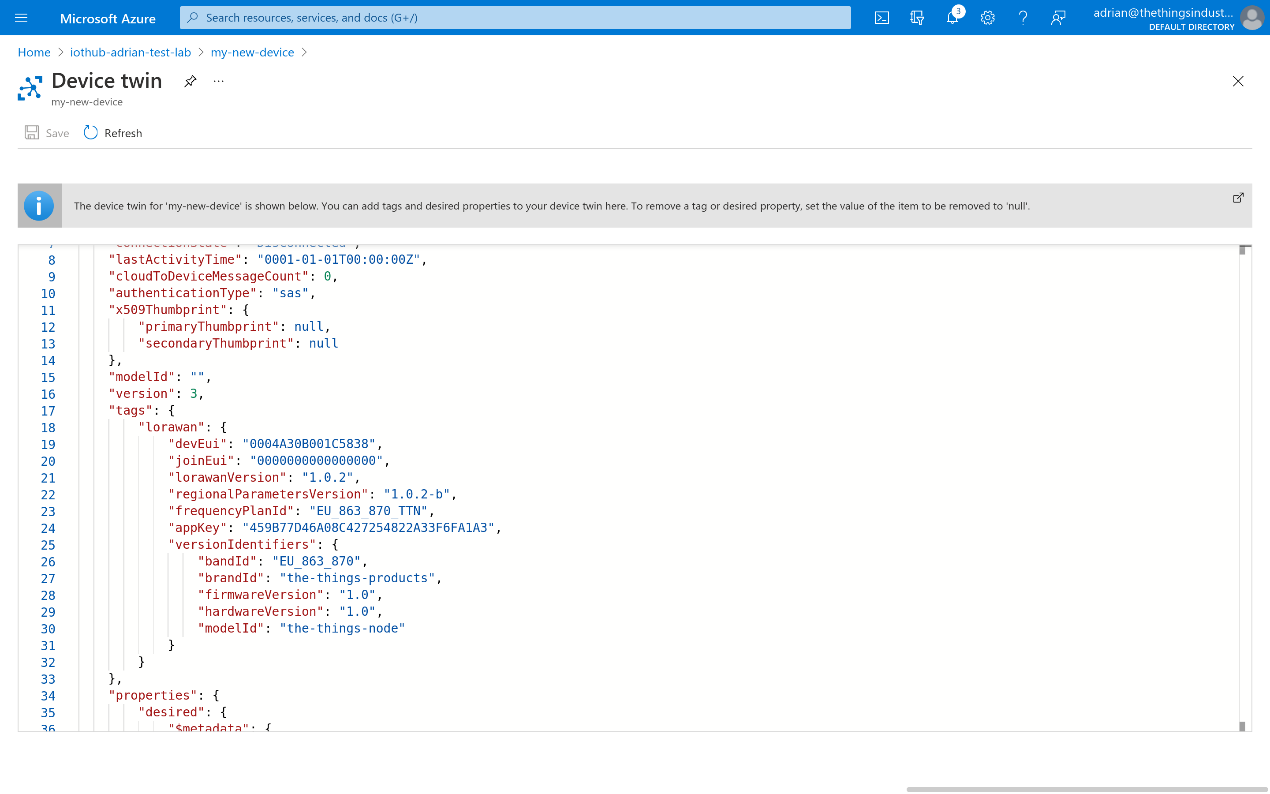
You will now be presented with a JSON document containing the Device Twin. You now have to add a new object called tags, which will contain an object called lorawan with the LoRaWAN specific tags. You will have to specify the following tags:
- devEui: the hexadecimal LoRaWAN DevEUI.
- joinEui: the hexadecimal LoRaWAN JoinEUI (or AppEUI).
- lorawanVersion: either 1.0, 1.0.1, 1.0.2, 1.0.3 or 1.1.
- regionalParametersVersion: either 1.0, 1.0.1, 1.0.2 (or 1.0.2-a), 1.0.2-b, 1.0.3-a, 1.1-a or 1.1-b.
- appKey: the hexadecimal LoRaWAN AppKey.
- nwkKey: the hexadecimal LoRaWAN NwkKey (only when using LoRaWAN 1.1 or higher).
- frequencyPlanId: the frequency plan ID. See Frequency Plans for the supported values.
If your end device is a part of the LoRaWAN Device Repository, you may provide the identifiers of the device as part of an optional versionIdentifiers object. You can specify the following information as part of the identifiers:
- bandId: the band ID.
- brandId: the brand ID.
- firmwareVersion: the firmware version.
- hardwareVersion: the hardware version.
- modelId: the model ID.
Note:
If the version identifiers are provided, the end device will automatically load the Payload Formatters from LoRaWAN Device Repository.
The final JSON tags object should look as follows:
{
"lorawan":{
"devEui":"0004A30B001C5838",
"joinEui":"800000000000000C",
"lorawanVersion":"1.0.2",
"regionalParametersVersion":"1.0.2-b",
"frequencyPlanId":"EU_863_870_TTN",
"appKey":"459B77D46A08C427254822A33F6FA1A3",
"versionIdentifiers":{
"bandId":"EU_863_870",
"brandId":"the-things-products",
"firmwareVersion":"1.0",
"hardwareVersion":"1.0",
"modelId":"the-things-node"
}
}
}
Click on Save in the top-left corner. The end device will now be created in The Things Stack.
3.2 Deleting Devices
In the Azure Console, open your Azure IoT Hub resource. In the menu on the left, click IoT Devices.
Click on the checkbox in front of the device you want to delete, then click Delete.
The end device will be deleted from Azure IoT Hub and The Things Stack.
Example(TrackerD):
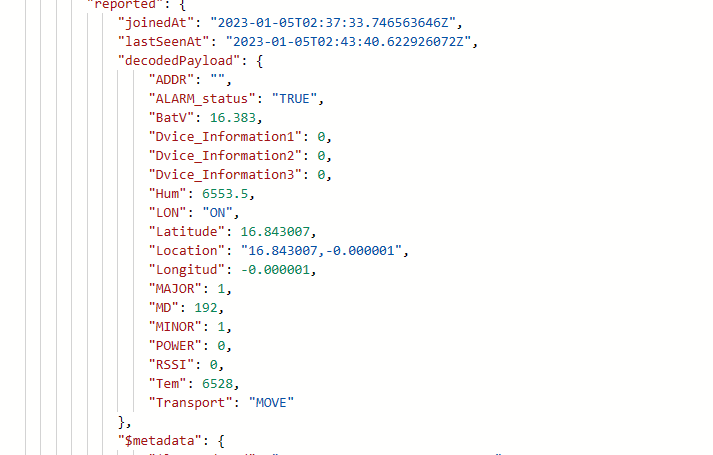
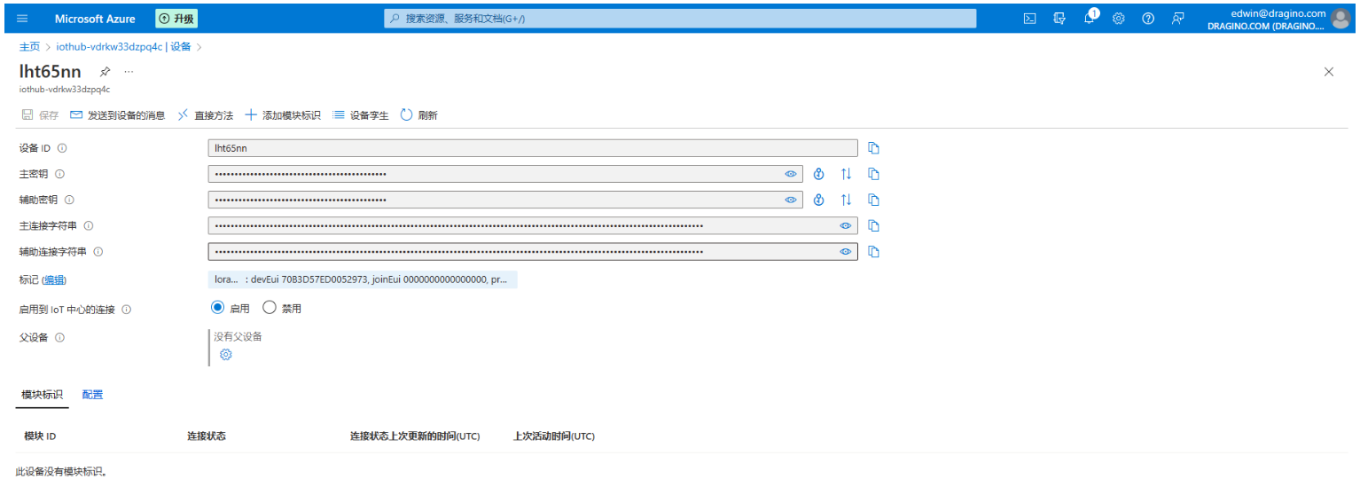
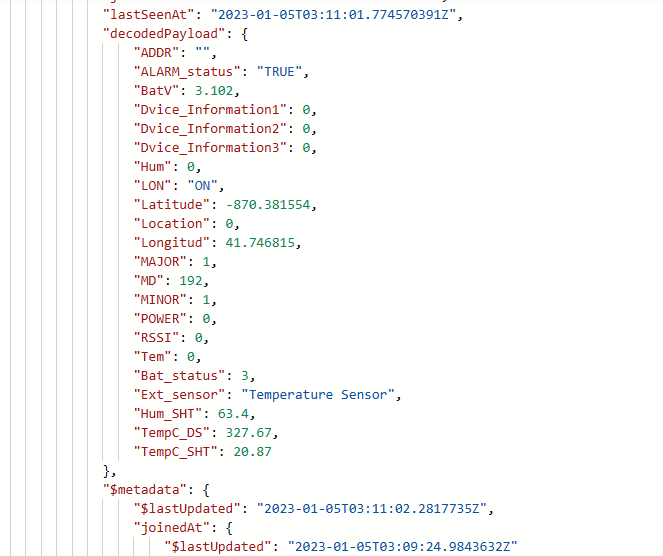
Example(LHT65N):