DR-PH01 -- Water PH Sensor
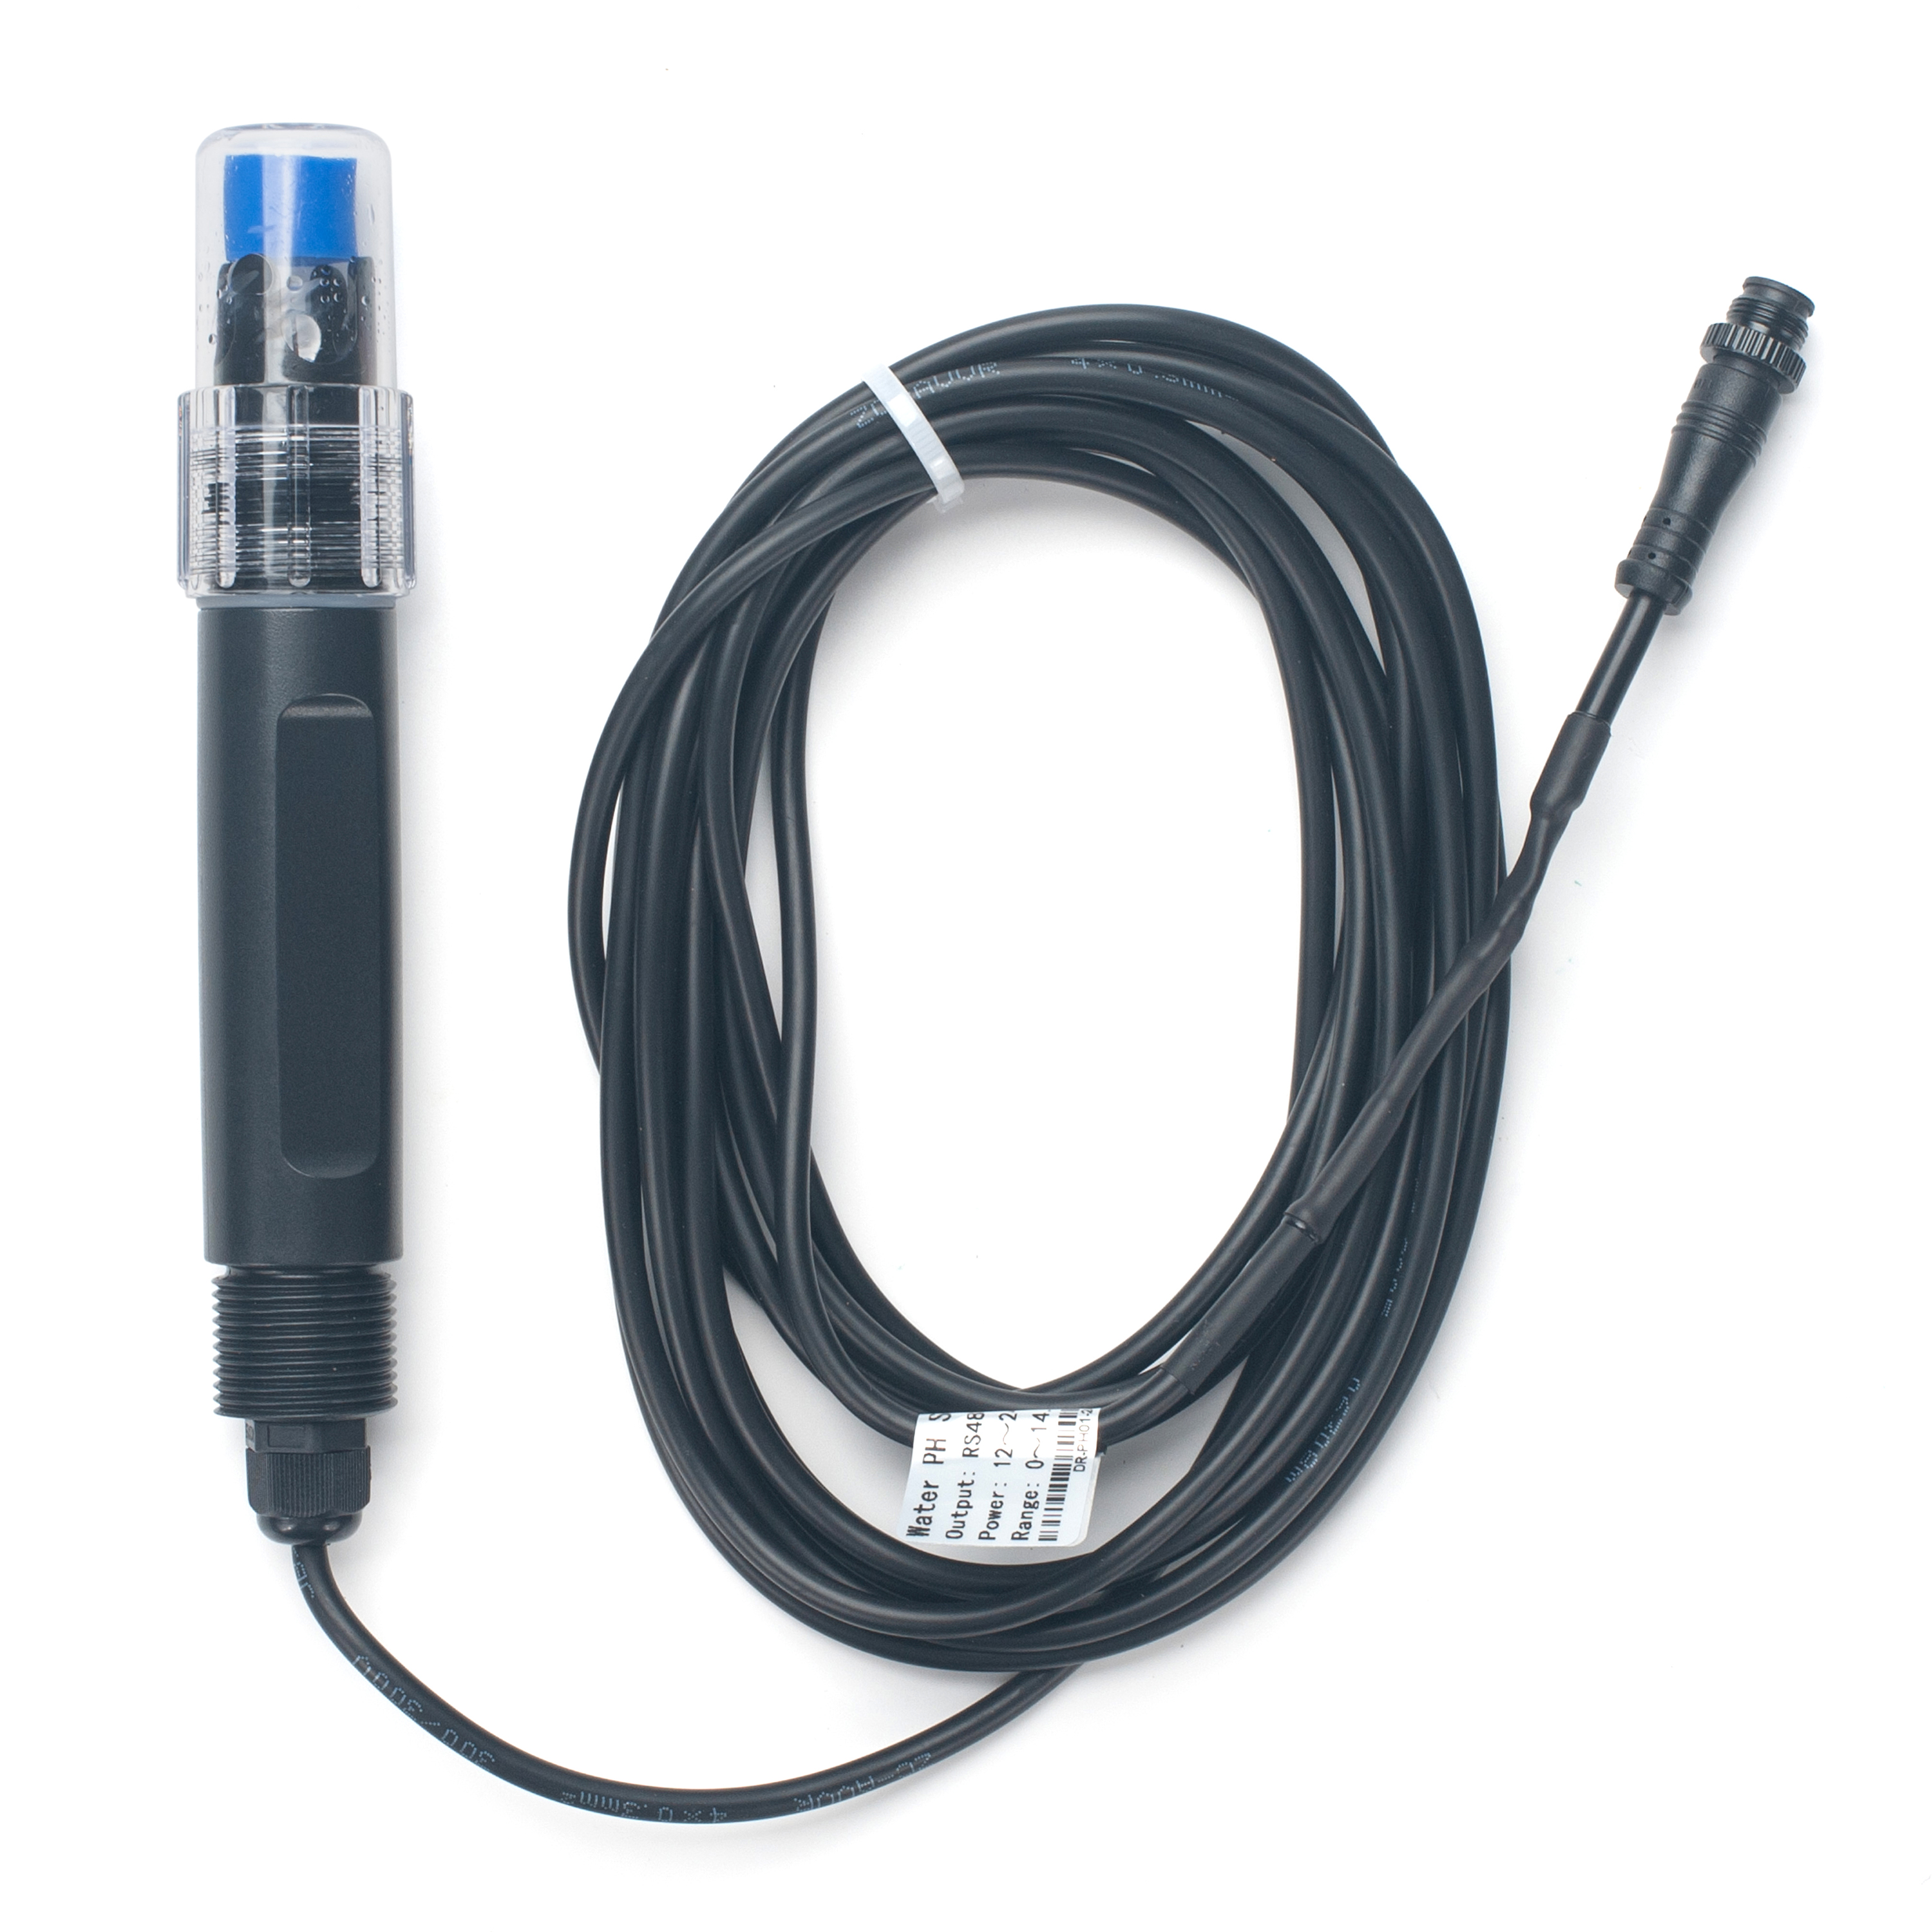
1. Introduction
1.1 Specification
-
Power Input: DC7~30V
-
Power Consumption : < 0.5W
-
Interface: RS485. 9600 Baud Rate
-
pH measurement range: 0~14.00pH; resolution: 0.01pH
-
pH measurement error: ±0.15pH
-
Repeatability error: ±0.02pH
-
Temperature measurement range:0~60°C; resolution: 0.1°C (set temperature for manual temperature compensation, default 25°C)
-
Temperature measurement error: ±0.5°C
-
Working environment:
- Ambient Temperature: 0--60°C
- Relative Humidity: <85% RH(Specifically refers to the cable male and female)
-
Temperature Accuracy:±0.5 °C
-
IP Rated: IP68
-
Max Pressure: 0.6MPa
-
Wire length: 5 meters
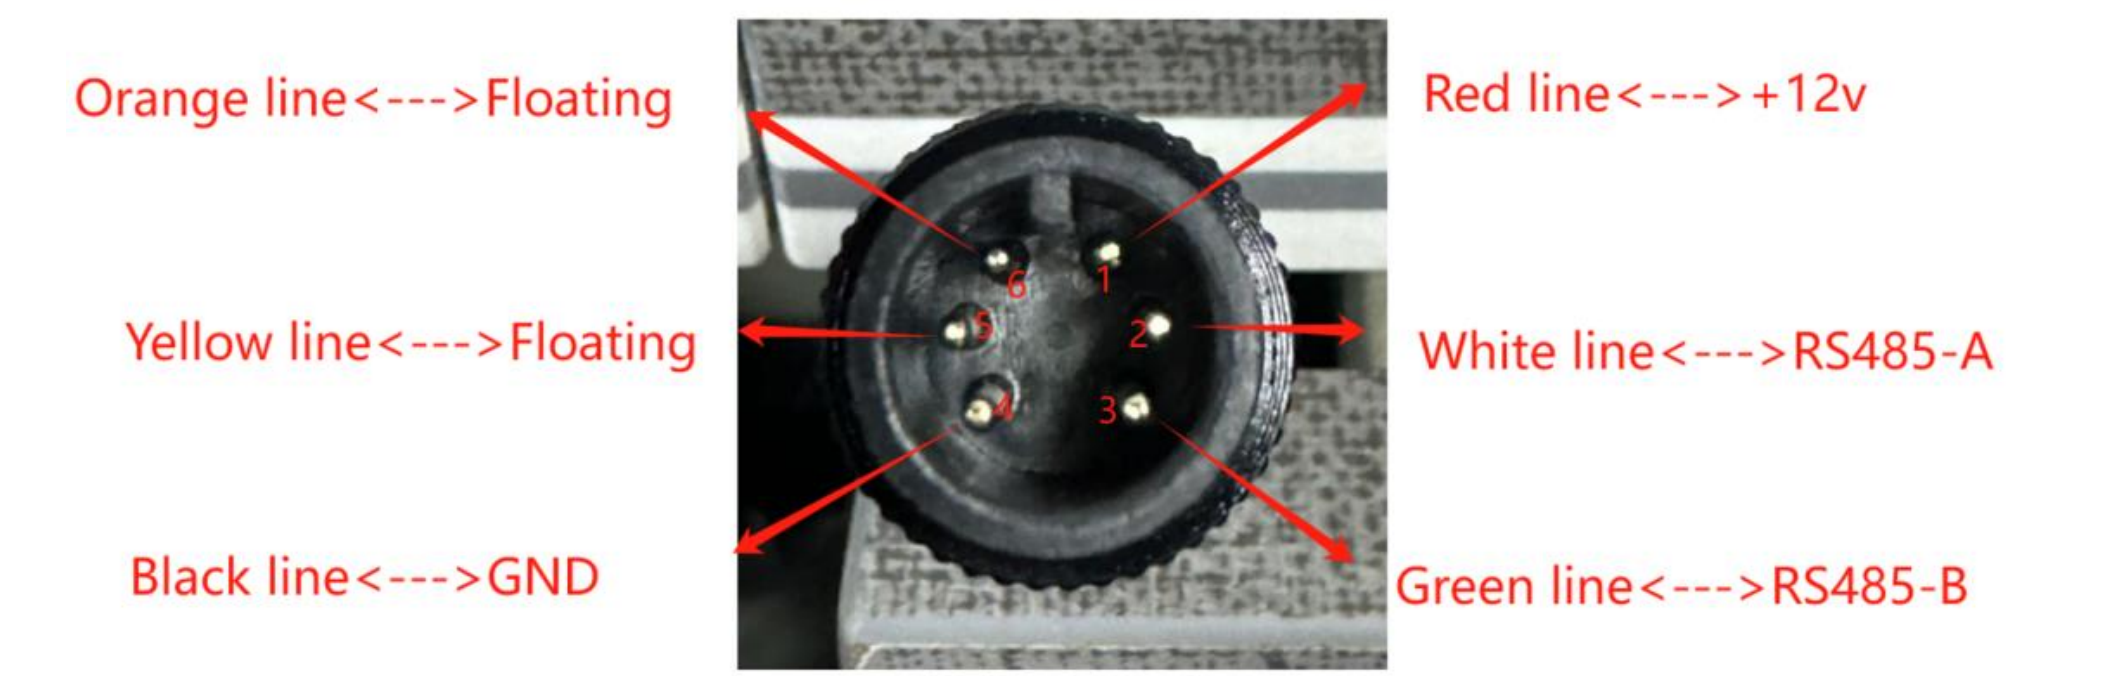
1.2 Wiring
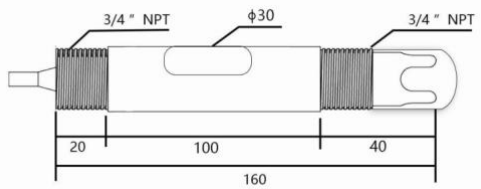
1.3 Mechinical Drawing
1.4 Installation Notice
Do not power on while connect the cables. Double check the wiring before power on.
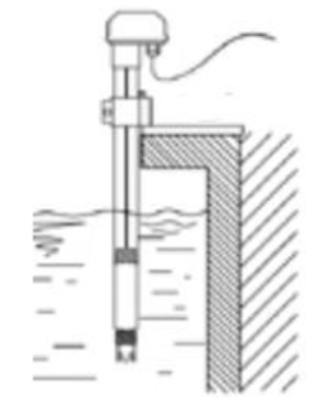
Installation Photo as reference:
Submerged installation:
The lead wire of the equipment passes through the waterproof pipe, and the 3/4 thread on the top of the equipment is connected to the 3/4 thread of the waterproof pipe with raw tape. Ensure that the top of the equipment and the equipment wire are not flooded.
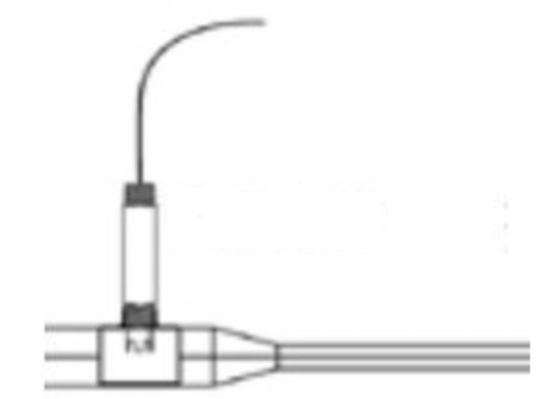
Pipeline installation:
Connect the equipment to the pipeline through the 3/4 thread.
Sampling:
Take representative water samples according to sampling requirements. If it is inconvenient to take samples, you can also put the electrode into the solution to be tested and read the output data. After a period of time, take out the electrode and clean it.
Measure the pH of the water sample:
First rinse the electrode with distilled water, then rinse it with the water sample, then immerse the electrode in the sample, carefully shake the test cup or stir it to accelerate the electrode balance, let it stand, and record the pH value when the reading is stable.
1.5 Maintenance
-
The equipment itself generally does not require daily maintenance. When an obvious fault occurs, please do not open it and repair it yourself. Contact us as soon as possible!
-
There is an appropriate amount of soaking solution in the protective bottle at the front end of the electrode. The electrode head is soaked in it to keep the glass bulb and the liquid junction activated. When measuring, loosen the bottle cap, pull out the electrode, and rinse it with pure water before use.
-
Preparation of electrode soaking solution: Take a packet of PH4.00 buffer, dissolve it in 250 ml of pure water, and soak it in 3M potassium chloride solution. The preparation is as follows: Take 25 grams of analytical pure potassium chloride and dissolve it in 100 ml of pure water.
-
The glass bulb at the front end of the electrode cannot come into contact with hard objects. Any damage and scratches will make the electrode ineffective.
-
Before measurement, the bubbles in the electrode glass bulb should be shaken off, otherwise it will affect the measurement. When measuring, the electrode should be stirred in the measured solution and then placed still to accelerate the response.
-
The electrode should be cleaned with deionized water before and after measurement to ensure accuracy.
-
After long-term use, the pH electrode will become passivated, which is characterized by a decrease in sensitivity gradient, slow response, and inaccurate readings. At this time, the bulb at the bottom of the electrode can be soaked in 0.1M dilute hydrochloric acid for 24 hours (0.1M dilute hydrochloric acid preparation: 9 ml of hydrochloric acid is diluted to 1000 ml with distilled water), and then soaked in 3.3M potassium chloride solution for 24 hours. If the pH electrode is seriously passivated and soaking in 0.1M hydrochloric acid has no effect, the pH electrode bulb can be soaked in 4% HF (hydrofluoric acid) for 3-5 seconds, washed with pure water, and then soaked in 3.3M potassium chloride solution for 24 hours to restore its performance.
-
Glass bulb contamination or liquid junction blockage can also cause electrode passivation. At this time, it should be cleaned with an appropriate solution according to the nature of the contaminant.
-
The equipment should be calibrated before each use. For long-term use, it is recommended to calibrate once every 3 months. The calibration frequency should be adjusted appropriately according to different application conditions (degree of dirt in the application, deposition of chemical substances, etc.). After aging, the electrodes should be replaced in time.
1.6 RS485 Commands
RS485 signaldefault address 0x10 Standard Modbus-RTU protocol, baud rate: 9600; check bit: none; data bit: 8; stop bit: 1
1.6.1 Query address
send:
| Original address | Function code | Address high | Address low | Quantity high | Quantity low | CRC16 low | CRC16 high |
|---|---|---|---|---|---|---|---|
| 0XFE | 0X03 | 0X00 | 0X50 | 0X00 | 0X00 | 0X51 | 0XD4 |
response:
| New address | Function code | Data length | CRC16 low | CRC16 high |
|---|---|---|---|---|
| 0X01 | 0X03 | 0X00 | 0X20 | 0XF0 |
1.6.2 Change address
For example: Change the address of the sensor with address 1 to 2, master → slave
| Original address | Function code | Address high | Address low | Quantity high | Quantity low | CRC16 low | CRC16 high |
|---|---|---|---|---|---|---|---|
| 0X01 | 0X06 | 0X00 | 0X50 | 0X00 | 0X02 | 0X08 | 0X1A |
If the sensor receives correctly, the data is returned along the original path.
Note: If you forget the original address of the sensor, you can use the broadcast address 0XFE instead. When using 0XFE, the host can only connect to one slave, and the return address is still the original address, which can be used as a method of address query.
1.6.3 Modify intercept
send:
| Address | Function code | Starting register address high | Starting register address low | Register Length high | Register Length low | CRC16 low | CRC16 high |
|---|---|---|---|---|---|---|---|
| 0X10 | 0X06 | 0X00 | 0X10 | 0X00 | 0X64 | 0X8A | 0XA5 |
Change the intercept of the sensor at address 10 to 1 (default is 0). You need to pass the intercept 1*100 =100 into the command 0x006.
response:
| Address | Function code | Address high | Address low | Quantity high | Quantity low | CRC16 low | CRC16 high |
|---|---|---|---|---|---|---|---|
| 0X10 | 0X06 | 0X00 | 0X10 | 0X00 | 0X64 | 0X8A | 0XA5 |
1.6.4 Query data
Query the data (PH) of the sensor (address 10), host → slave
| Address | Function code | Starting register address high | Starting register address low | Register length high | Register length low | CRC16 low | CRC16 high |
|---|---|---|---|---|---|---|---|
| 0X10 | 0X03 | 0X00 | 0X00 | 0X00 | 0X01 | 0X87 | 0X4B |
If the sensor receives correctly, the following data will be returned, slave → host
| Address | Function code | Data length | Register 0 Data high | Register 0 Data low | CRC16 low | CRC16 high |
|---|---|---|---|---|---|---|
| 0X10 | 0X03 | 0X02 | 0X02 | 0XAE | 0XC4 | 0X9B |
The query data command is 10 03 00 00 00 01 87 4B. After the query, 7 bytes will be returned.
For example, the returned data is 10 03 02 02 AE C4 9B.
02 AE is the pH value, which is converted into decimal to get 686, and then two decimal places are added to get the actual value. 02 AE means the current pH value is 6.86.
1.6.5 Calibration Method
This device uses three-point calibration, and three known pH standard solutions need to be prepared.
The calibration steps are as follows:
(1) Place the electrode in distilled water to clean it, and then place it in 9.18 standard buffer solution. After the data stabilizes, enter the following calibration command, and the 9.18 calibration is completed.
| Address | Function code | Address high | Address low | Quantity high | Quantity low | CRC16 low | CRC16 high |
|---|---|---|---|---|---|---|---|
| 0X10 | 0X06 | 0X00 | 0X20 | 0XFF | 0XFF | 0X8A | 0XF1 |
(2) Wash the electrode in distilled water and place it in 6.86 standard buffer. After the data stabilizes, enter the following calibration command. The 6.86 calibration is completed.
| Address | Function code | Address high | Address low | Quantity high | Quantity low | CRC16 low | CRC16 high |
|---|---|---|---|---|---|---|---|
| 0X10 | 0X06 | 0X00 | 0X21 | 0XFF | 0XFF | 0XDB | 0X31 |
(3) Wash the electrode in distilled water and place it in 4.01 standard buffer. After the data stabilizes, enter the following calibration command, and the 4.00 calibration is completed.
| Address | Function code | Address high | Address low | Quantity high | Quantity low | CRC16 low | CRC16 high |
|---|---|---|---|---|---|---|---|
| 0X10 | 0X06 | 0X00 | 0X22 | 0XFF | 0XFF | 0X2B | 0X31 |
After the above three steps are completed, the calibration is successful. The advantage of three-point calibration compared to two-point calibration is that the electrode is calibrated separately in the acid and alkali parts, thereby achieving accurate calibration of the full range and making the measurement data more accurate.