-FB/-FS Series Firmware Update Guide
1. Overview
This document describes the firmware update methods for DraginoFB/FS series end nodes based on the Nordic nRF9151 Module.
Two update methods are covered:
- OTA (Over-The-Air) Update via HTTP - Remote firmware update without physical access
- J-Link Interface Update - Direct firmware programming via hardware interface
- Update through UART TTL interface - Direct firmware programming via hardware interface
2. OTA Firmware Update via HTTP
Perform the following steps:
① Place the firmware binary (e.g., FB-FS.bin) on an HTTP-accessible server.
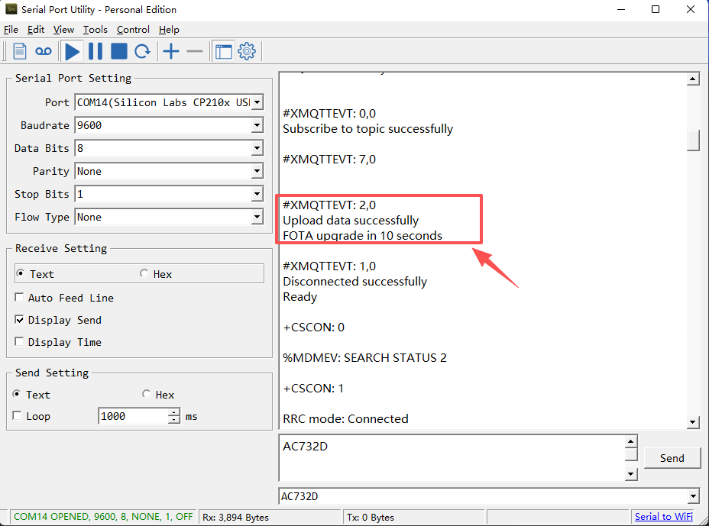
② Use a serial port or send the following command to the device: AT#XFOTA=1,"<firmware_url>"Example: AT#XFOTA=1,"http://repo.dragino.com/release/NB/S31-FB.bin"
After the node receives the upgrade command, it will perform the upgrade automatically as shown below:
3. Firmware Update via J-Link Interface
3.1 Prerequisites
- An ARM emulator (J-Link compatible)
- Firmware update tool: nRF Connect for Desktop
3.2 Hardware Connection
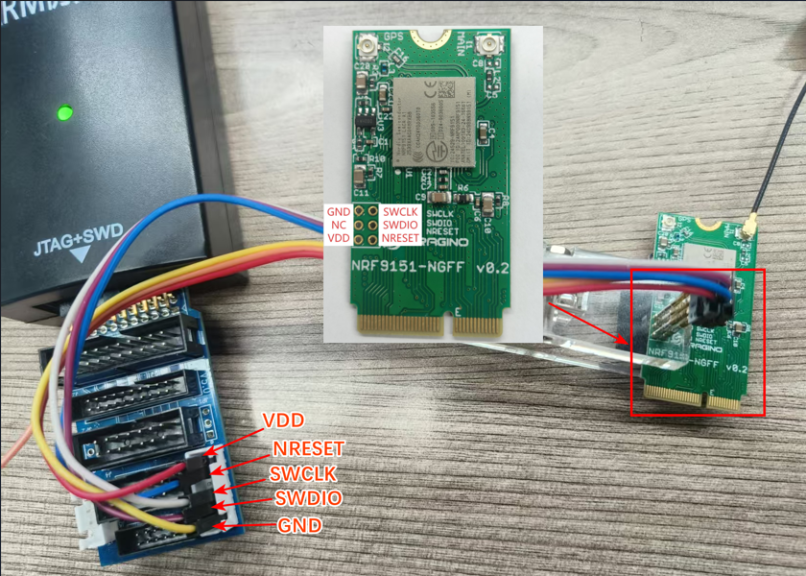
Remove the nRF9151 module from the motherboard and connect it to the J-Link as illustrated below:
nRF9151 Module Hardware Wiring:
3.3 Software Setup
① Launch nRF Connect for Desktop.
② Locate and download the Programmer tool from the available apps (see below):
③ After download, click OPEN to enter the Programmer interface.
3.4 Firmware Update Steps
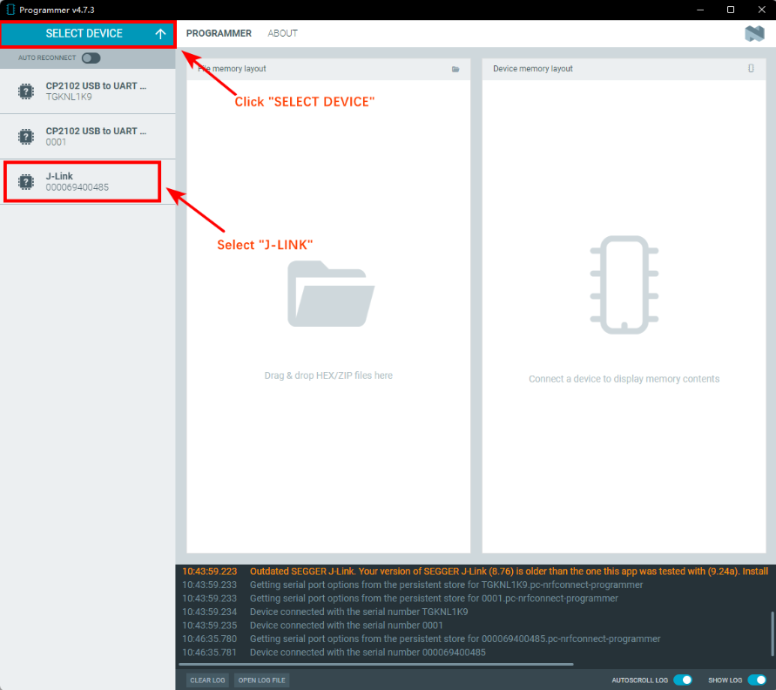
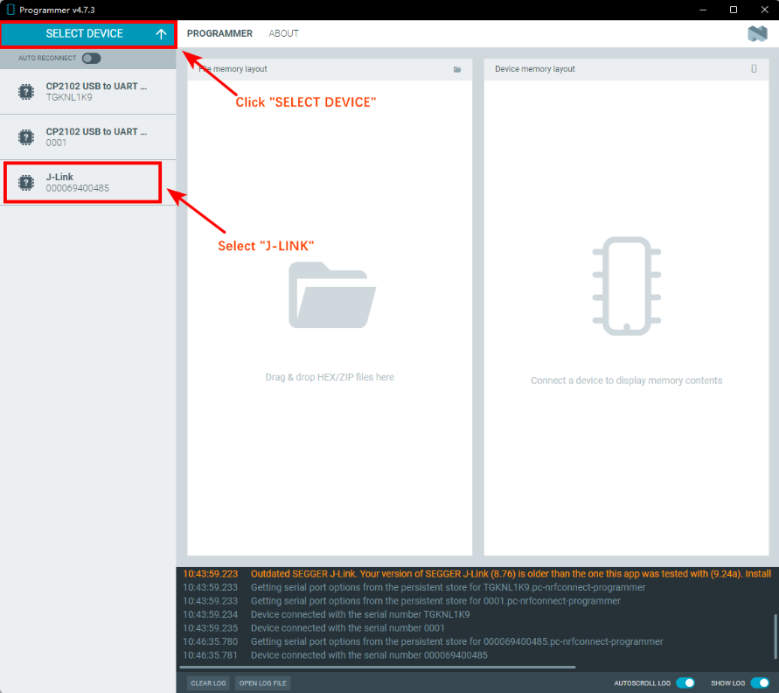
① Click "SELECT DEVICE" → Select "J-Link"
② On the main screen, click "Add file", then click "Browse" and select the firmware you want to update in the pop-up window.
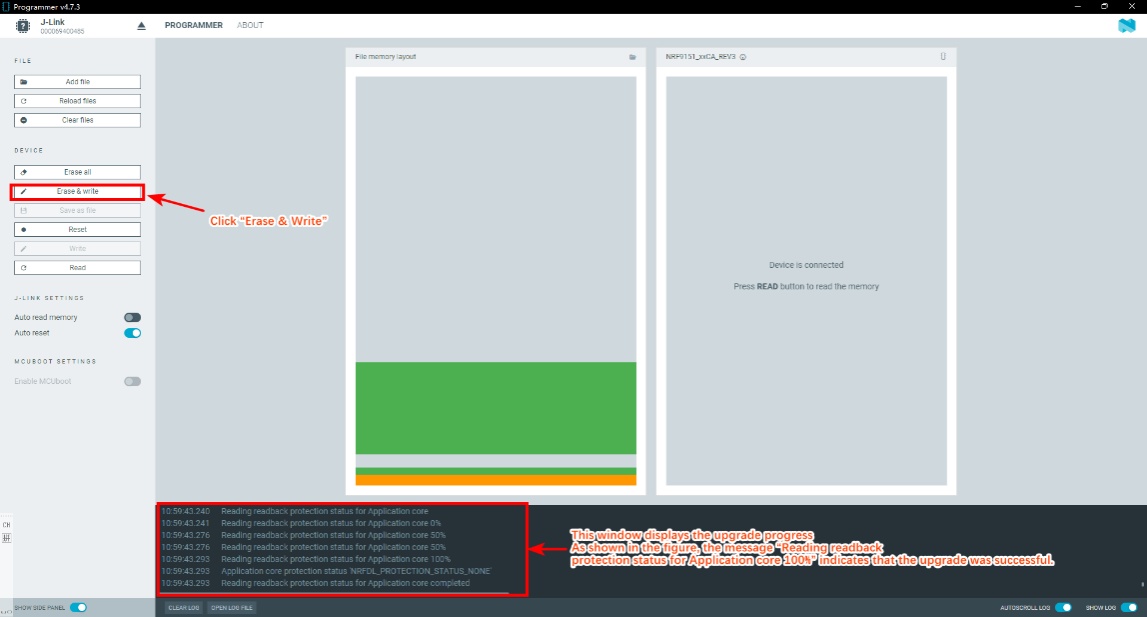
③ Click "Erase & Write" to begin the update.
4. Firmware Update via USB-TTL Interface
4.1 General software set up for AT Commands via UART
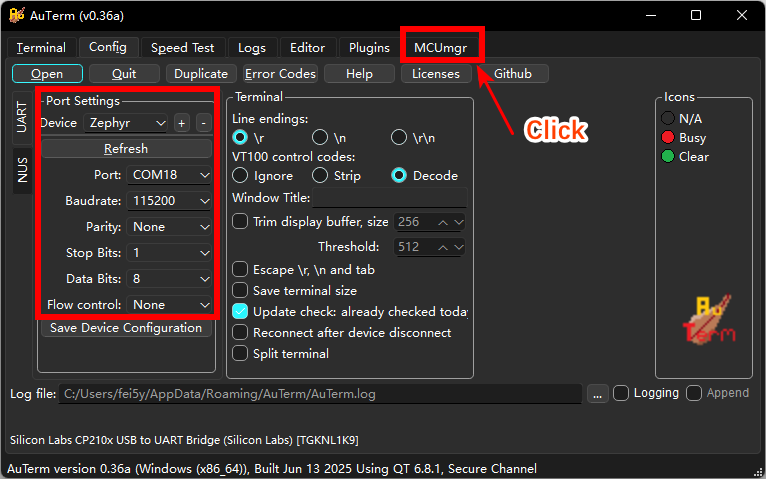
1. Use a general serial tool.
2. Connect PC to device's UART interface, Wiring Method
- Select the appropriate serial port.
4. Set up serial tool with : BaudRate: 115200, databit:8, No parity, No flow control.
- Firmware update tool: AuTerm.exe
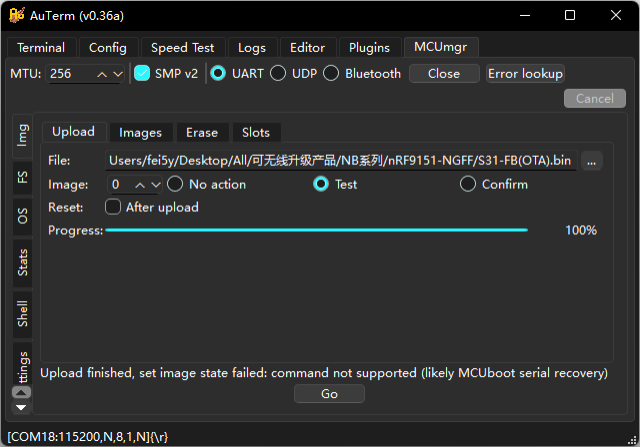
6. Click "MCUmgr"
4.2 Update Instructions
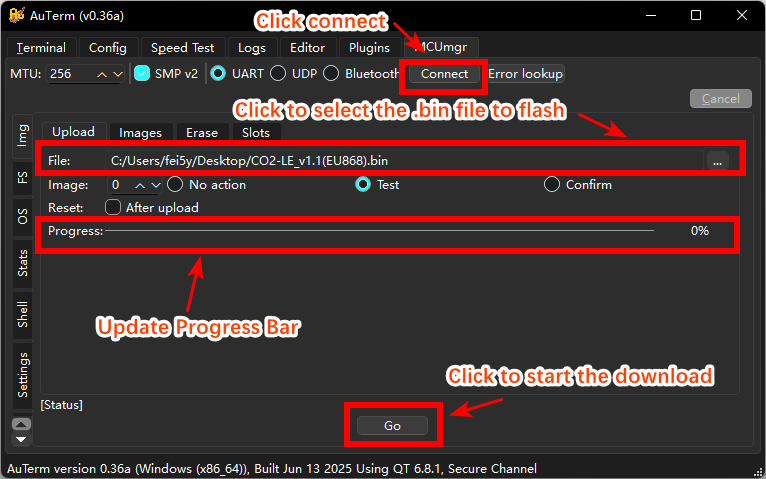
1. click Connect & open
2. Select the .bin file
3. Click to start the download
- Before clicking to start the burn, you must first put the node into burn mode. Follow these steps:
a. To put the device into programming mode, first press and hold the ACT button, then press the RESET button on the motherboard.
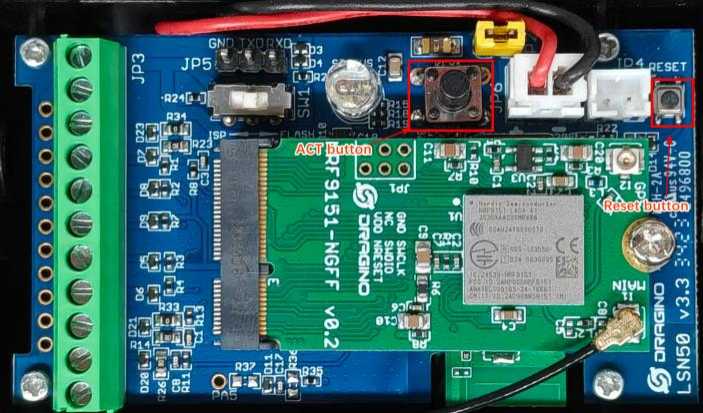
When the update progress bar reaches 100%, the firmware update is complete.
5. Click “Close” to disconnect the serial connection, then press the Reset button on the motherboard to reset the module.