Compile Firmware for -FB (nRF9151 Base) End Node
1. Introduction
This document describes how to compile the firmware for a -FB End Node based on the Nordic nRF9151 platform by using Visual Studio Code and the nRF Connect for VS Code extension.
The example in this document uses:
- nRF Connect SDK v2.9.1
- nRF Connect SDK Toolchain v2.9.1
- Board target:
nrf9151dk/nrf9151/ns
The SDK and toolchain version should normally match the version required by the firmware project.
2. Prerequisites
Before compiling the firmware, make sure that:
- Visual Studio Code is installed.
- The nRF Connect for VS Code extension is installed.
- The required nRF Connect SDK and toolchain are installed.
- The firmware project has been opened in Visual Studio Code.
3. Compile the Firmware
3.1 Add a Build Configuration
Open the firmware project in Visual Studio Code.
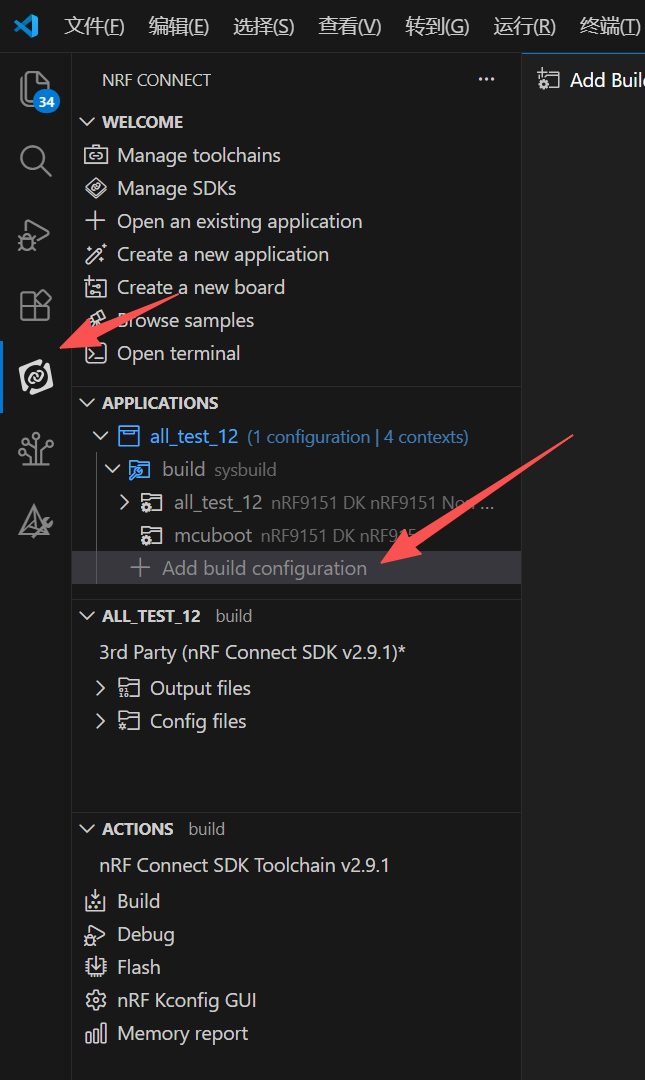
Click the nRF Connect icon in the Activity Bar to open the NRF CONNECT panel.
Under APPLICATIONS, locate the opened firmware project and click Add build configuration.
3.2 Select the Board Target
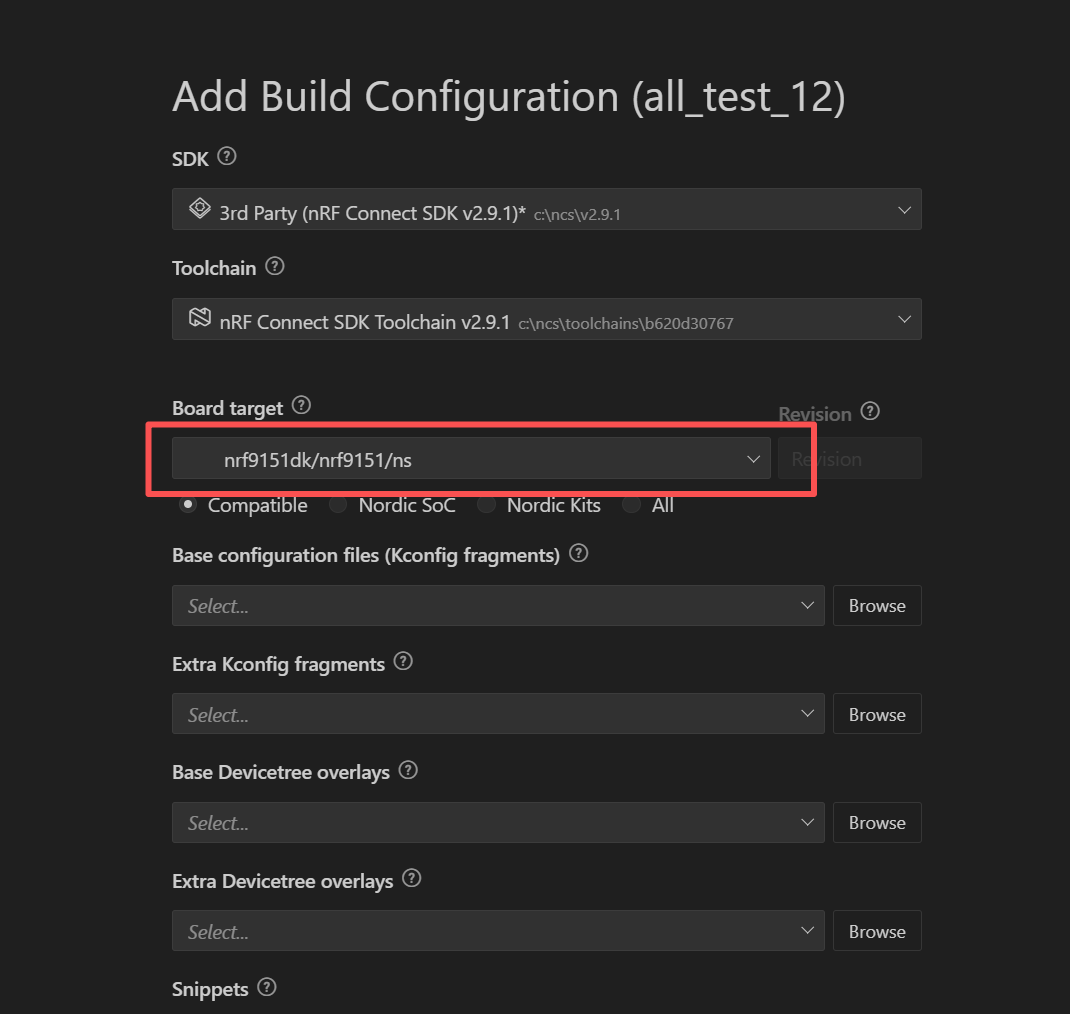
In the Add Build Configuration page, check that the correct SDK and toolchain are selected.
In Board target, select:
nrf9151dk/nrf9151/ns
The /ns target builds the application for the non-secure processing environment of the nRF9151.
3.3 Generate and Build
Keep the other build settings at the project defaults unless the firmware project requires specific configuration files or CMake arguments.
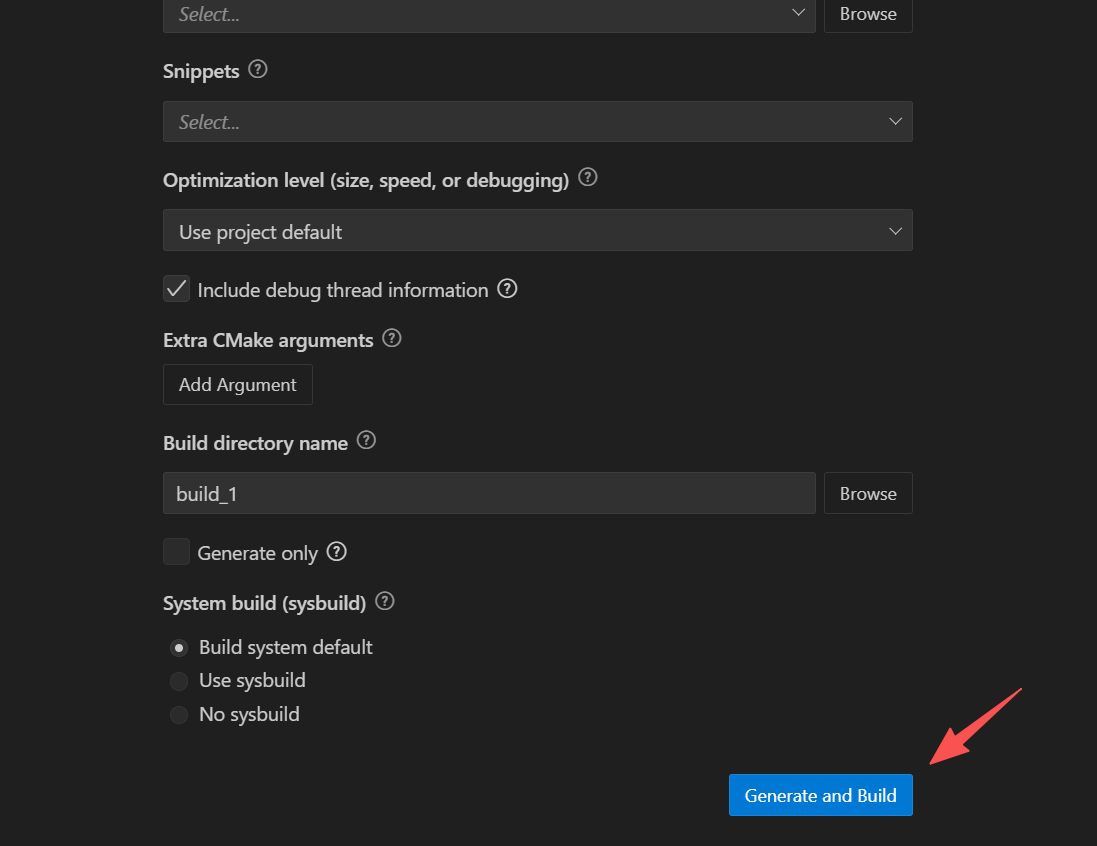
Set a build directory name if required. The example below uses:
build_1
Click Generate and Build to create the build configuration and start compilation.
3.4 Check the Build Progress
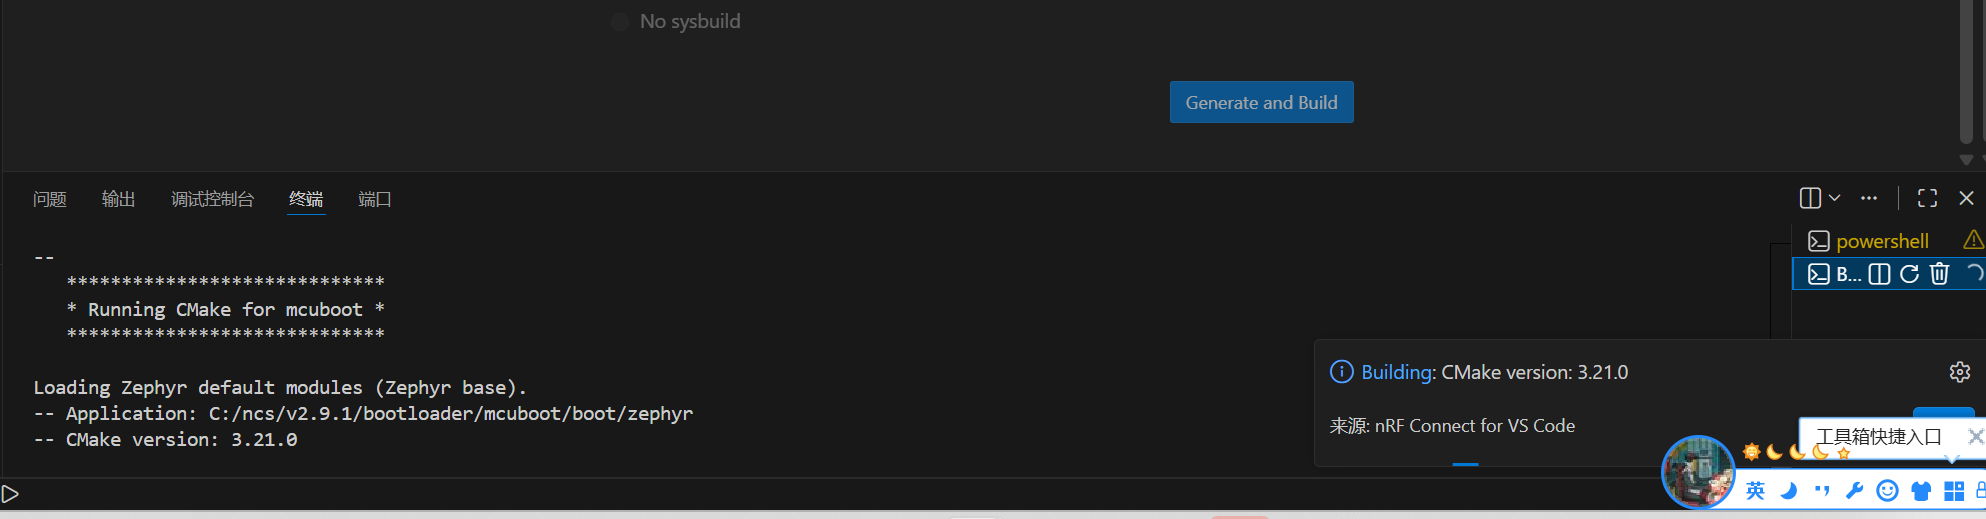
The nRF Connect extension opens a terminal and displays the CMake and build output.
Wait until the build process is complete. If compilation fails, review the error messages in the terminal, correct the reported issue, and run the build again.
3.5 Confirm a Successful Build
The build is successful when the terminal completes all build tasks without an error and displays the firmware file generation message.
For a sysbuild project, the terminal should show that merged.hex has been generated.
The exact output path depends on the project structure and build configuration. Expand Output files in the NRF CONNECT panel or check the selected build directory, such as build_1, to locate the generated .hex file.
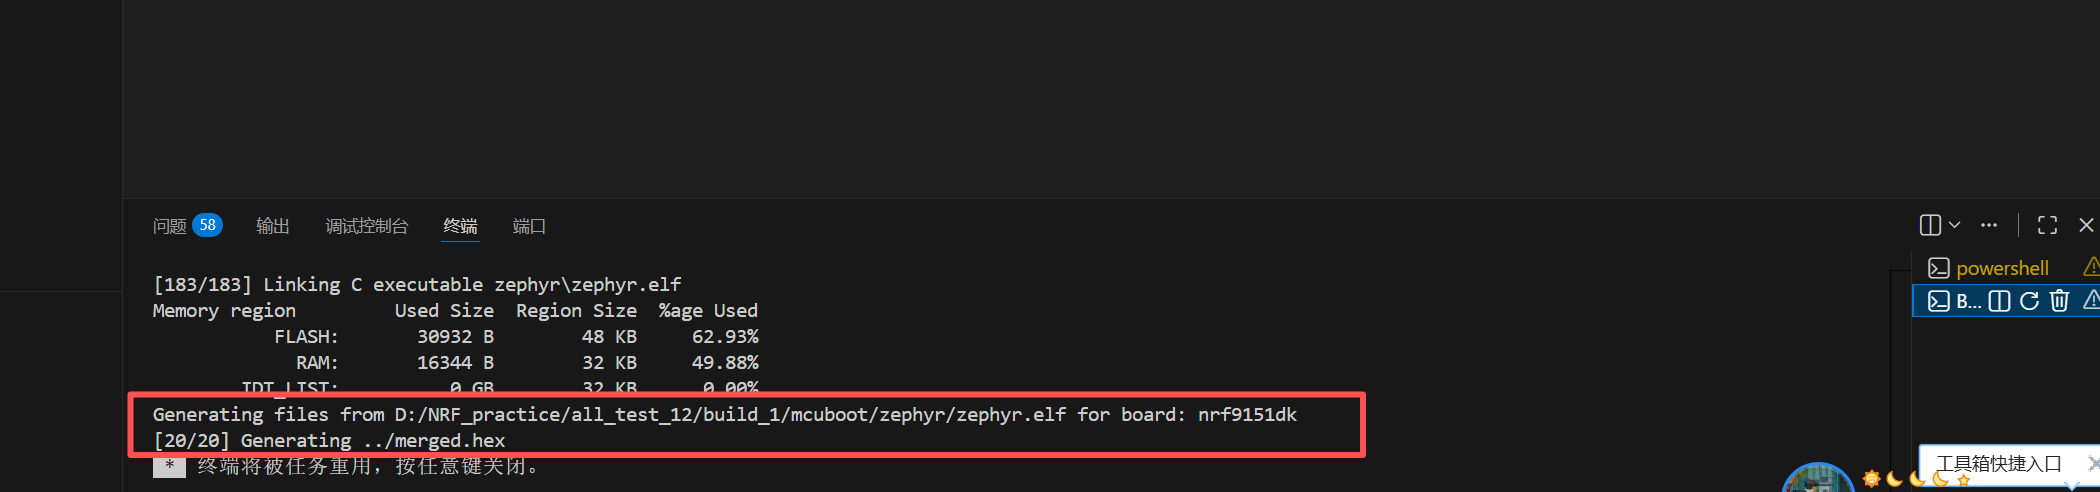
The generated merged.hex file can then be used for the firmware programming process.
4. Rebuild the Firmware
After modifying the source code, select the existing build configuration in the NRF CONNECT panel and click Build under ACTIONS.
If the SDK version, board target, Kconfig files, Devicetree overlays, or other major build settings have changed, create a new build configuration or perform a pristine build before compiling again.
5. Build Troubleshooting
5.1 Board Target Is Not Available
- Confirm that the required nRF Connect SDK version is installed.
- Confirm that the SDK and toolchain selected in the build configuration are compatible.
- Search for the complete target name:
nrf9151dk/nrf9151/ns.
5.2 Build Fails in the Terminal
- Review the first error reported in the build terminal.
- Confirm that all required project files and modules are available.
- Confirm that the selected SDK and toolchain versions match the project requirements.
- Rebuild the project after correcting the error.
5.3 The merged.hex File Is Not Generated
- Confirm that the terminal reports a successful build.
- Check the selected build directory.
- Confirm that the project is using sysbuild when a merged firmware image is required.
- Expand Output files in the NRF CONNECT panel to locate generated firmware files.