UART Upgrade for -FB/-FS/-FE models
1. Overview
This document describes how to update the firmware of Dragino -FB / -FS / -FE series end nodes based on the Nordic nRF9151 module through the UART (USB-TTL) interface.
These models use the same firmware update tool and UART update procedure. However, the steps for entering programming mode and resetting the device differ between -FB / -FS models and -FE models.
2. Prerequisites and Software Setup
-
Prepare a USB-TTL adapter and connect the PC to the device's UART interface. Refer to the Wiring Method.
-
Download and open the firmware update tool: AuTerm.exe.
-
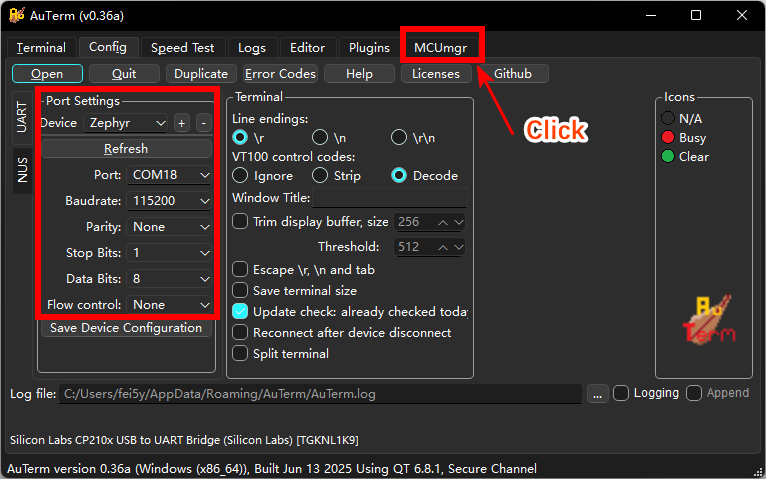
Select the appropriate serial port and configure the serial settings as follows:
- Baud rate: 115200
- Data bits: 8
- Parity: None
- Flow control: None
-
Prepare the .bin firmware file for your device model.
-
Click "MCUmgr" in AuTerm to open the firmware update interface.
3. Firmware Update Steps
3.1 Connect and Select the Firmware
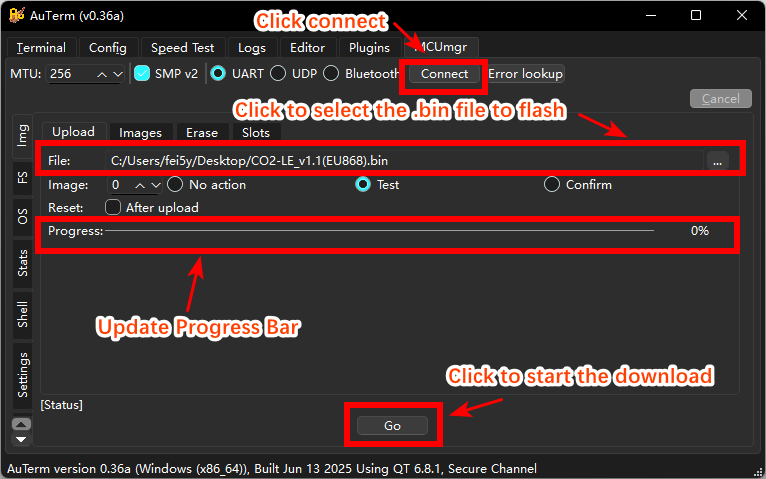
① Click "Connect & open" to open the serial connection.
② Select the .bin firmware file for your device model.
3.2 Enter Programming Mode
Before starting the firmware download, put the device into programming mode using the instructions for your model below.
For -FB / -FS models:
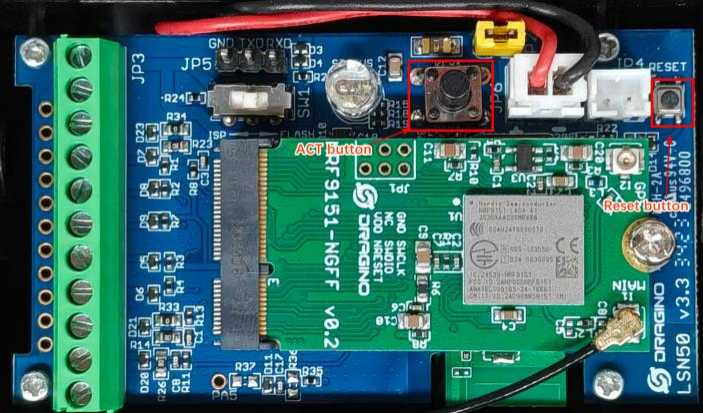
Press and hold the ACT button, then press the RESET button on the motherboard to enter programming mode.
For -FE models:
Send the "AT+DFU" command through the Serial Assistant to enter programming mode.
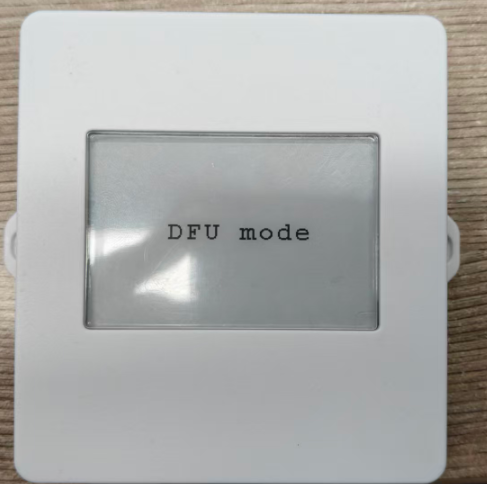
When the device screen displays "DFU Mode", the device has successfully entered programming mode.
3.3 Start the Firmware Download
Click the button to start the firmware download in the MCUmgr interface.
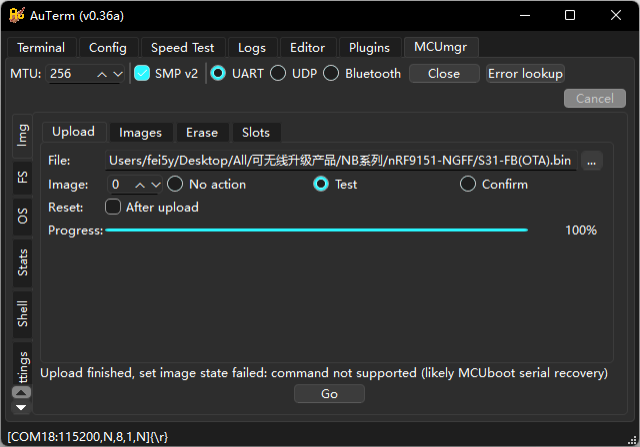
When the update progress bar reaches 100%, the firmware download is complete. Follow the steps below to reset the device.
3.4 Reset the Device and Disconnect
For -FB / -FS models:
① Click "Close" to disconnect the serial connection.
② Press the RESET button on the motherboard to reset the module.
For -FE models:
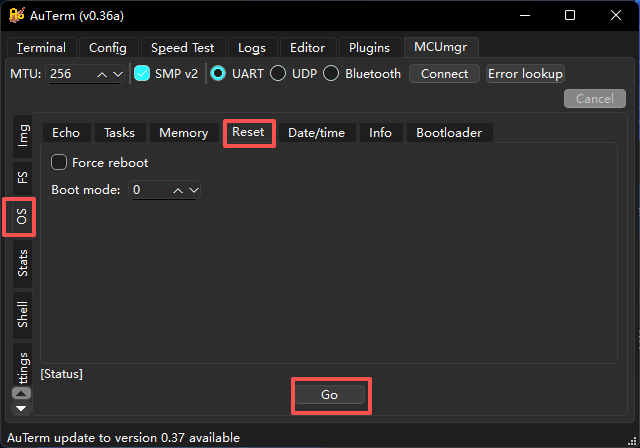
① Click "OS" in the left-hand toolbar of AuTerm.
② Click "Reset", then click "GO" to reset the device.
③ Click "Close" to disconnect the serial connection.