Quick Start for Dragino Mesh Nodes
This Quick Start explains how to enroll a Dragino Mesh Node, verify data transmission, and prepare it for final installation.
1. Before Enrollment
1.1 Prepare the Node and Network
Enroll and verify each node near the Mesh gateway before installing it at its final location.
Prepare the items required for the selected enrollment method:
- The Mesh Node and its product label.
- A LoRa antenna that matches the device's shipping Region.
- The node's Dev EUI and App Key.
- A Mesh gateway and access to its management page for remote wireless enrollment.
- A computer with FirmwareUpdateUtility for Bluetooth or serial enrollment, or a supported mobile app for Bluetooth enrollment.
- The internal serial connection specified in the Product Guide when using serial enrollment.
Each node ships with a fixed Region set during manufacturing. The gateway and all nodes in the network must use the same Region.
Define one scheduled wake-up interval for the network. All nodes in the same network must use this shared interval so that their active communication windows remain synchronized.
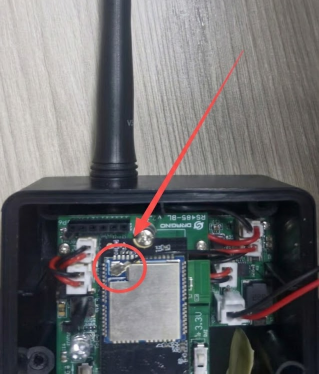
Always install the LoRa antenna before powering on the device. Transmitting without an antenna may damage the RF front end.
2. Enroll and Verify the Node
2.1 Choose an Enrollment Method
| Method | Connection | Configuration Interface |
|---|---|---|
| Remote wireless enrollment (recommended) | Management interface → Mesh gateway → Node | Mesh gateway management page |
| Bluetooth enrollment (recommended) | Computer or mobile device → Node | FirmwareUpdateUtility or a supported mobile app |
| Serial enrollment | Computer → Internal node serial interface | FirmwareUpdateUtility |
The node does not provide an external USB interface for enrollment. Serial enrollment requires opening the enclosure and connecting to the internal serial interface, so it is not the preferred method.
2.2 Method 1: Remote Wireless Enrollment
- Keep the Mesh gateway powered on and open its management page.
- Configure the gateway to use the node's shipping Region and the shared scheduled wake-up interval.
- Add the target node to the gateway using its Dev EUI and App Key, then save the device entry.
- Keep the Mesh Node powered off until the gateway configuration is complete, then install the antenna and power on the node.
- When the gateway detects the node's enrollment request, it authenticates the node using the saved Dev EUI and App Key. If they match, the gateway enrolls the node and sends the network configuration.
- Wait until the gateway shows that the node is enrolled, then complete the verification steps in Section 2.5.
Before enrollment, a node does not relay packets from other nodes. After its first startup or a restart, it broadcasts up to 50 onboarding advertisements so that the gateway can discover and enroll it.
2.3 Method 2: Bluetooth Enrollment
- Wake the node and Bluetooth before scanning:
- If the node is asleep, hold the button for about 1 second and release it when the green LED starts flashing.
- If the node is already awake, press the button once and wait about 5 seconds.
- Use FirmwareUpdateUtility or a supported mobile app to scan for and connect to the node.
- Verify the product, SN, Dev EUI, and Region.
- Open the network enrollment function, select the target network, and set the same scheduled wake-up interval used by the other nodes in that network.
- Start enrollment and wait for a clear success result, then complete the verification steps in Section 2.5.
2.4 Method 3: Serial Enrollment
- Open the device enclosure and connect to the internal serial interface according to the Product Guide.
- Open FirmwareUpdateUtility and connect to the correct serial port.
- Verify the product, SN, Dev EUI, and Region.
- Open the network enrollment function, select the target network, and set the same scheduled wake-up interval used by the other nodes in that network.
- Start enrollment and wait for a clear success result, then complete the verification steps in Section 2.5.
2.5 Verify the Node After Enrollment
Complete these checks regardless of the enrollment method:
- Check the enrollment status: While the node is awake, press the button once. A green LED means the node is enrolled; a blue LED means it is not enrolled.
- Trigger the first data transmission: Hold the button for 1 to 3 seconds and release it while the green LED is flashing.
- Check the received data: Confirm the node identity, reception time, and sensor data on the target gateway or project data interface.
- Wait for one scheduled transmission: Confirm that the node follows the configured wake-up interval.
- Install and retest: After these checks pass, install the node at its final location and verify both a manual transmission and a scheduled transmission again.
Check the Region match, credentials, antenna, and enrollment status. See Connection Troubleshooting for the complete checklist.
3. Operation and next steps
3.1 Button operations and LED status
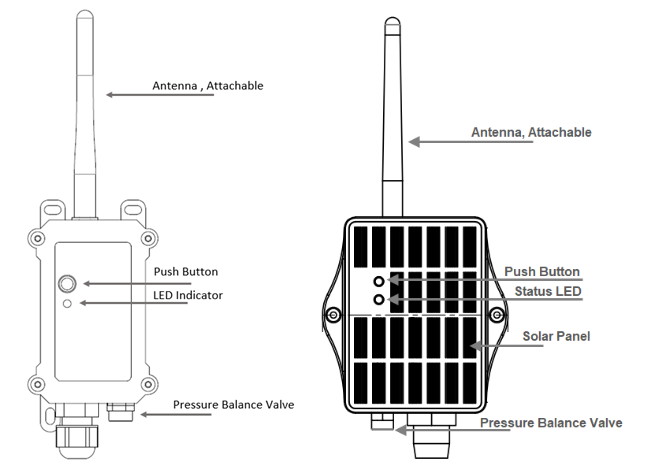
Once a node is running, the button and LED are all you need for day-to-day operation.
When the Node Is Asleep
| Operation | Result |
|---|---|
| Hold the button for about 1 second and release it when the green LED starts flashing | Wakes the node and Bluetooth. An enrolled node enters its normal operating cycle; an unenrolled node starts discovery. |
When the Node Is Awake
| Operation | LED | Result |
|---|---|---|
| Press once | Green if enrolled; blue if not enrolled | Shows the current enrollment status and wakes Bluetooth after button processing is complete. |
| Hold for 1 to 3 seconds, then release | Green flashing if enrolled; blue flashing if not enrolled | Triggers a data transmission when enrolled or sends a discovery message when not enrolled. |
| Hold for 5 to 8 seconds, then release | Red flashing | Restarts the node. |
For factory reset, manual sleep, and Bootloader entry, see How to Use Advanced Button Operations.
3.2 Installation and Mesh coverage recommendations
Radio placement. Install the antenna vertically and keep it away from large metal surfaces, high-power electrical equipment, and enclosed metal boxes. Install the Mesh gateway as high as practical in a location with minimal obstruction.
Initial deployment. Enroll and verify each node near the Mesh gateway before moving it to its final location. When intermediate nodes extend coverage, confirm that they are awake during the required communication periods.
Solar installations. Install solar-powered devices where they receive stable sunlight. Prevent long-term obstruction from leaves, buildings, dirt, or other objects.
Outdoor cabling. Protect cables from pulling and provide a drip loop so that water and mechanical force are not directed toward waterproof connectors, cable glands, or probes.
3.3 Next steps
- External Network Bridges: methods to forward local Mesh data to external networks. See Mesh to LoRaWAN and Mesh to LTE CAT-1.
- Mesh Edge Gateway: gateway setup and data handling. See Mesh Edge Gateway.
- Mesh End Node: per-model setup, wiring, and shipping profiles. See Mesh End Node.
- Developer Instruction: build the firmware from source. See Developer Instruction.