Armbian-Based Devices OS Advanced Guide
1. Overview
This is a general instruction for the use of Armbian base OS of Dragino devices. Current models include:
- HP0A
- HP0C
- LPS8v2
- MS20
2. Development Guide
For advanced users to develop Driver/ Linux etc.
2.1 How to recompile LoRaWAN Concentrator Driver ( dragino-fwd package).
Step 1. Clone dragino-fwd package
Requirements:
sudo apt install -y libsqlite3-dev
sudo apt install -y libftdi1-dev
Run command clone dragino-fwd package:
git clone https://github.com/dragino/dragino_fwd_src.git

Step 2. Compile dragino_fwd
After cloning is complete, Run the command starts compiling:
Compile HP0C/HP0A fwd:
./hp0z-make-deb.sh c
The following example compilers HP0C fwd.
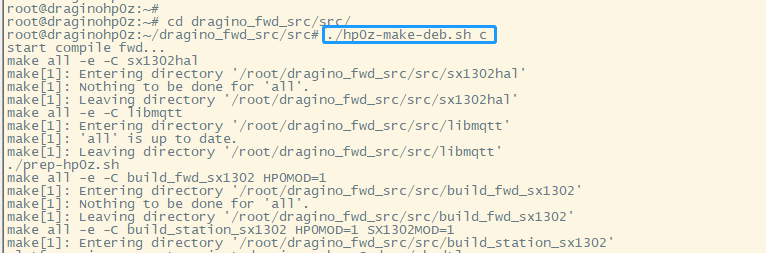
When the compilation is complete a draginofwd-*.deb package is generated.
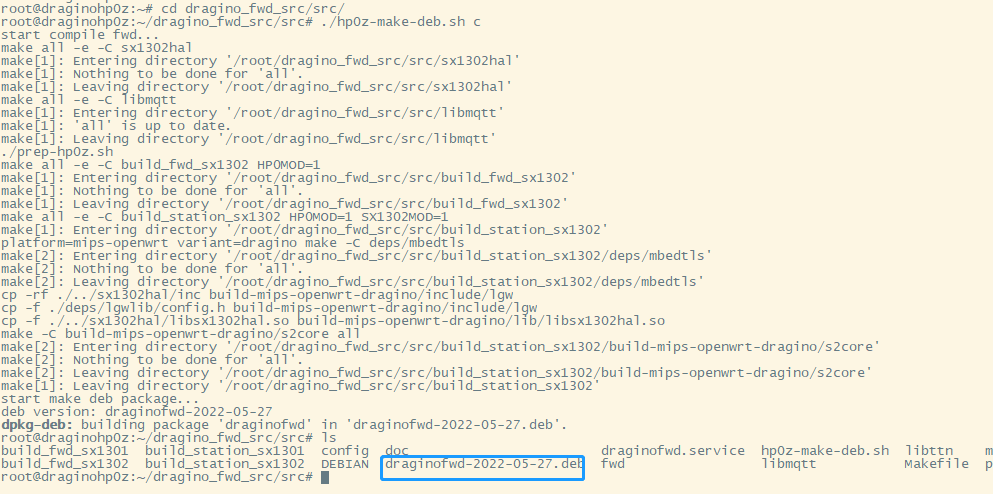
Step 3. Install the dragino_fwd
Run command:
dpkg -i draginofwd-*.deb

Step 4. Test
Check the dragino_fwd log:
journalctl -u draginofwd -f

Start/stop dragino_fwd via systemctl:
systemctl start draginofwd
systemctl stop draginofwd
2.2 How to clone Complete OS on the EMMC to SD card
2.2.1 Prepare a USB flash drive/SD card and plug it into the USB port of the gateway.
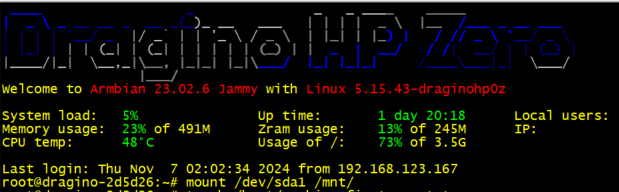
2.2.2 Mounting a USB Flash Drive/SD Card in the Linux CLI
mount /dev/sda1 /mnt/
2.2.3 Using the dd command, copy Emmc as an img file
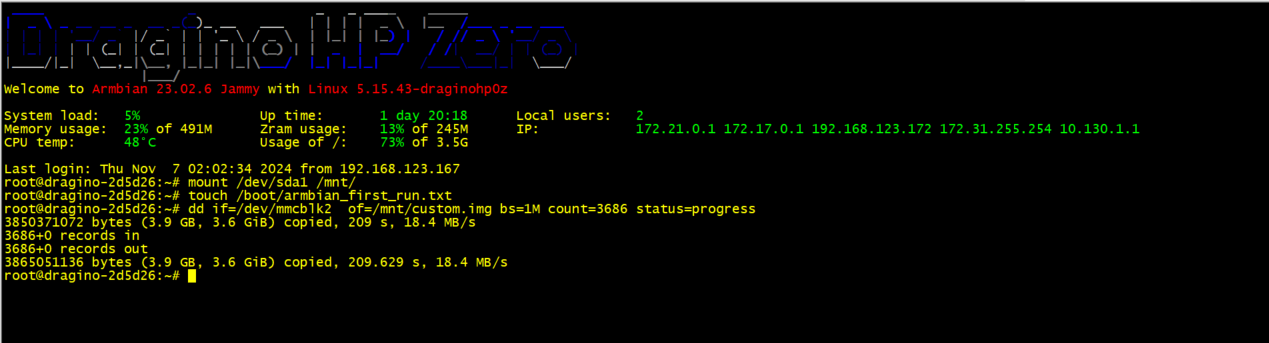
dd if=/dev/mmcblk2 of=/mnt/custom.img bs=1M count=3686 status=progress
2.2.4 Export the img file and follow the steps in 2.3 for burning
2.3 How to flash a new image(OS) to the gateway
Since the gateway has a large system, you need to use the sd card to reflash the system for the gateway
2.3.1: Prepare the SD Card with the New Image
2.3.2: Install the SD card in the gateway(LPS8v2/MS48-LR)
2.3.3: Flash the image to the gateway's built memory from the SD card
Preparations:
- Prepare an SD card
- Prepare a card reader device
- Download the OS image from the release.image: draginolps8v2-release-v1.7
- A Flash software tool ( Such as v1.7.9 from balenaEtcher )
- SD Card format tool
2.3.1 Prepare the SD Card with the New Image
Step 1. Format the SD Card:
Use your formatting tool to prepare the SD card.
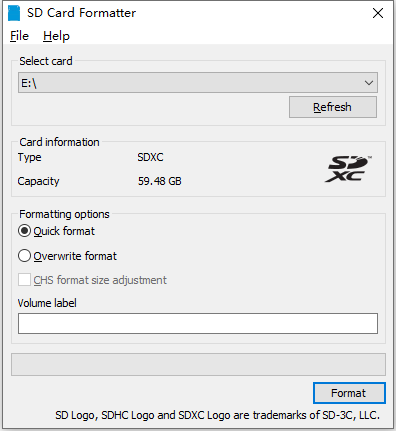
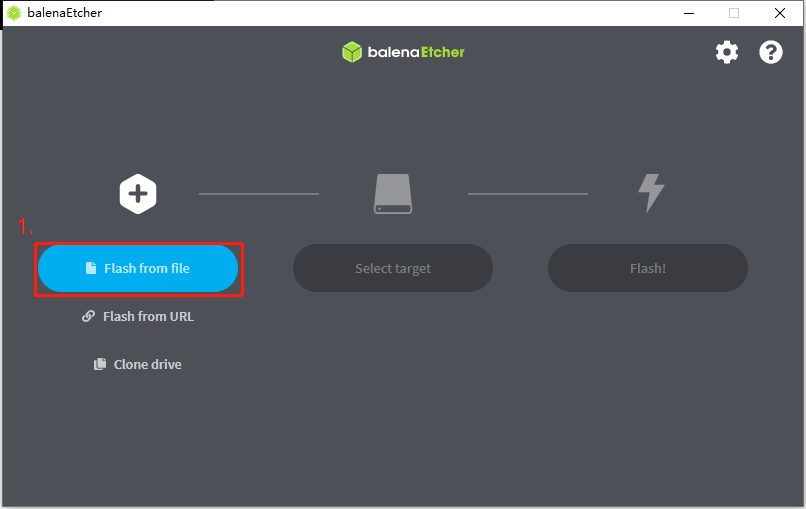
Step 2. Select the OS image
Open your flashing tool (like balenaEtcher) and select the downloaded OS image file.
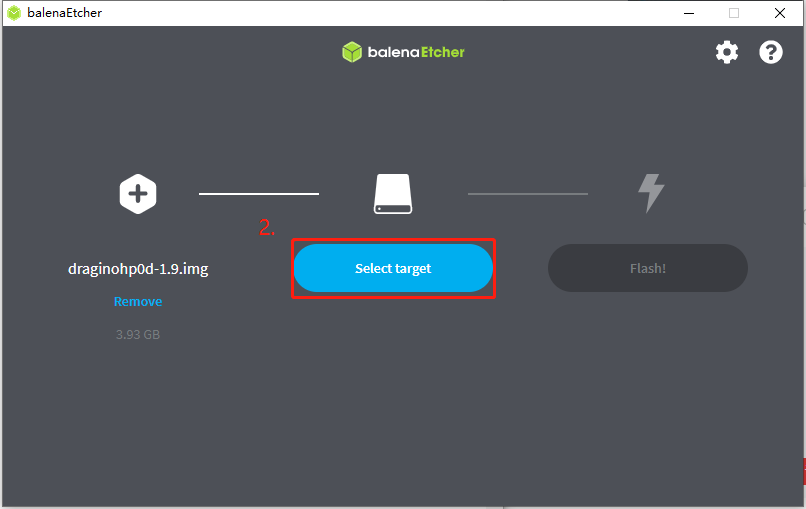
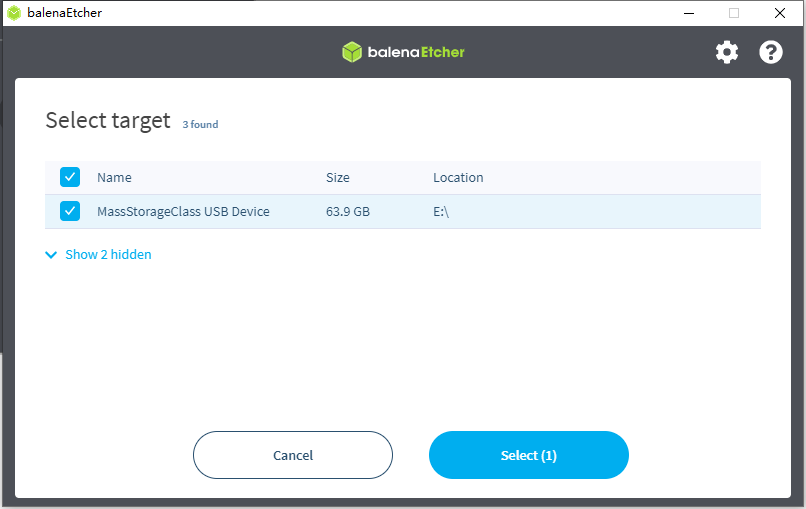
Step 3. Select the target
Choose the SD card as the target drive.
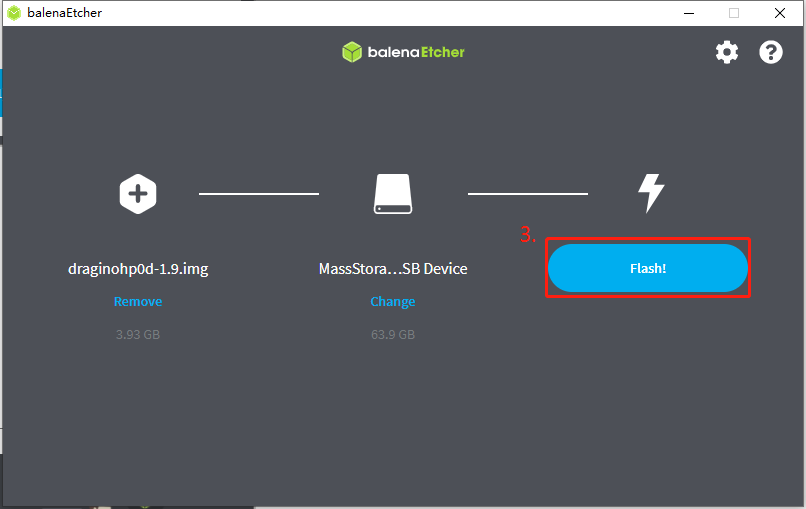
Step 4. Flash start
Begin the flashing process. Wait for it to complete successfully.
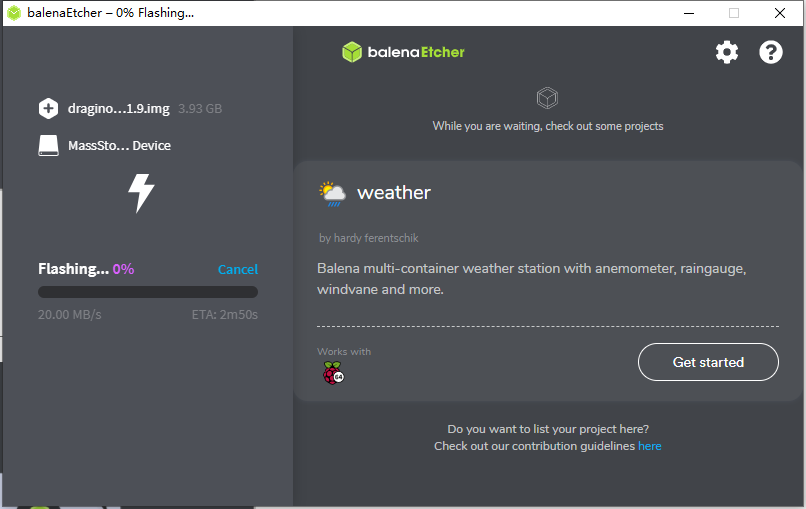
2.3.2 Install the SD card in the gateway
LPS8v2:
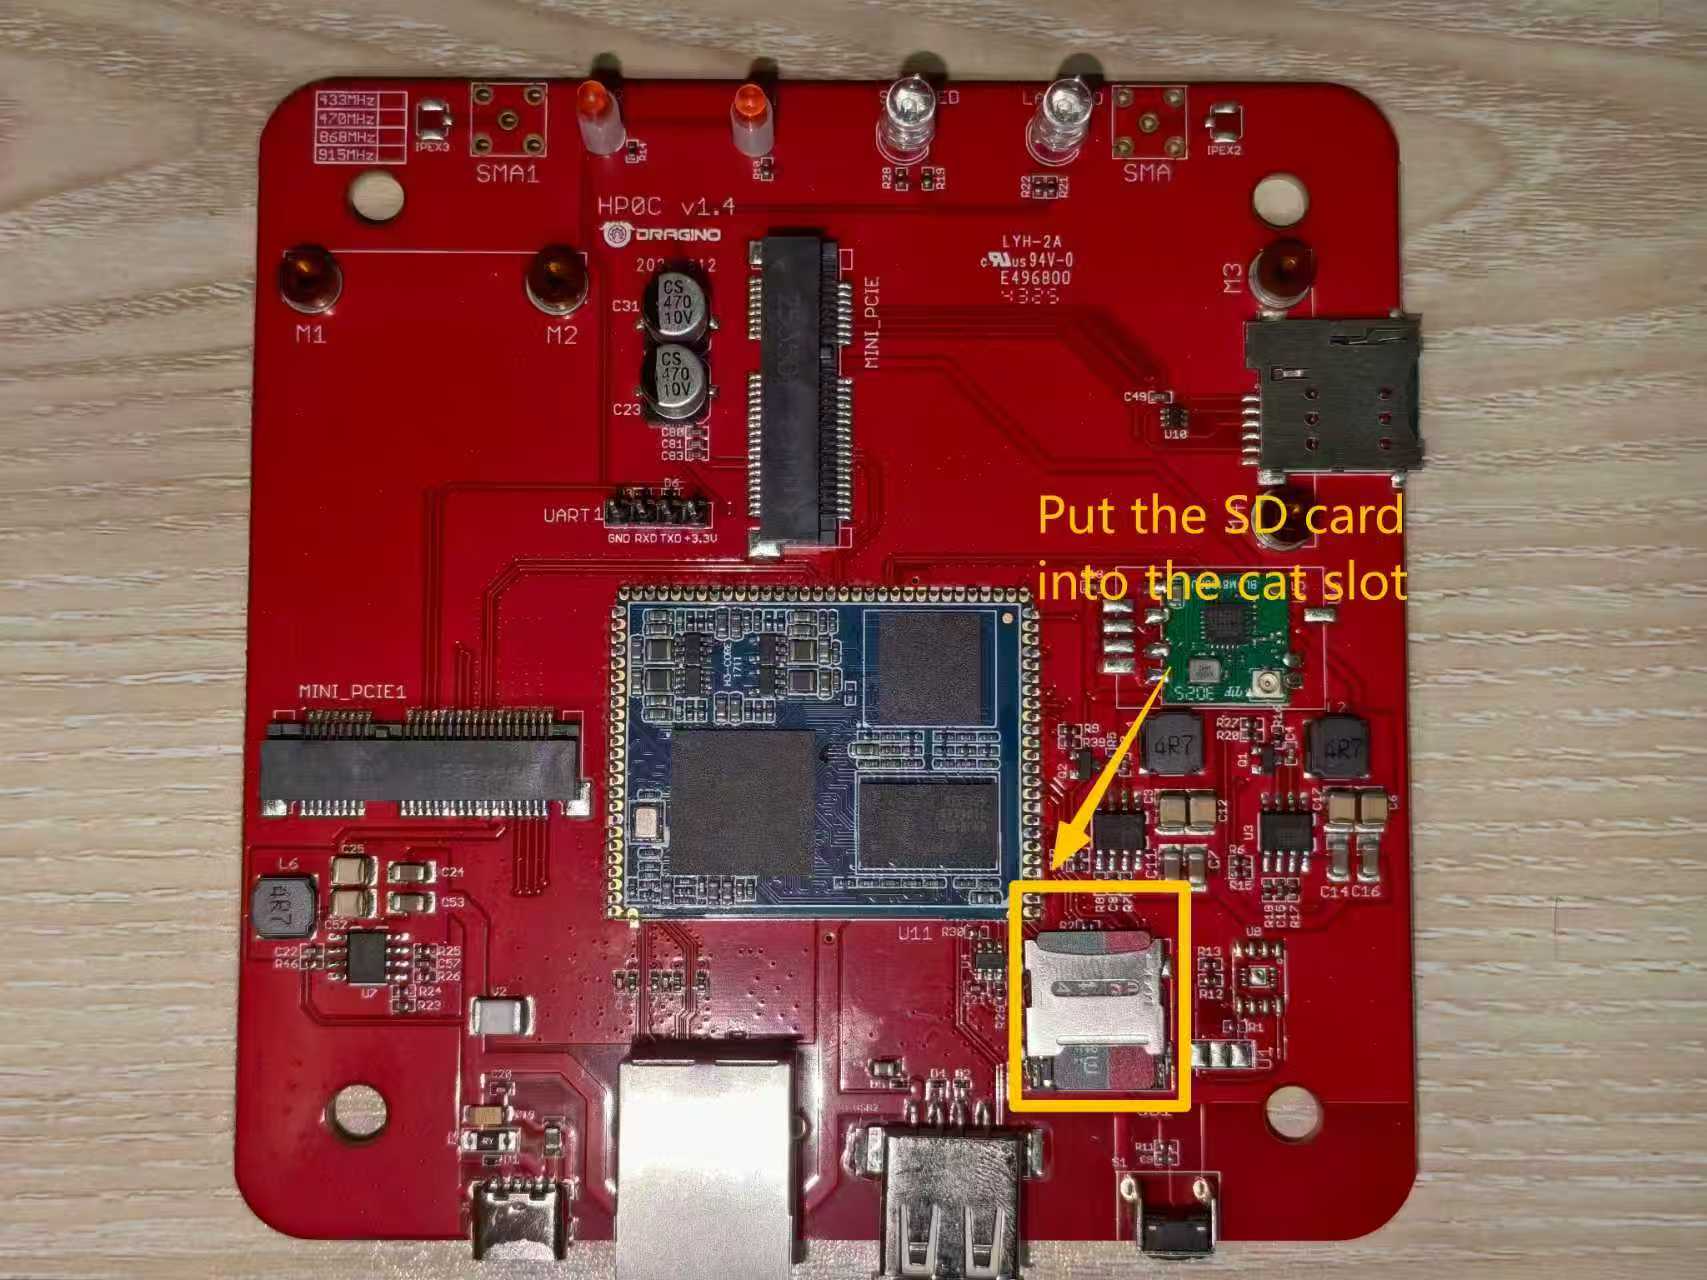
- Power Off: Ensure the gateway is powered off and disconnected from its power supply.
- Insert SD Card: Open the device enclosure and insert the prepared SD card into the dedicated SD card slot.
MS48-LR:
- Power Off: Ensure the gateway is powered off and disconnected from its power supply.
- Insert SD Card: Open the device enclosure and insert the prepared SD card into the dedicated SD card slot.
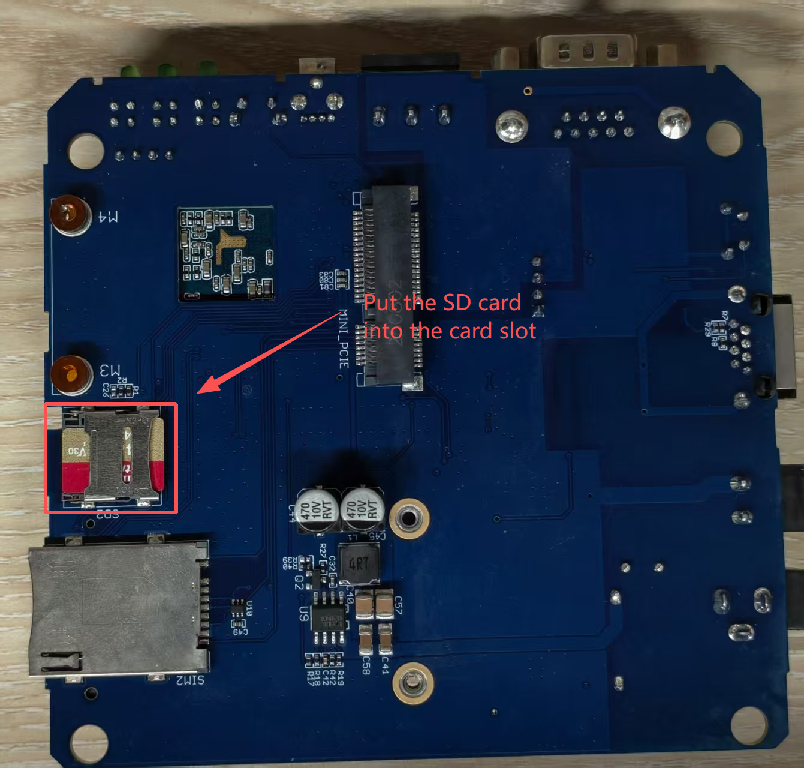
2.3.3 Flash the Gateway
LPS8v2:
- Power On: Connect the power supply (5V/2A) to the gateway. The system will automatically detect the SD card and begin the flashing process.
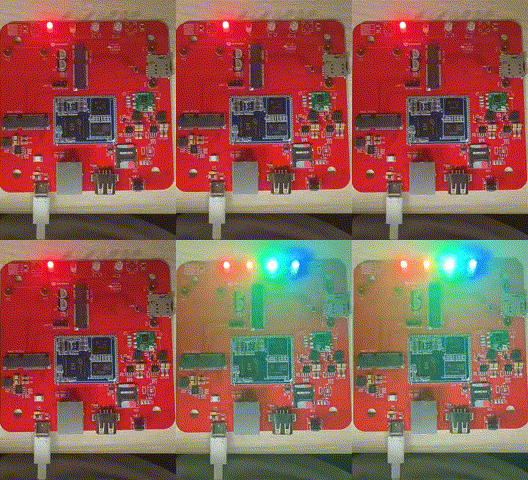
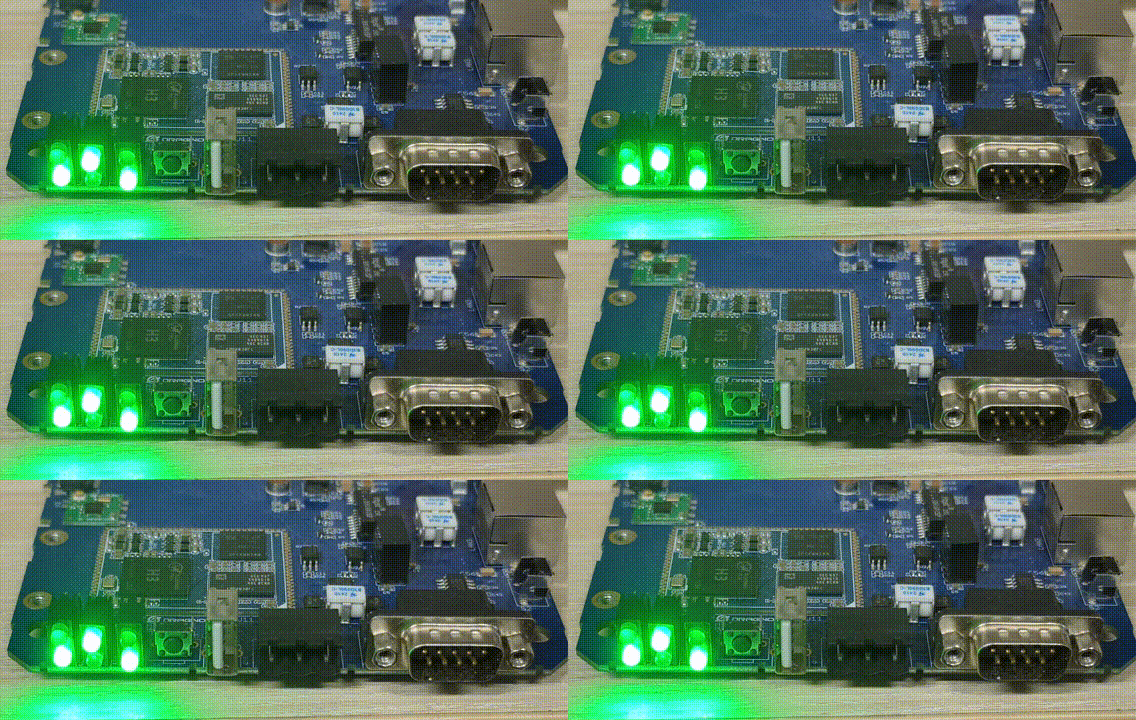
- Observe Indicators: The LED behavior indicates the process status:
-
During Flashing:
- PWR LED: Solid Red
- WiFi LED: Blinking
- LAN LED: Blinking
- SYS LED: Blinking
-
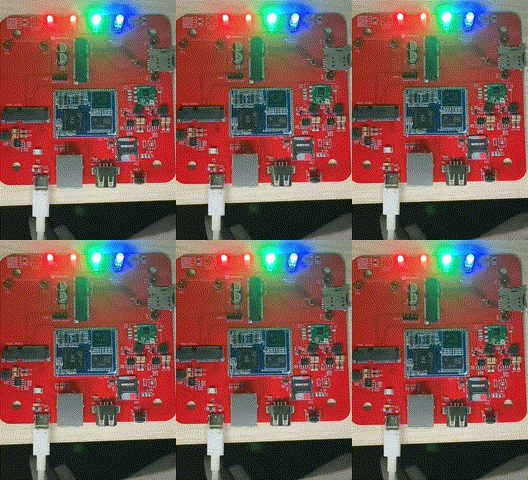
Flashing Complete:
- PWR LED: Solid Red
- WiFi LED: Solid Red
- LAN LED: Solid Green
- SYS LED: Solid Blue
 MS48-LR:
- Power On: Connect the power supply (12V/2A) to the gateway. The system will automatically detect the SD card and begin the flashing process.
- Observe Indicators: The LED behavior indicates the process status:
- During Flashing:
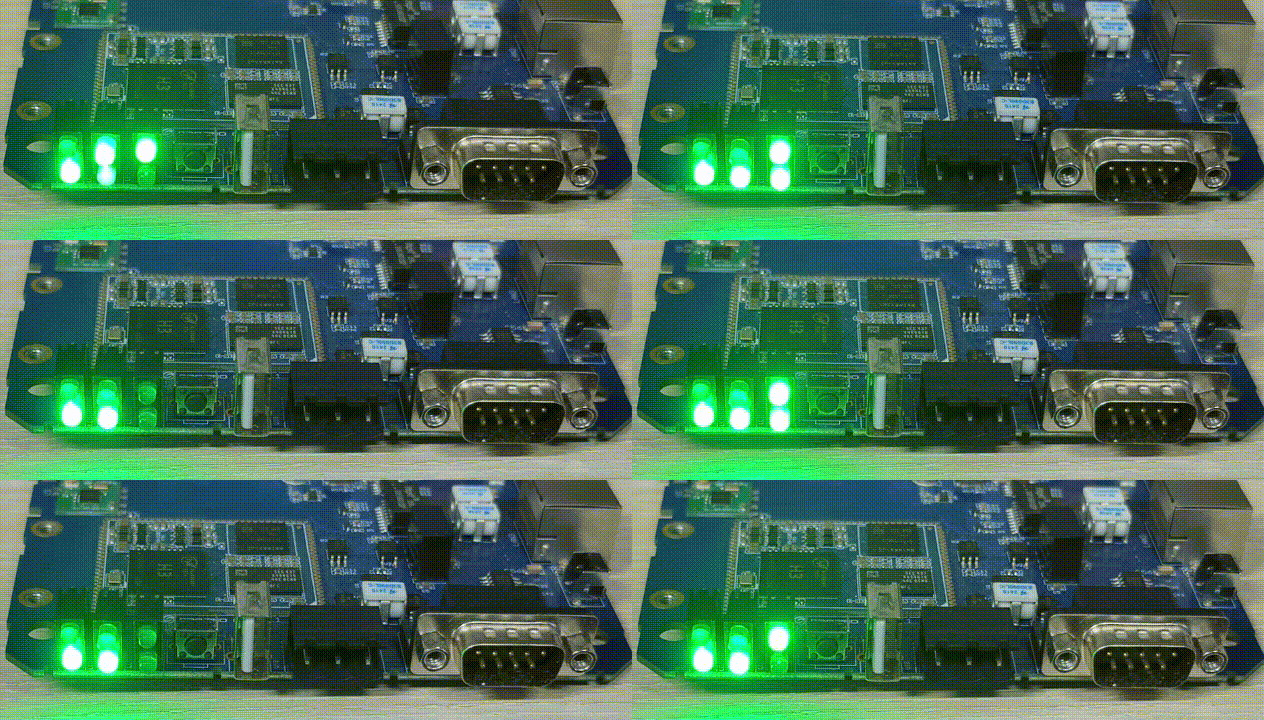
- Flashing Complete:
2.4 How to extend the gateway size of memory with SD card
Users can use the SD card slot to expand the gateway memory size by following the steps below
2.4.1 Install the SD card
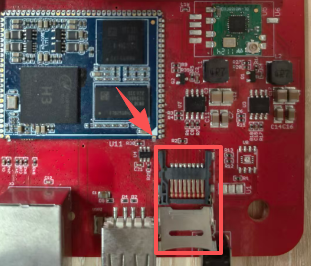
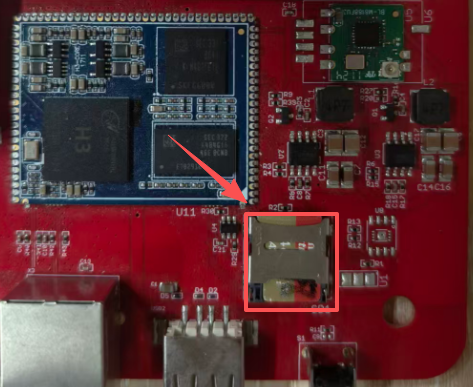
When installing the SD card, the power supply of the gateway needs to be disconnected
2.4.2 View SD card information
After the SD card is installed, access the Linux console of the gateway via SSH and run the following command:
fdisk -l
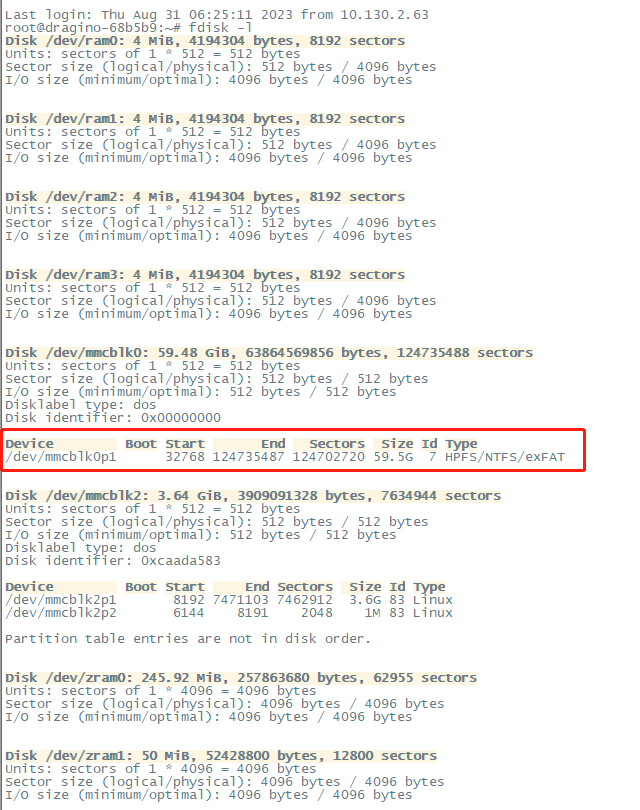
2.4.3 Displays the current file system disk usage statistics on Linux systems
df -h

2.4.4 Mount SD card
mkdir /mnt/sd
mount /dev/mmcblk0p1 /mnt/sd
After the mount is successful to check the file system disk usage on the Linux system again:

If the mount fails, you can format the file system and try the mount again
mkfs.ext4 /dev/mmcblk0p1
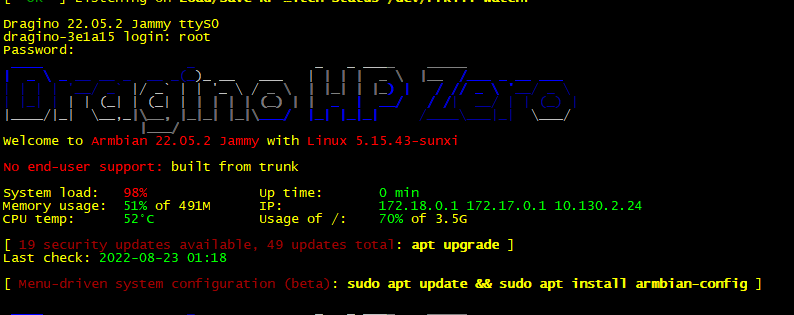
2.5 Default Built Version
2.6 How to upgrade the nodejs version to the latest.
By default, the nodejs uses the pre-install version v12 which is due to Debian the ultra-stable via ultra-old.

If you want to upgrade the nodejs to the latest, please follow to use these commands on the gateway CIL.
#install n, which is an Interactively Manage Your Node.js Versions

npm install -g n
#Install the latest LTS Node.js release (downloading if necessary)
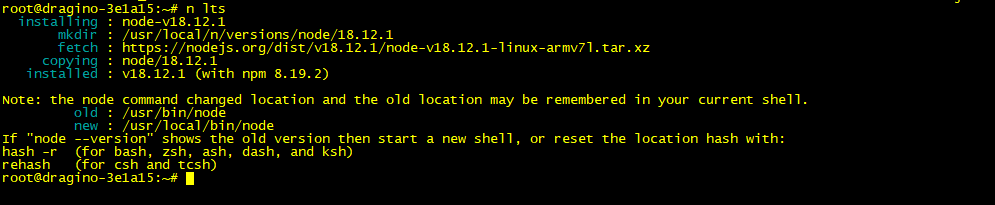
n lts
#Remove all downloaded versions except the installed version

n prune
apt remove nodejs -y && apt autoremove -y && reboot
Check the current version

node -v
2.7 How to install Grafana and influxdb
Grafana:
curl https://packages.grafana.com/gpg.key | gpg --dearmor | sudo tee /usr/share/keyrings/grafana-archive-keyrings.gpg >/dev/null
echo "deb [signed-by=/usr/share/keyrings/grafana-archive-keyrings.gpg] https://packages.grafana.com/oss/deb stable main" | sudo tee /etc/apt/sources.list.d/grafana.list
apt update && apt install grafana
Check the running status:
systemctl status grafana-server
configuration path:
/etc/grafana/grafana.ini
Influxdb:
curl https://repos.influxdata.com/influxdata-archive_compat.key | gpg --dearmor | sudo tee /usr/share/keyrings/influxdb-archive-keyring.gpg >/dev/null
echo "deb [signed-by=/usr/share/keyrings/influxdb-archive-keyring.gpg] https://repos.influxdata.com/debian $(lsb_release -cs) stable" | sudo tee /etc/apt/sources.list.d/influxdb.list
apt update && apt install influxdb
Check the running status:
systemctl status influxdb
configuration path:
/etc/influxdb/influxdb.conf
3. Package Management
3.1 Default Package Maintain System
3.1.1 How Package-Auto-Update works?
By default, LPS8v2 / MS20 series products have an auto-update feature for main packages. The device will connect to Dragino's auto-update server and check for updates.
When devices will check for updates?
- Devices will check for updates for every boot.
- Devices will check for updates on every day midnight.
What packages will be checked for updates?
dragino-httpd -- Main Web UI http configuration
dragino-sid -- SN write and read tool
dragino-ui -- Gateway Web UI package
draginofwd -- UDP packet forwarder, LoRa Base Station
draginoups -- Miscellaneous between different versions
Location and changelog for packages:
- Location: http://repo.dragino.com/release/tool/
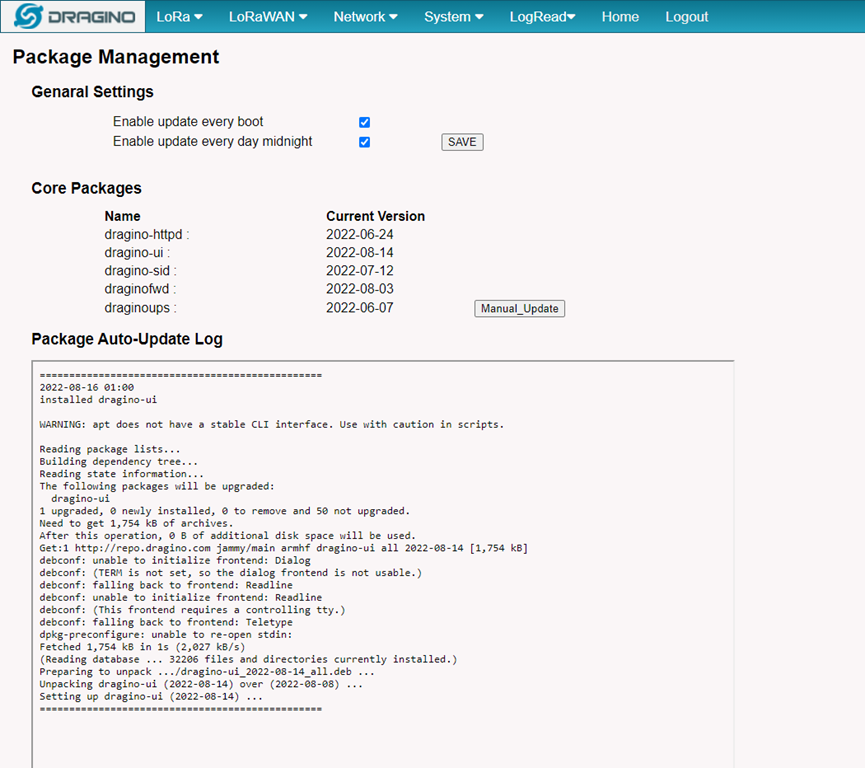
How to view auto-updated log
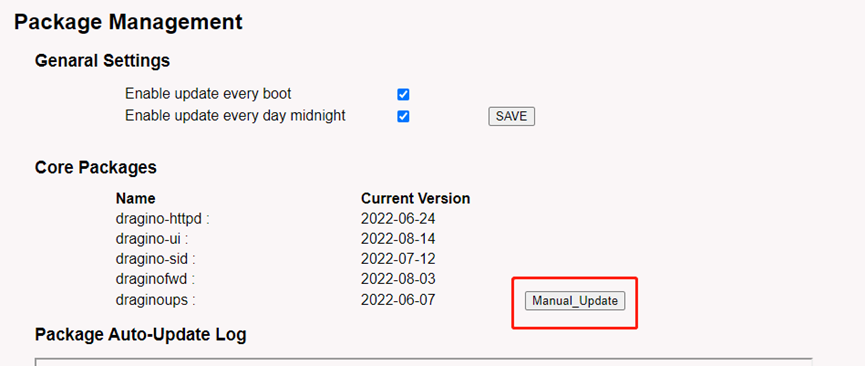
You can view the log on the page of System --> Package Management.
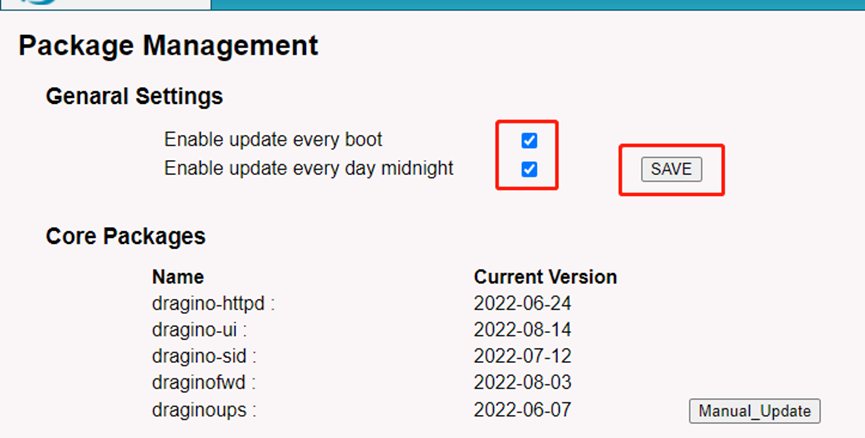
Can I disable package-auto-update?
You can check the checkbox and click the ‘SAVE’ button to enable or disable the auto-update.
3.1.2 How to manually update core packages?
You can click the ‘Manual Update’ to update the dragino's packages.
3.1.3 How to manually update other packages?
For the other packages, you have to access the device's CLI to do it via the apt command.
Example:
dpkg -i draginofwd-*.deb
3.2 Set up a 3rd party package maintain server
3.2.1 Overview
Customers can use their own package maintenance system instead of using the default one from Dragino. They need to set up a package maintenance system for Debian. Lots of instructions are available in Internet, below is a reference instruction.
3.2.2 Install Apache2 HTTP server
apt install apache2
3.2.3 Creating Package Directories
cd /var/www/html/
mkdir debian/release/dists/stable/main/binary-armhf/ -p
mkdir debian/release/pool/main/d/dragino/ -p
Tree Structure:
Note: If you are not familiar with updating servers, most directory names are not recommended to be changed.
└── debian
    └── release
        ├── dists
        │   └── stable
        │       └── main
        │           └── binary-armhf
        └── pool
            └── main
                └── d
                    └── dragino   -->  This is the directory to store the packages. User can change it to other name.
3.2.4 Get deb packages
The deb packages for auto-update can be placed in /var/www/html/debian/release/pool/main/d/dragino/
Below is an example package(testing-0808.deb) for test purpose:
wget http://repo.dragino.com/release/tool/unimportant/testing-0808.deb
cp ./testing-0808.deb /var/www/html/debian/release/pool/main/d/dragino/
3.2.5 Generate Package Index file
cd /var/www/html/debian/release/
dpkg-scanpackages pool/ > dists/stable/main/binary-armhf/Packages
cat dists/stable/main/binary-armhf/Packages | gzip -9 > dists/stable/main/binary-armhf/Packages.gz
Note: Every time a package has been update, above comments need to be executed in the server to get the up-to-date package list.
3.2.6 Generate Release file
Create the generated script:
cd /var/www/html/debian/release/dists/stable
wget http://repo.dragino.com/release/tool/unimportant/generate-release.sh
chmod + x ./generate-release.sh
./generate-release.sh > Release
3.2.7 Sign the Release file with gpg and generating Inrelease file
Make sure auto-update server has gnupg
apt install gnupg
generate gpg key
gpg -gen-key
Note: Fill in the content as required and remember the name and email address.
Check the gen-key
gen -list-key
Generate the release.gpg
cd /var/www/html/debian/release/dists/stable
gpg --armor --detach-sign -o Release.gpg Release
gpg --clearsign -o InRelease Release
Generate the public key
gpg --armor --output <name>.asc --export <email address>
# example:
gpg --armor --output xiao.asc --export xiaoye@dragino.cc
3.2.8 Add url as apt source in LPS8v2 / MS20
Add the public key
cp xiao.asc /etc/apt/trusted.gpg.d/
Note: First need to transfer the public key from auto-update server to device.
Add the apt source list
Add the apt source list url and name this as test_server.list
echo "deb http://<IP_address or hostname>/debian/release stable main" | tee /etc/apt/sources.list.d/test_server.list
Validate the apt repository
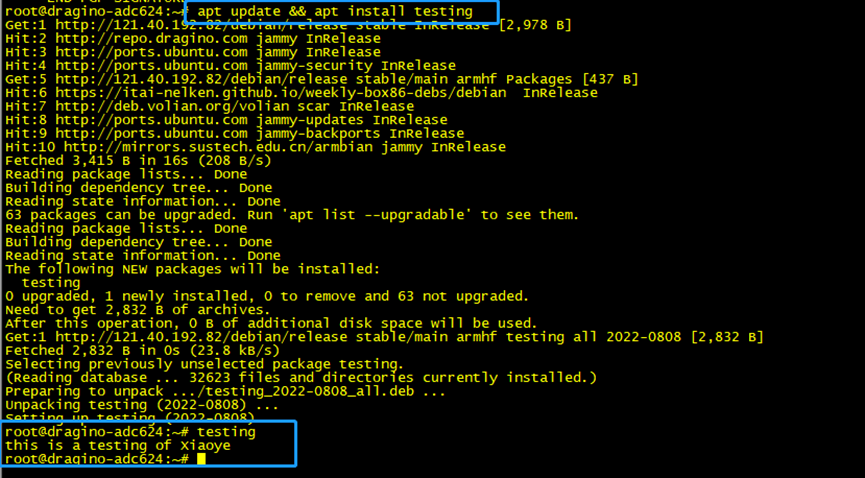
Get and install the testing package (download testing-0808.deb and test)
apt update && apt install testing
Example output:
3.2.9 Configure the gateway's auto-upgrade rules
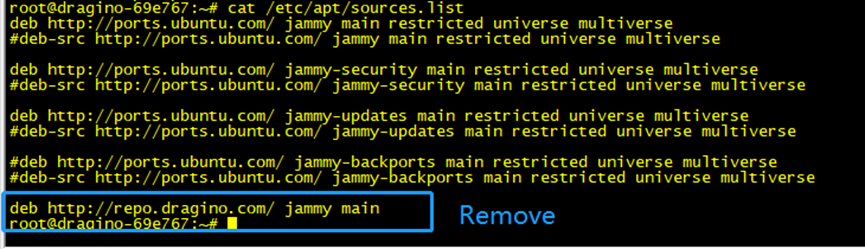
Remove dragino apt source
/etc/apt/sources.list
Set up automatic updates
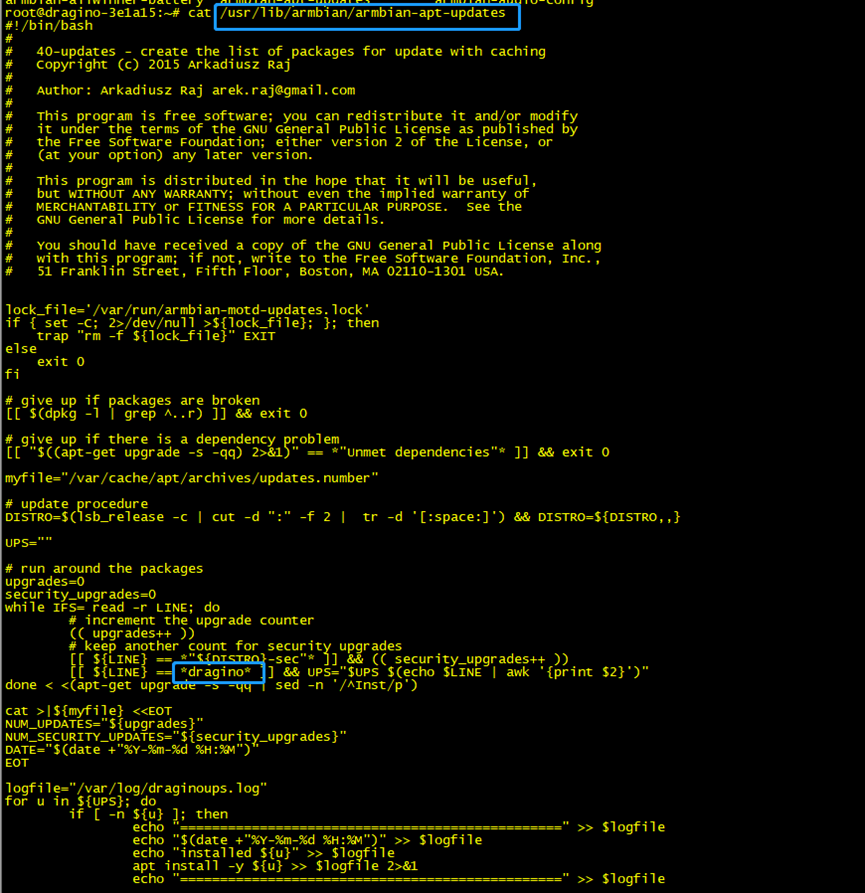
Path : /usr/lib/dragino/dragino-apt-updates
The device performs automatic updates from this script,
But it will now only look for dragino as a keyword, so you need to replace the keyword dragino with your own keyword.