Chirp Wireless
Introduction
Chirp is an AI-first IoT platform for the consumer (B2C) segment. It connects sensors and devices from different manufacturers into one system — with dashboards, automations, alarms, an AI assistant, and mobile notifications — and it includes a built-in LoRaWAN Network Server (LNS). Your Dragino gateway connects directly to the platform: there is no separate network server to install or pay for, and no middleware in between.
Setting up LoRaWAN on Chirp is designed to be effortless and to scale with you: you roll out your LoRaWAN server with one click, register your Dragino gateway against it, and add Dragino sensors from Chirp's built-in device template library — the LoRaWAN class, frequency band, and payload decoder are filled in for you.
App: app.chirpwireless.io · Documentation: docs.chirpwireless.io
This page shows how to activate the LoRaWAN network server, connect a Dragino gateway, and add a Dragino sensor.
Supported Dragino gateways
Any Dragino LoRaWAN gateway that supports the LoRa Basics Station protocol works with Chirp, including the LIG16, LPS8N, LPS8v2, LG308N, and DLOS8N. The legacy UDP packet forwarder is not supported — Chirp gateways connect over encrypted TLS/WSS via Basics Station.
Prerequisites:
- A Dragino gateway with a working internet connection
- The Gateway EUI — printed on the device sticker and shown in the gateway's web UI
- A Chirp account (app.chirpwireless.io)
Step 1 — Roll out your LoRaWAN server (one click)
Chirp uses connectors to link device protocols to your home. Deploying a complete LoRaWAN Network Server takes a single click:
- Click Connectors in the sidebar.
- Click Add connector.
- Select LNS from the Connector type dropdown and click Add.
That's it — your LNS is live. Chirp's built-in LoRaWAN network server activates for your home automatically and handles everything behind the scenes: device authentication (join requests), data reception, message deduplication, and delivery.
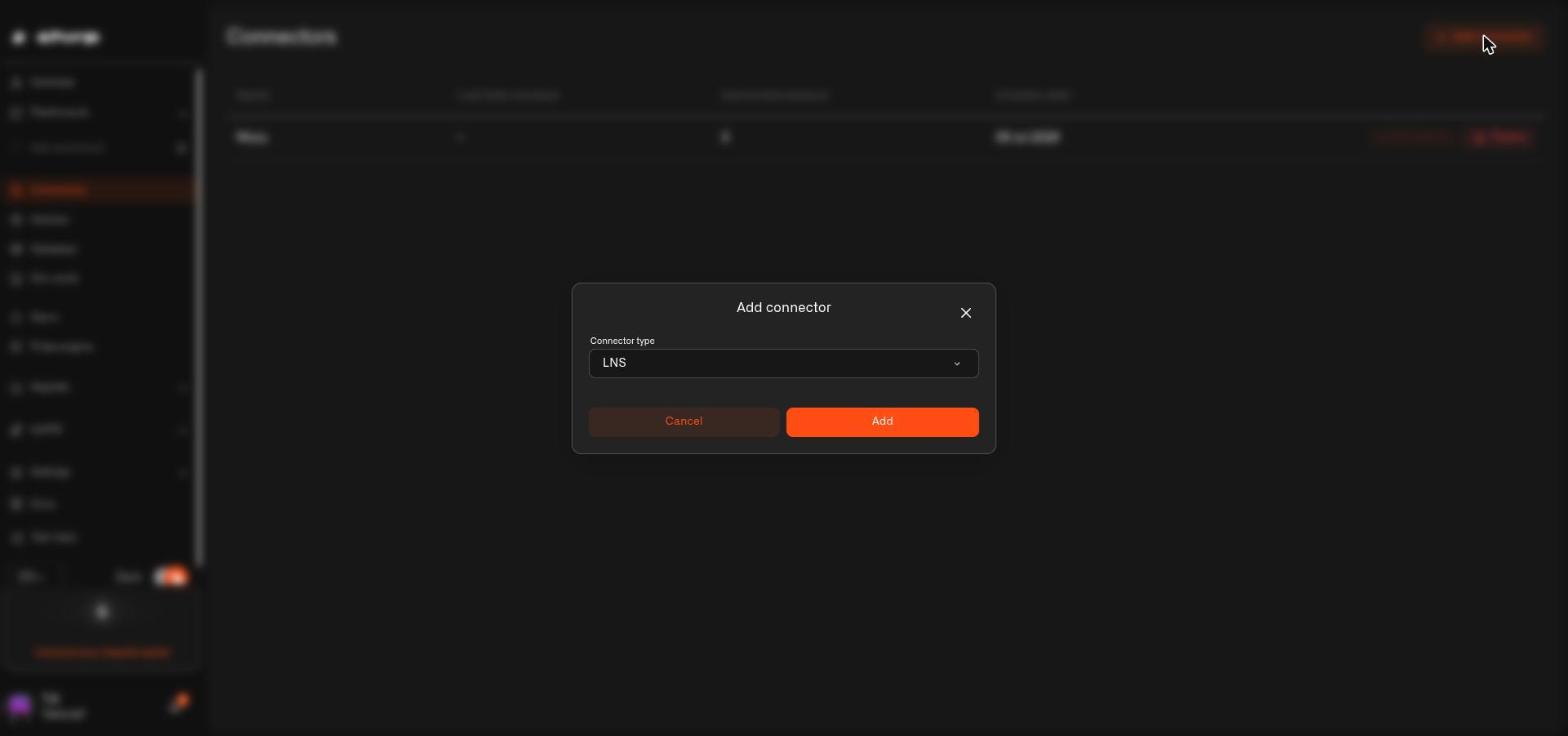 Add connector — select LNS.
The new connector appears in the list with two tabs — LoRaWAN Gateways and Connected Devices — where your gateways and sensors will show up.
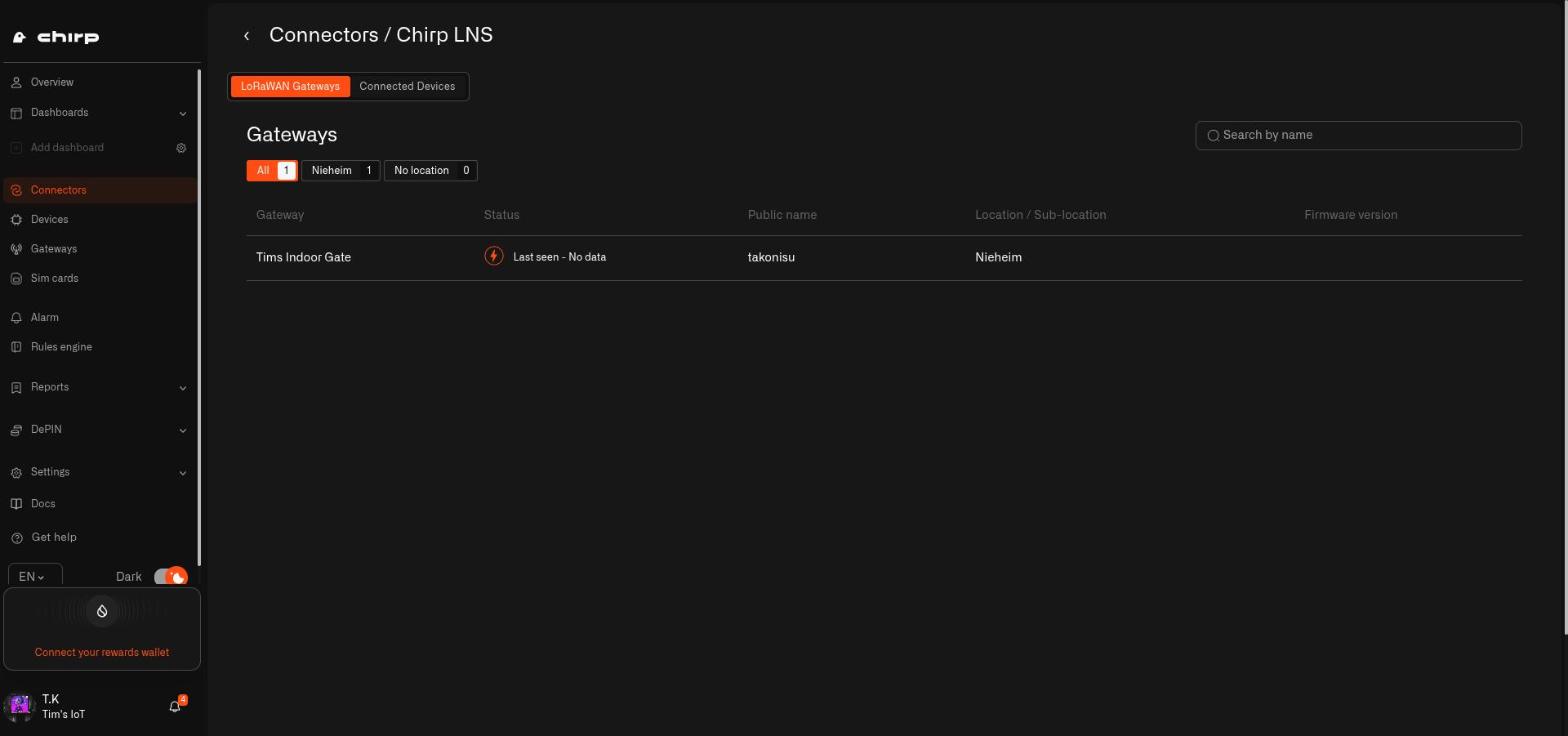 The Chirp LNS connector with its LoRaWAN Gateways and Connected Devices tabs.
Step 2 — Register your Dragino gateway
- Click Gateways in the sidebar and click Add gateway.
- Choose 3rd Party Gateway (any 3rd-party LoRaWAN gateway that supports LoRa Basics Station).
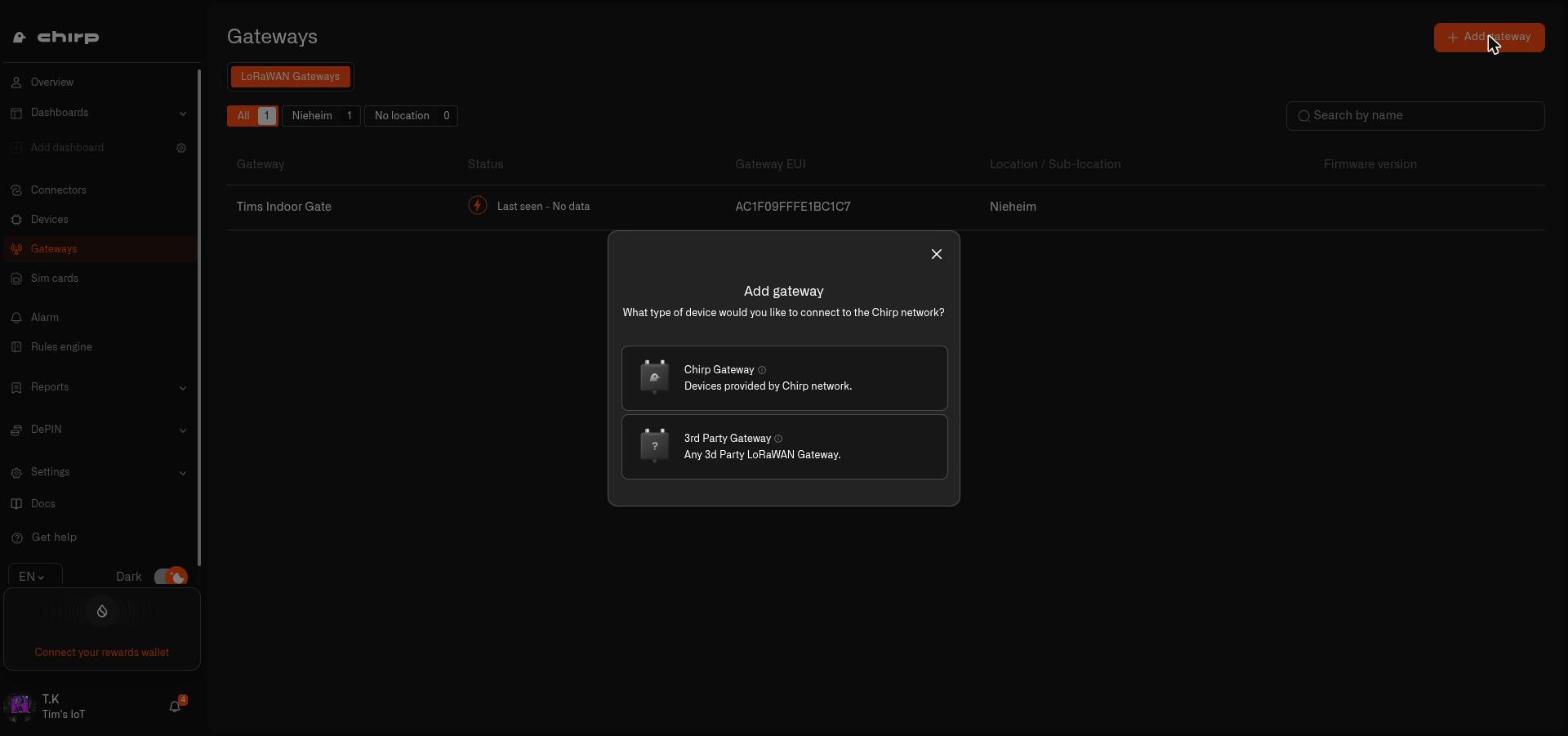 Add gateway — choose 3rd Party Gateway
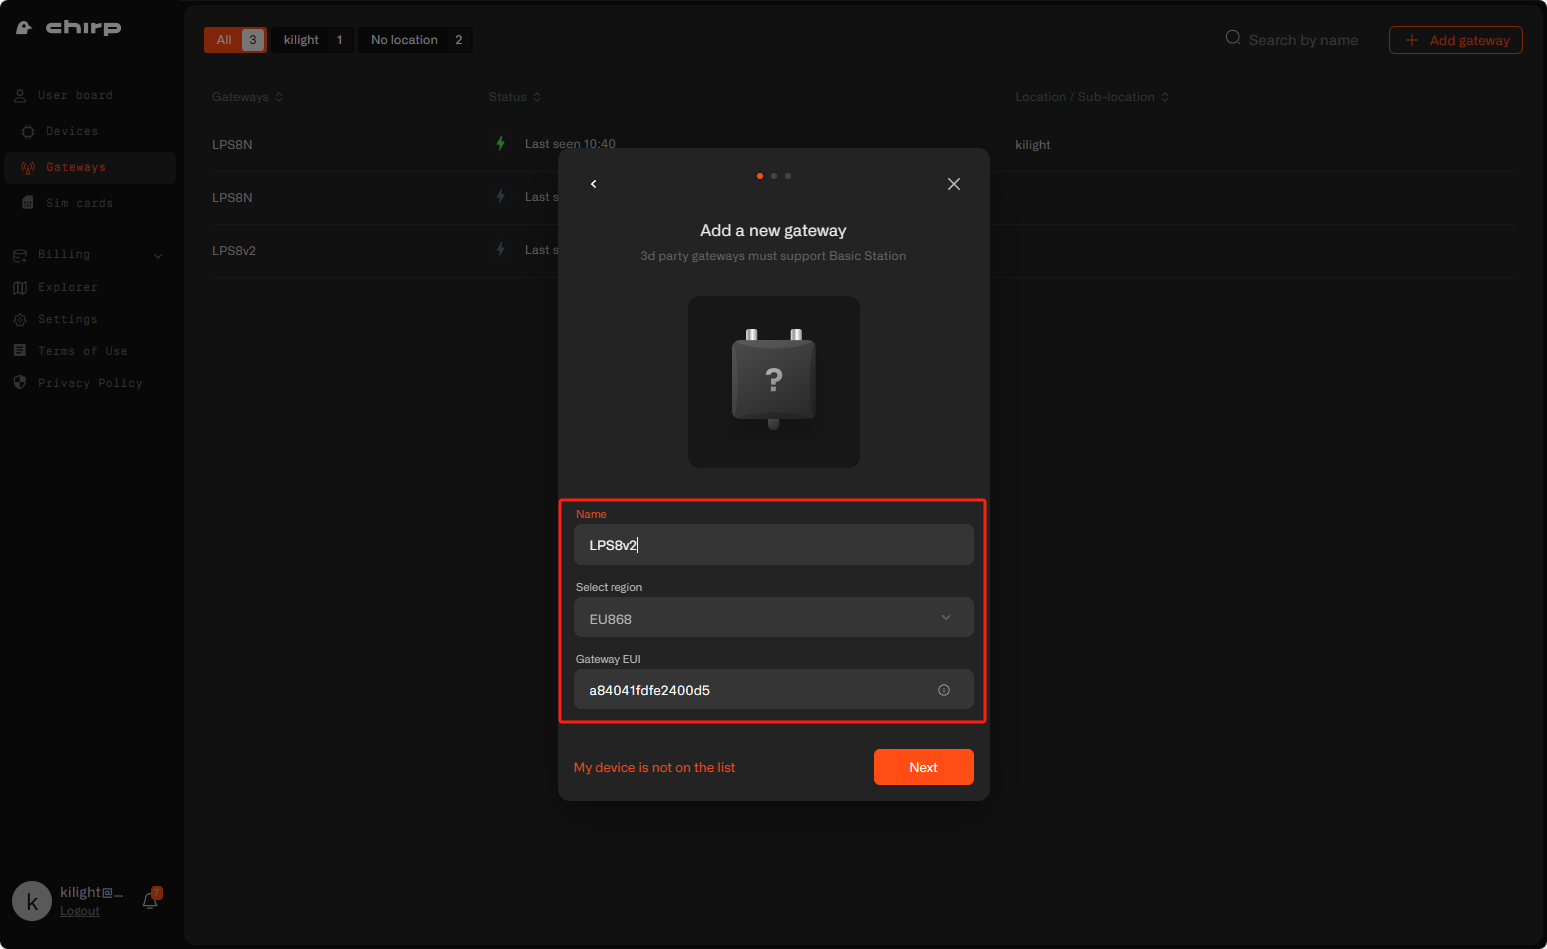
- Enter a Name for your gateway.
- Select your Region from the dropdown — it must match the frequency band your Dragino gateway hardware is built for:
| Region | Typical selection |
|---|---|
| EU868 | Most deployments in Europe |
| US915-0 / US915-1 | United States; select the variant that matches your network plan |
| AU915-0 | Australia |
| AS923 / AS923-2 | Asia-Pacific deployments where these bands are used |
| IN865 | India |
| KR920 | South Korea |
| RU864 | Russia |
| EU433 | Special-case 433 MHz deployments only |
- Enter your Gateway EUI — the 16-character identifier from the device sticker or the gateway's web UI.
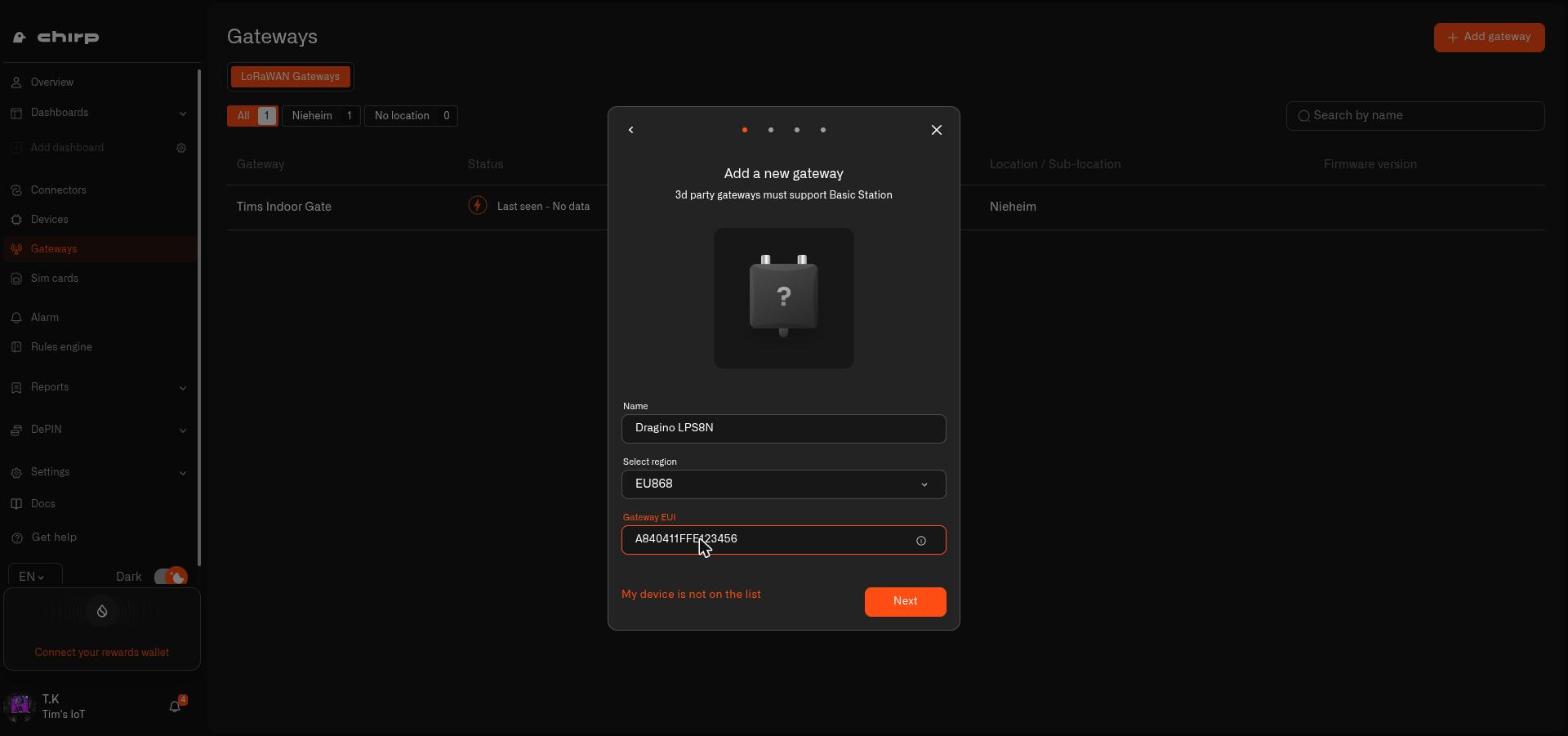 Add a new gateway — name, region, Gateway EUI.
You can find the Gateway EUI in the Dragino web UI under LoRaWAN — Basic Station:
 Gateway EUI in the Dragino web UI.
- Click Next.
Step 3 — Save the LNS Address and certificates
After registering, Chirp shows a confirmation screen with the two things your Dragino gateway needs:
- The LNS Address — click the copy icon to save it (for EU868 it looks like wss://lora-eu868.cloud.chirpwireless.io:443).
- The certs.zip certificate bundle — click the download icon. These TLS certificates authenticate your gateway's Basics Station connection.
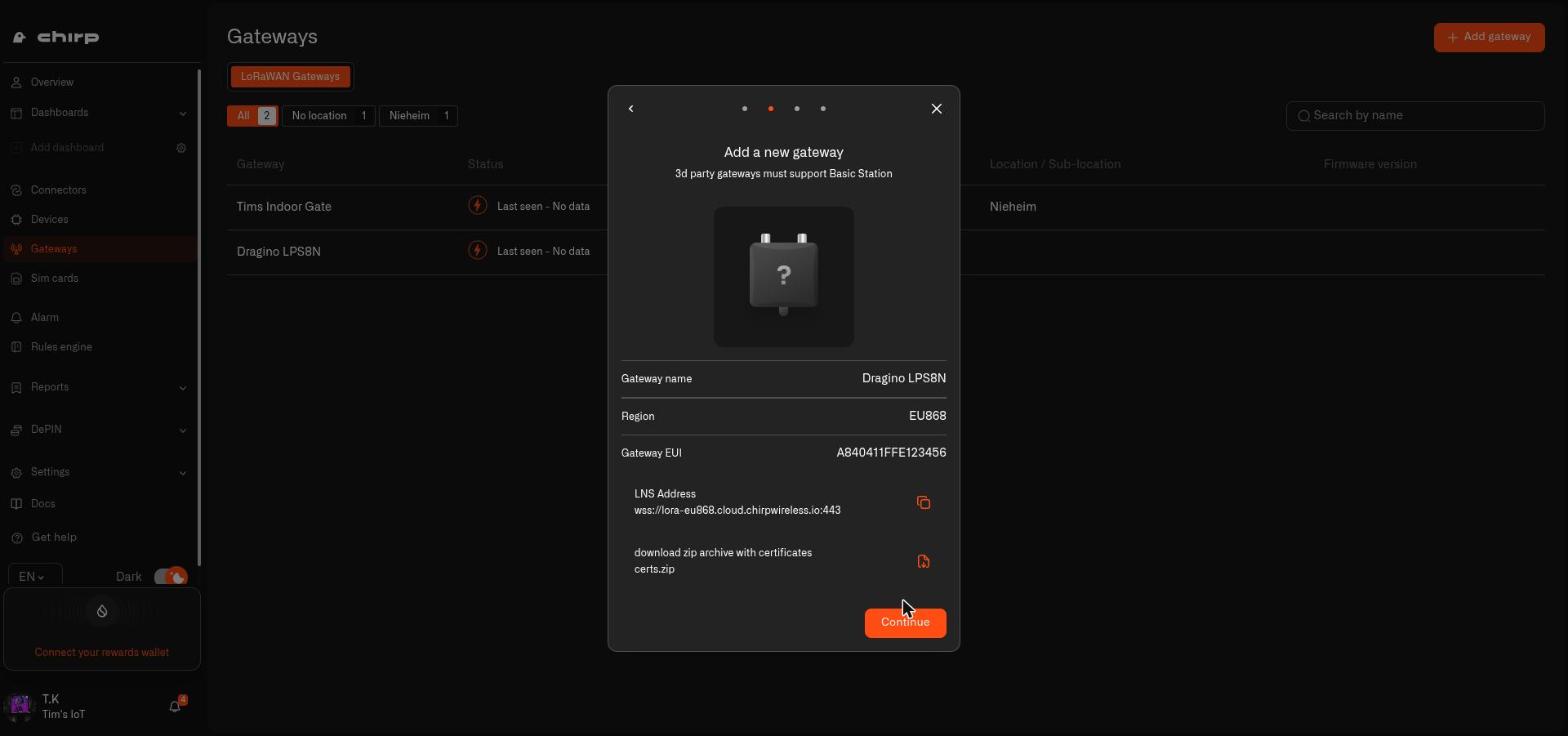 LNS Address and certs.zip download.
Click Continue to finish registration.
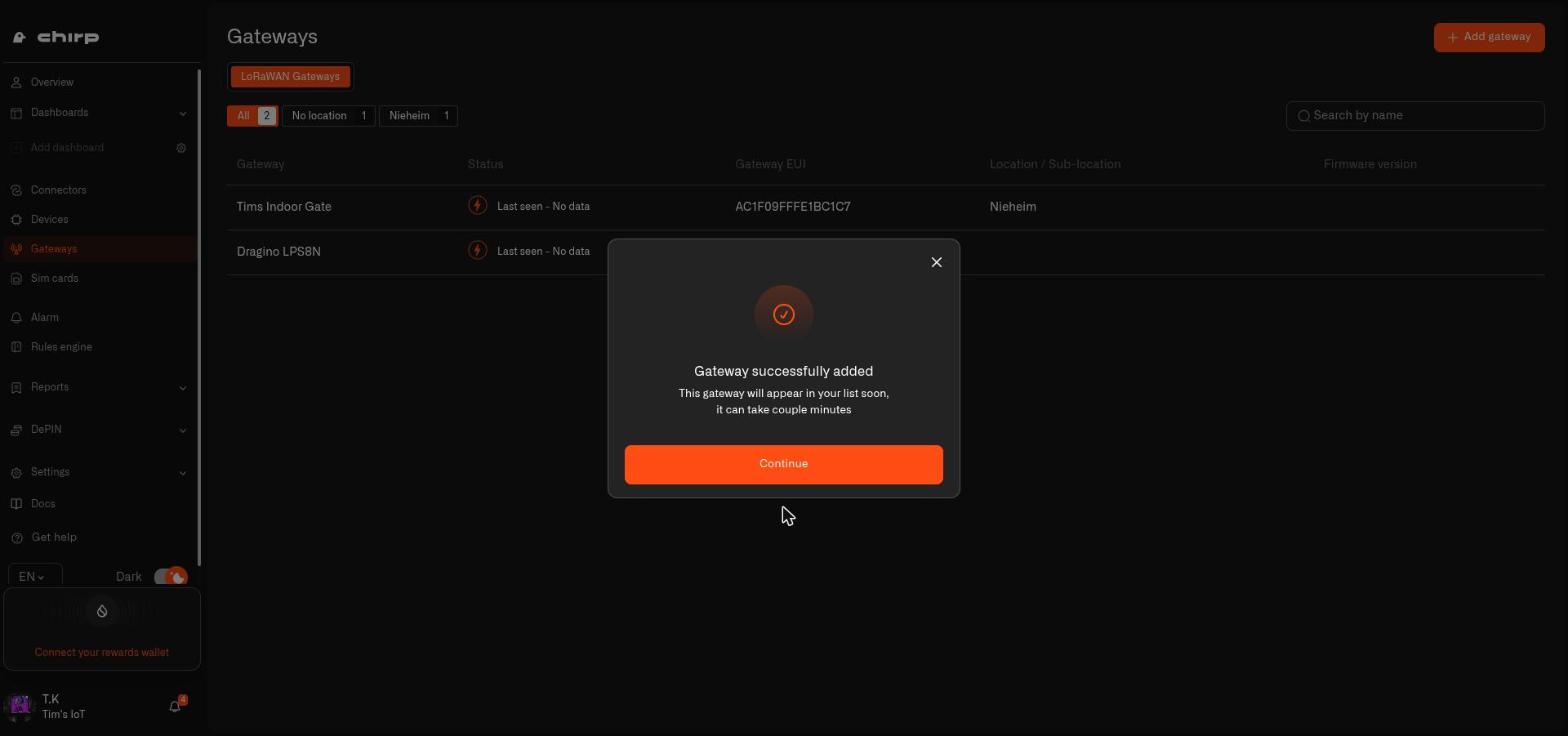 Gateway successfully added.
Skipped this screen? You can retrieve the LNS Address and regenerate the certificates any time from the gateway's Settings tab.
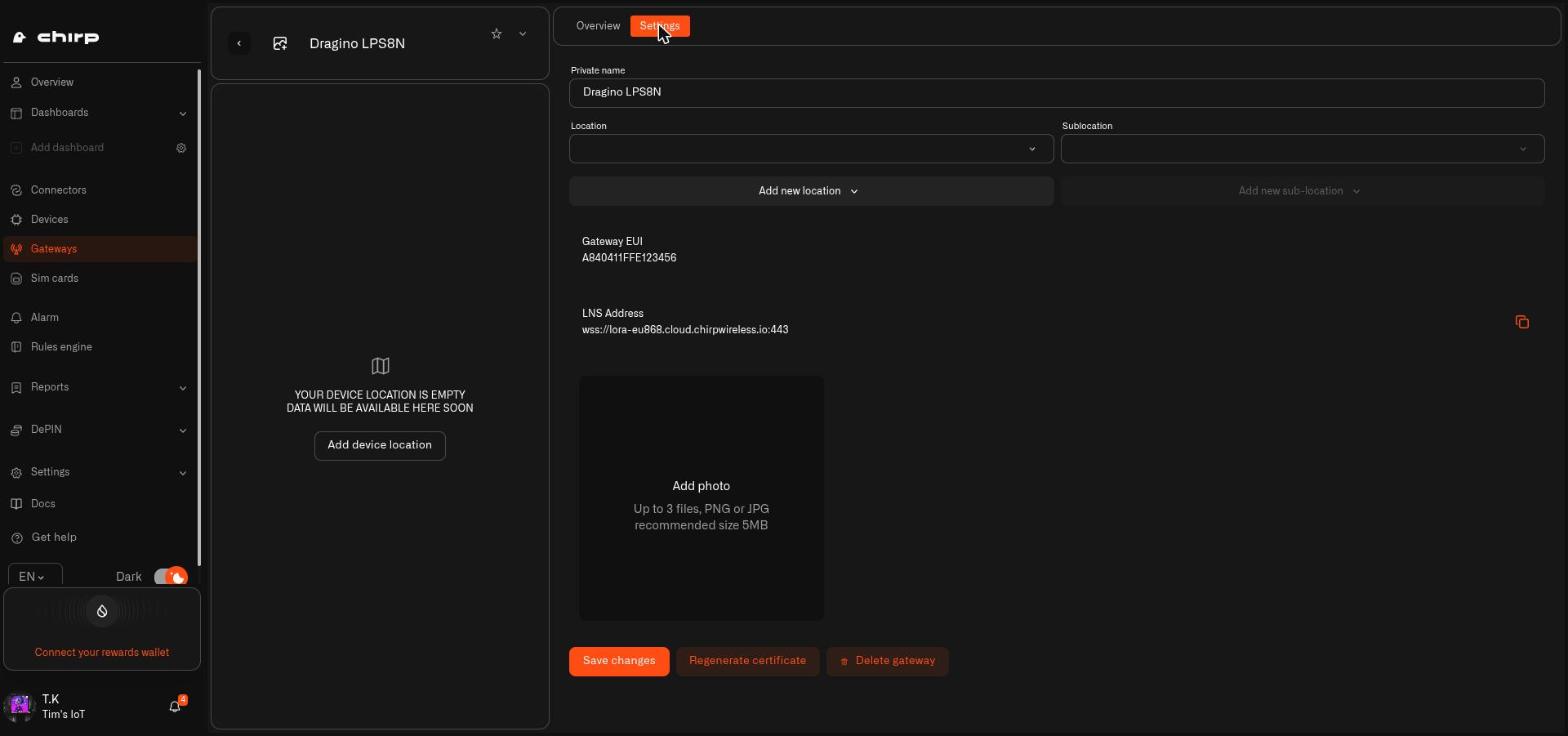 The gateway Settings tab with LNS Address and certificate regeneration.
Step 4 — Configure the Dragino gateway
- Open the Dragino gateway's web UI and go to LoRa → LoRaWAN — Basic Station.
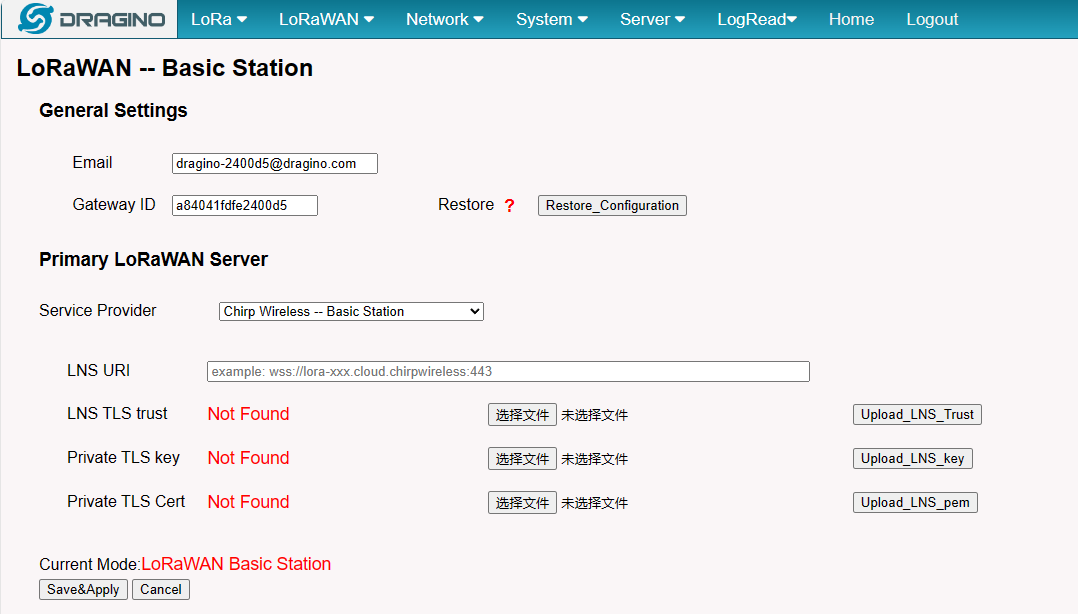 Dragino web UI — Basic Station configuration.
-
Select LNS Server mode and paste the LNS Address you copied into the LNS URI field.
-
Upload the certificate files extracted from certs.zip — trust certificate (tc.trust), client key (tc.key), and client certificate (tc.crt) — into the corresponding fields.
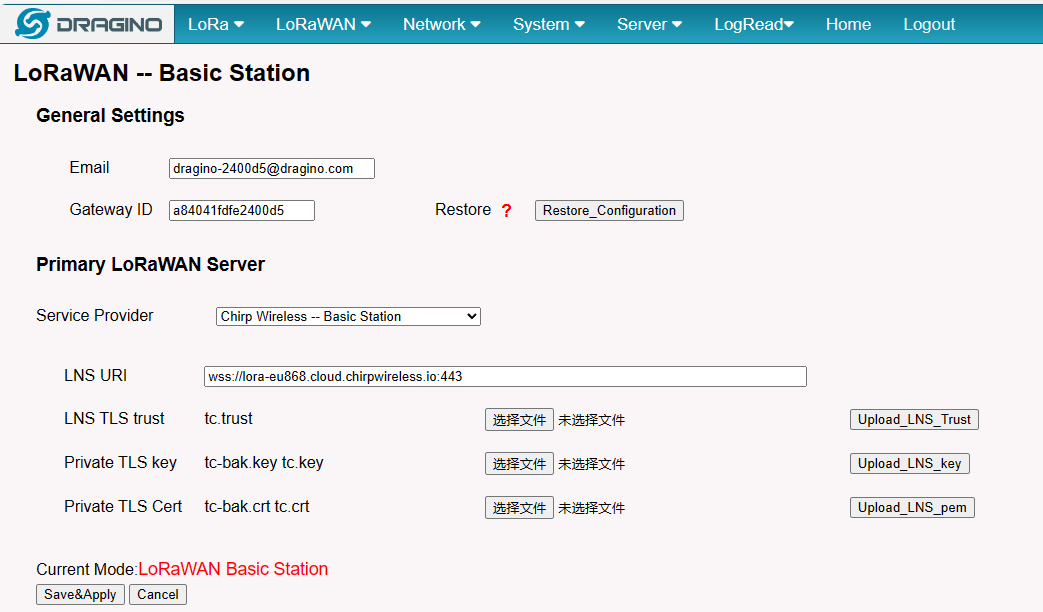 Dragino web UI — LNS URI and certificate fields.
- Click Save&Apply. The gateway reconnects and establishes the Basics Station connection.
Step 5 — Verify the connection
Within a few minutes your gateway shows online in Chirp — in the Gateways list and under your LNS connector's LoRaWAN Gateways tab.
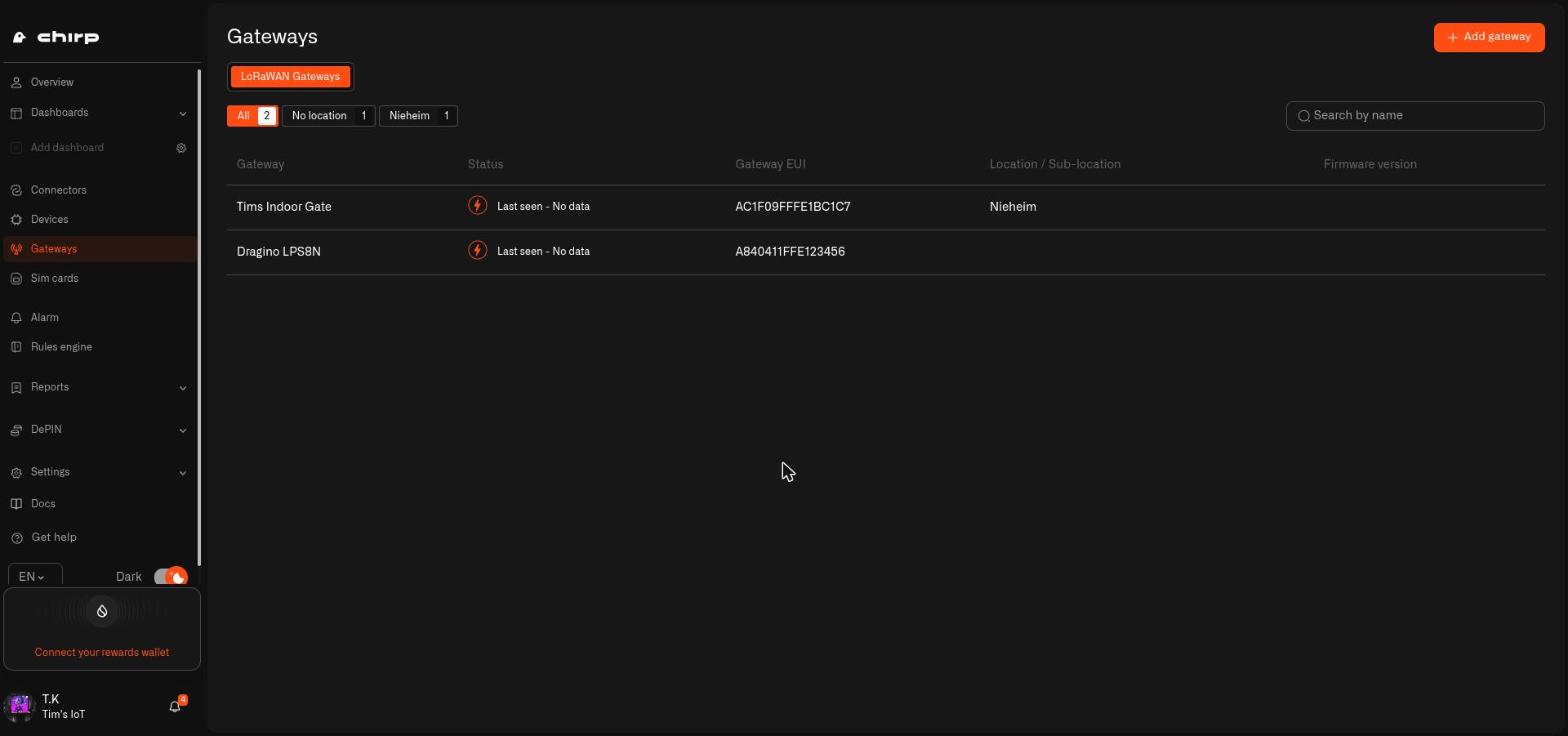 The Dragino gateway online in the Gateways list.
If it doesn't come online: re-check the LNS Address for typos, confirm the certificates were uploaded to the right fields, make sure the gateway has internet access, and verify the firmware supports Basics Station.
Step 6 — Add a Dragino sensor
Adding a Dragino sensor takes a few minutes, because Chirp ships device profile templates for Dragino devices — pick the model and the LoRaWAN class, frequency band, and payload decoder are filled in automatically. You'll need the sensor's Device EUI and AppKey from the device label.
- Click Devices in the sidebar and click Add device. Give the device a name (and optionally a photo), then open the Connection tab.
- Select your LNS connection from the Connector type dropdown.
- Enter the Device EUI from the sensor's label.
- Check Use device profile templates and pick your sensor — for example Brand: Dragino, Model: LDS02 (the LDS02 door sensor), and the Profile for your region's band. The template fills in the class, band, and decoder (Code functions) for you.
- Enter the AppKey from the label.
- Set the Data sending interval to match how often your sensor actually transmits (set on the device itself). Chirp uses this to tell a quietly sleeping sensor apart from one that's really offline.
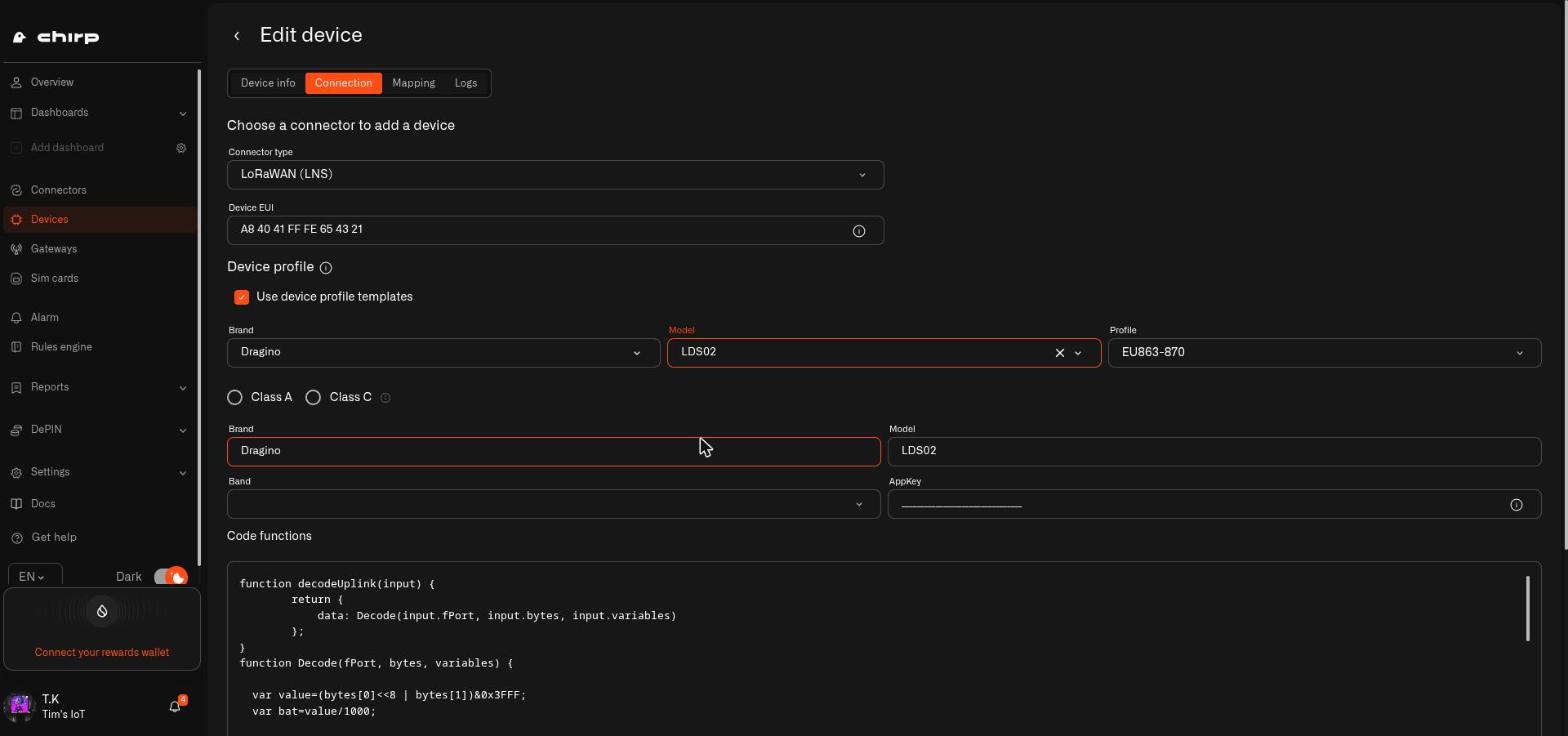 Device Connection tab — Dragino device profile template.
- Click Save and power on the sensor. It joins the network over the air (OTAA) and starts sending data — readings appear on the device page, ready for dashboards, automations, and alerts.