Table of Contents:
IoTConnect is a secured, cloud-based enterprise IoT and AI platform. It simplifies the complex. It jumpstarts the development of IoT-enabled systems, turning real-time data into actionable value-driven insights. It enables making an informed decision quickly, consequently sparking innovation.
IoTConnect brings IoT hardware, software, applications, data analytics and artificial intelligence capabilities. It comes with a feature-rich tool kit that is easy to use and significantly reduces complexity, cost and time-to-market.
In this guide, you will learn how to connect a dragino gateway to the LNS solution provided by AVNET/IOTConnect.
Login or crate an accountto get started with IoTConnect and start using IoTConnect Console.
Once you have an account,get started by following steps for adding Gateway,Device and Intergrations.
LoRaWAN Gateway model: Existing Gateway
Below list the support products and Requirements:
What do you need to prepare?
A gateway that can access the internet normally.
For more information, please refer to the official IOTConnect documentation: Wireless Device – docs.iotconnect.io
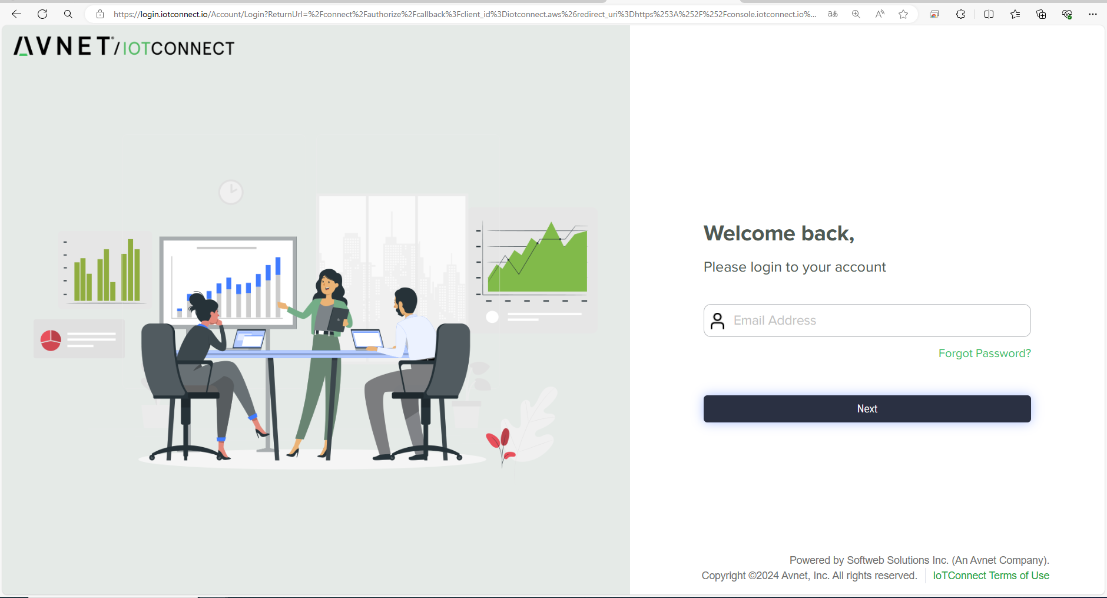
Log in to your dashboard at Avnet / IOTConnect login
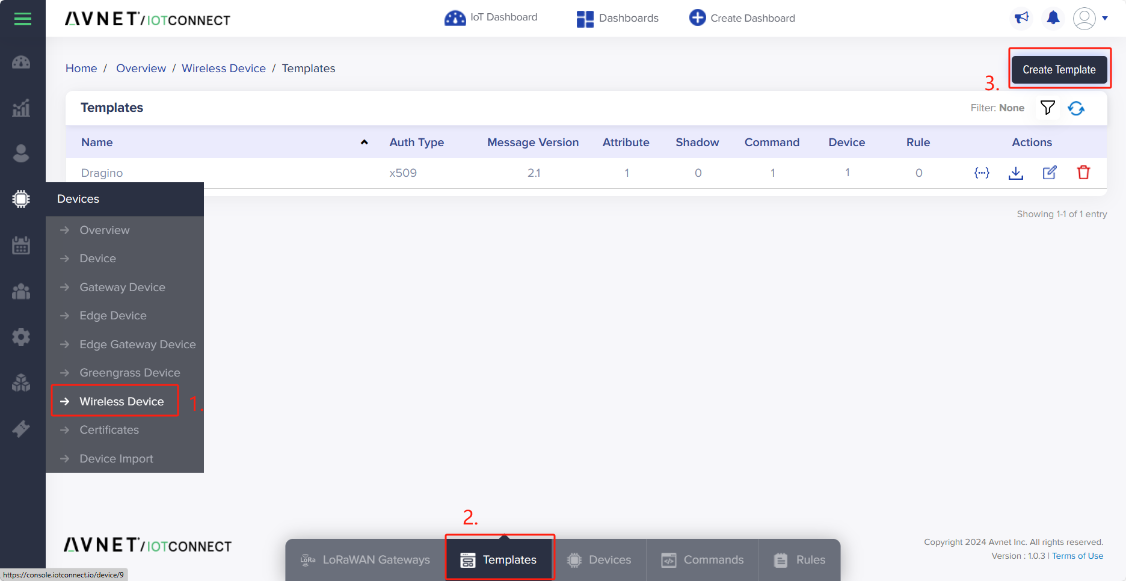
To create a template for your organization:
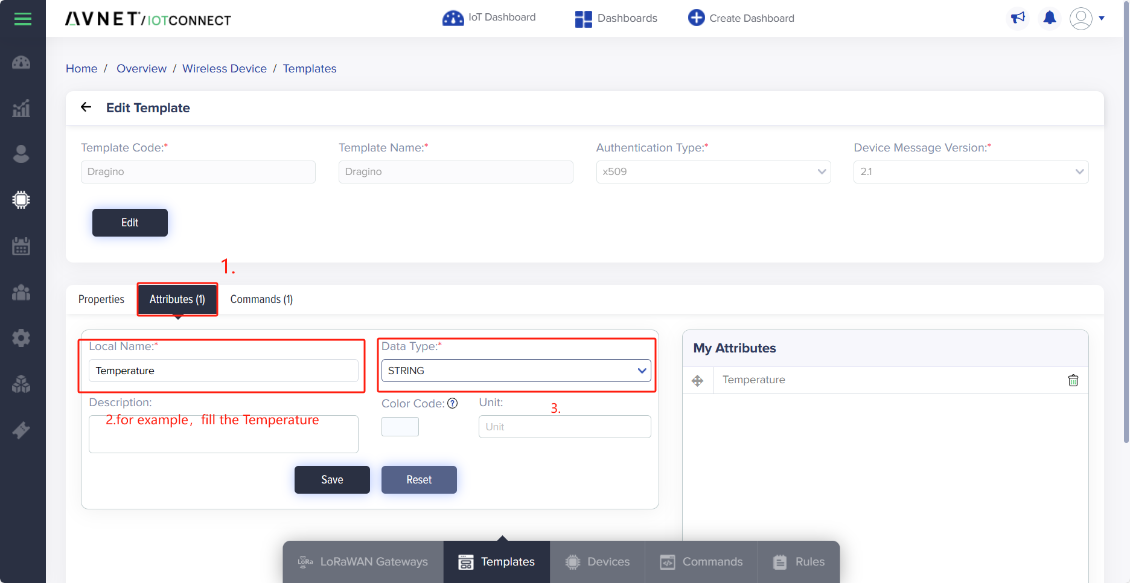
4. Click Save to create a template.

Attributes are device properties that you want a template’s devices to measure. It can be anything from temperature, humidity, luminosity, wattage, to CO2 concentration.
To create a LoRaWAN gatway device for your organization:
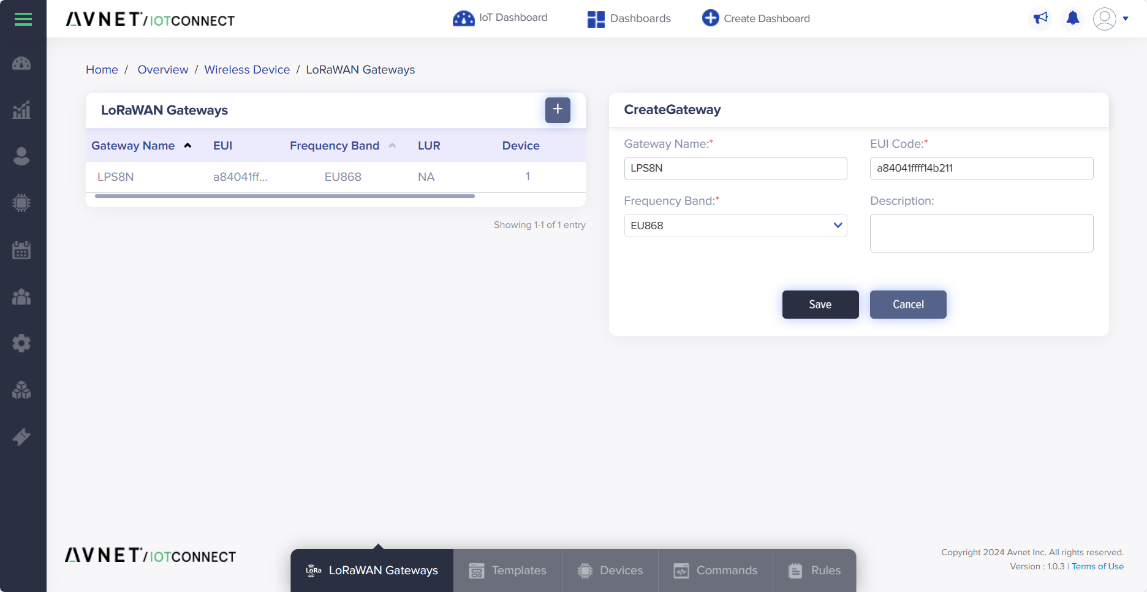
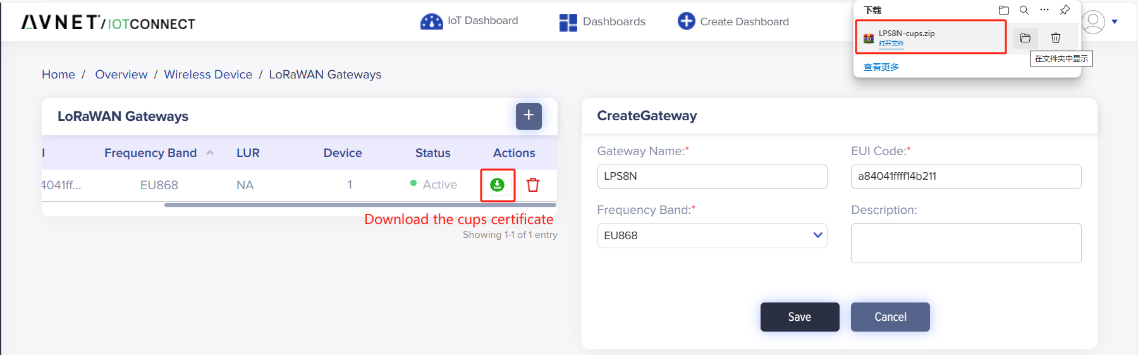
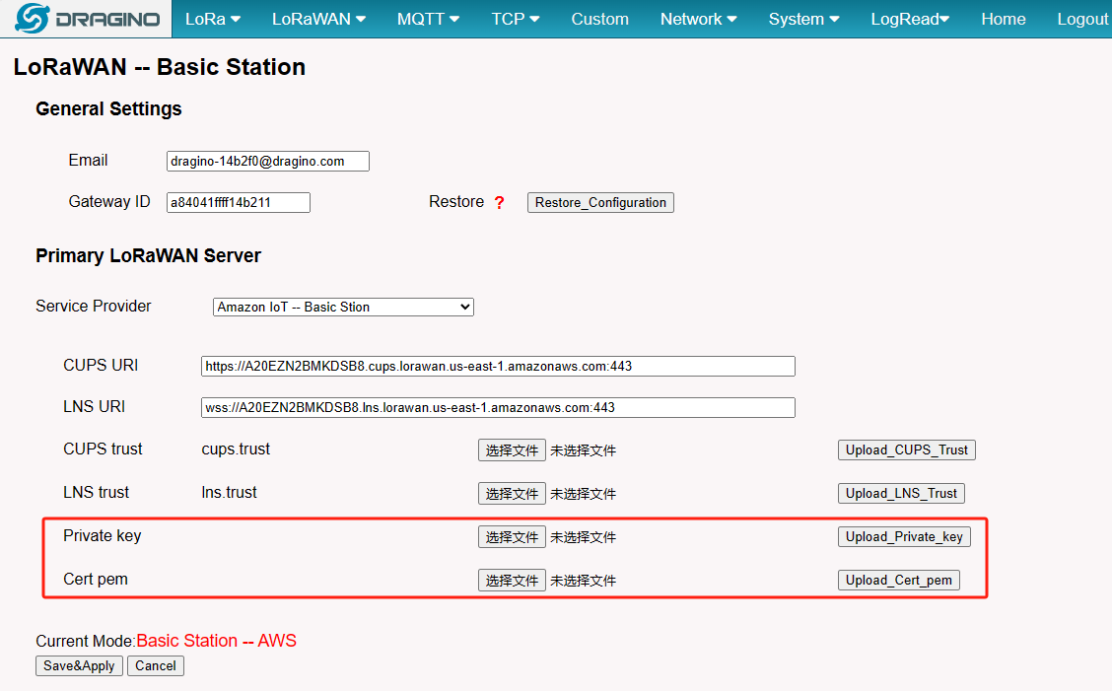
Once you create and store gateway credentials, you will get the certificate file under the zip to onboard your gateway. Upload the following files to your gateway:
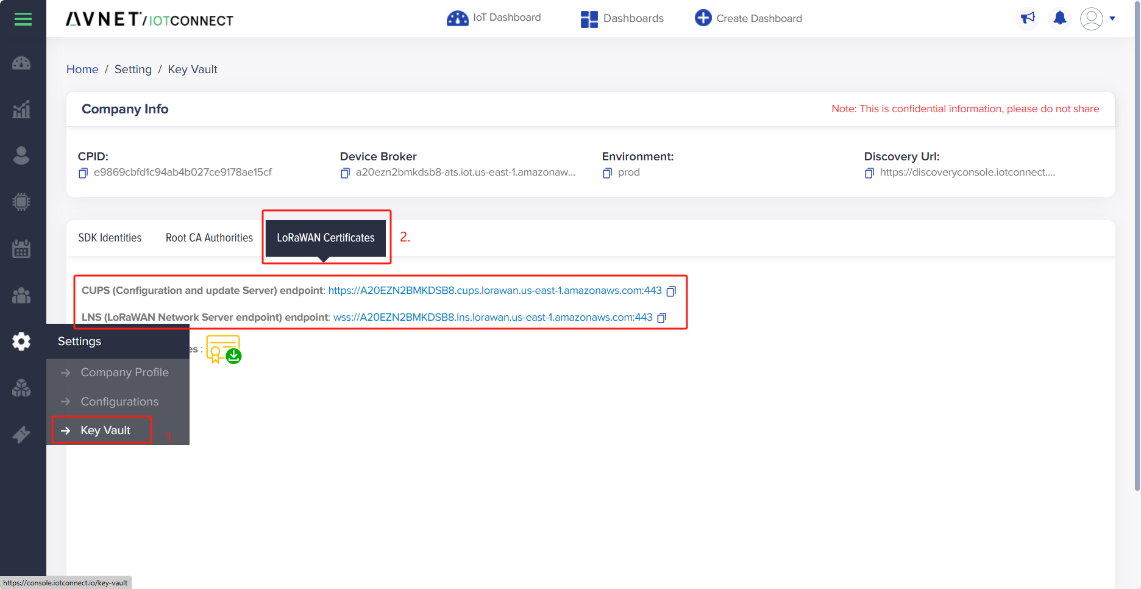
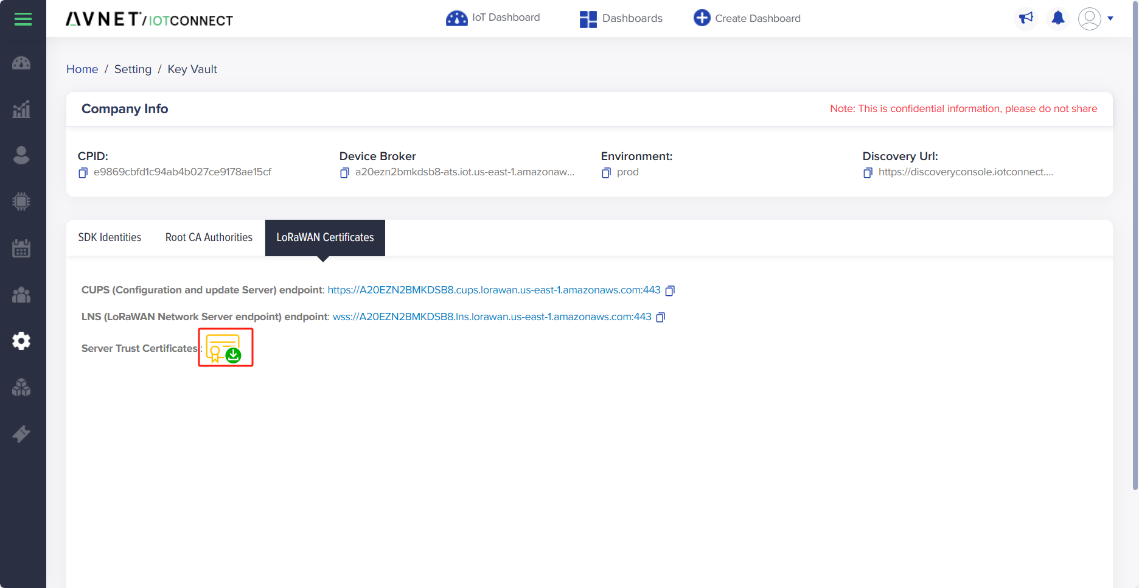
4.CUPS URI and LNS URI can be found on the Settings-->Key Vaylt interface
5.Download Server Trust Certificates
To configure the gateway, access it via the Web UI. To learn how to do that, refer to the Quick Start Guide for each gateway.
Users need to fill in the LNS URI and upload the Certificate.
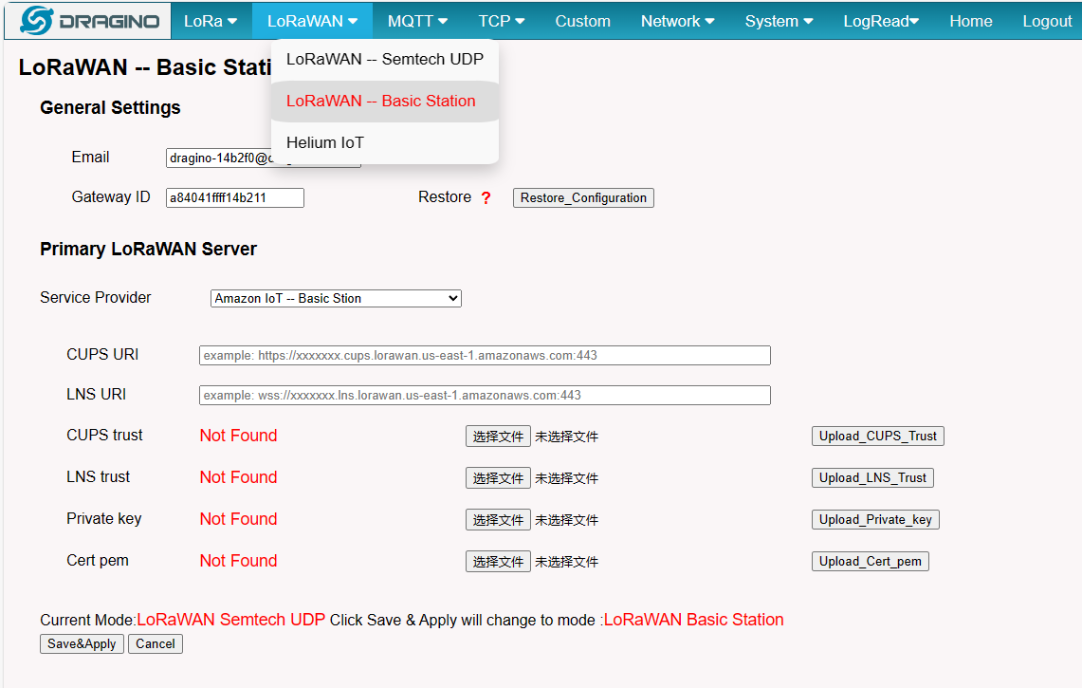
Users need to fill in the CUPS URI, LNS URI and upload the Certificate.
Note: The uploaded Private Key and Cert Pem cannot be displayed and the Service Provider does not have AVNET/IOTConnect, we will fix and add it in the next firmware release
Users can now use Amazon IoT Basic Station for testing.
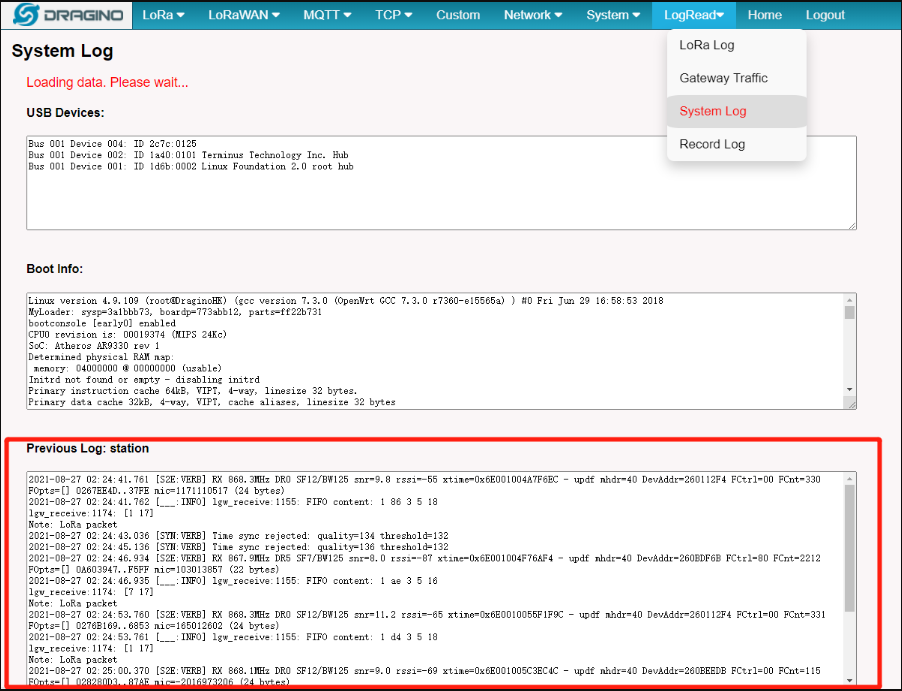
User can check the station log in the LogRead --> System Log page.
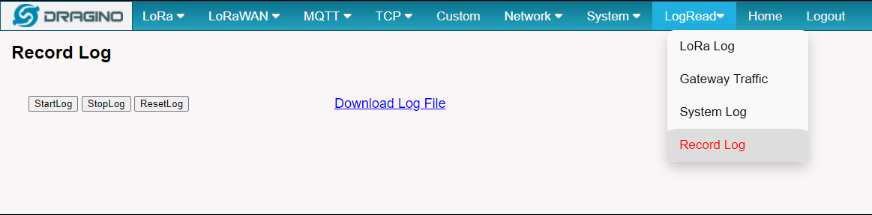
and recode the station log in the LogRead --> Recode Log page.
Following is an example for how to join the IoTConnect LoRaWAN Network.
The gateway is already set up to connect to the IoTConnect, so we now need to configure the IoTConnect server.
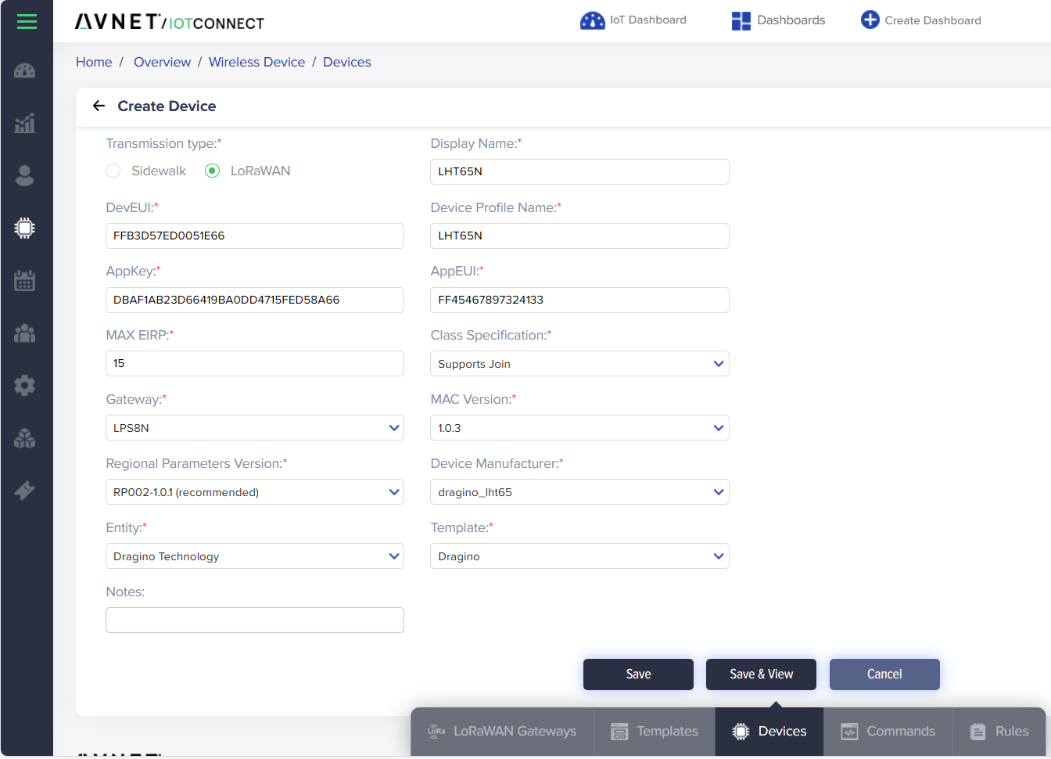
We take LHT65N as an example.
Create a device in Chirp Wireless with the OTAA keys from LHT65N.
Each LHT65N is shipped with a sticker with the default device EUI as below:

To create a LoRaWAN device for your organization:
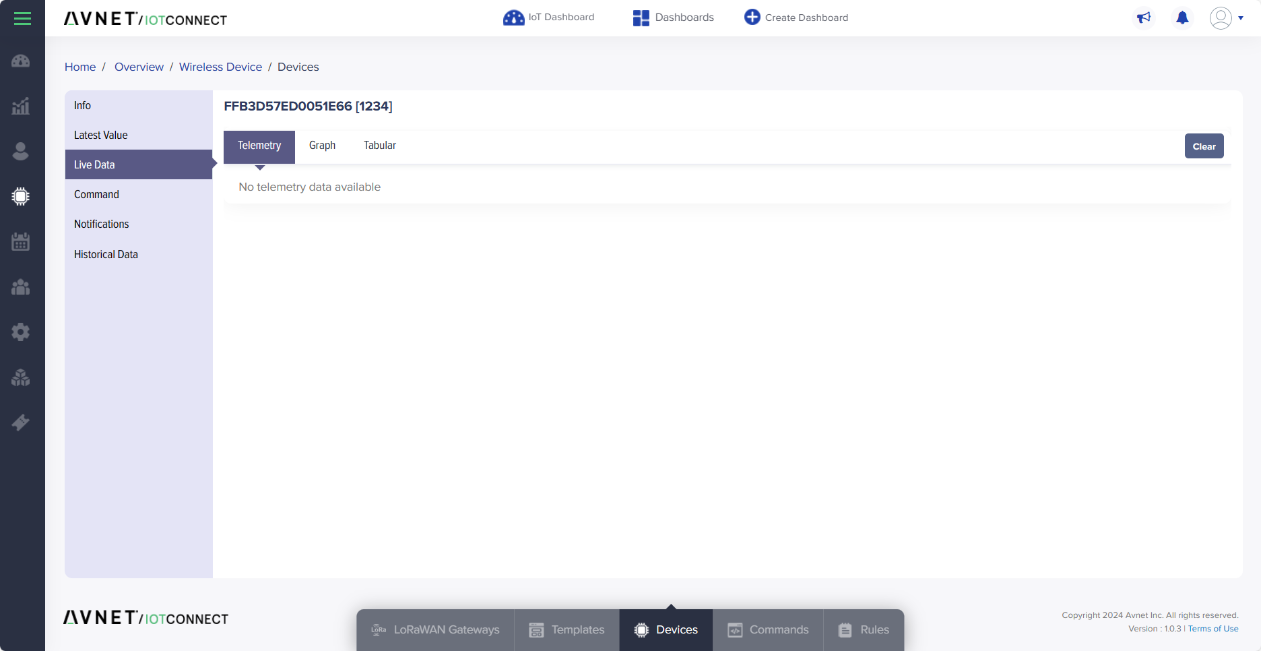
When the lorawan node successfully connects to IoTConnect, the user can check in the Live Data interface